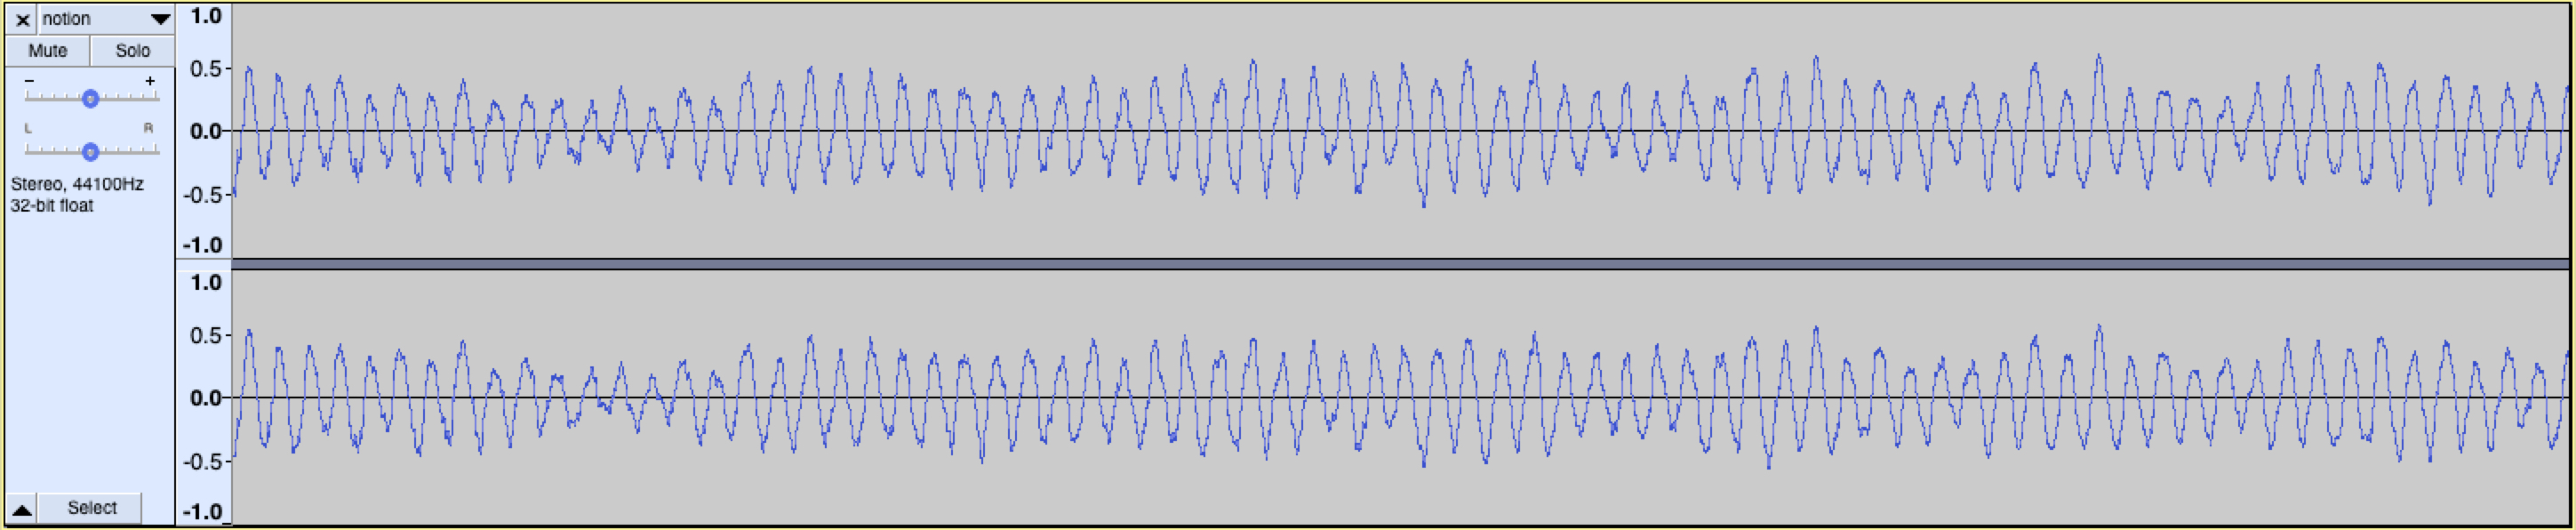
Laser cut audio
A recent song etched for a friend as a gift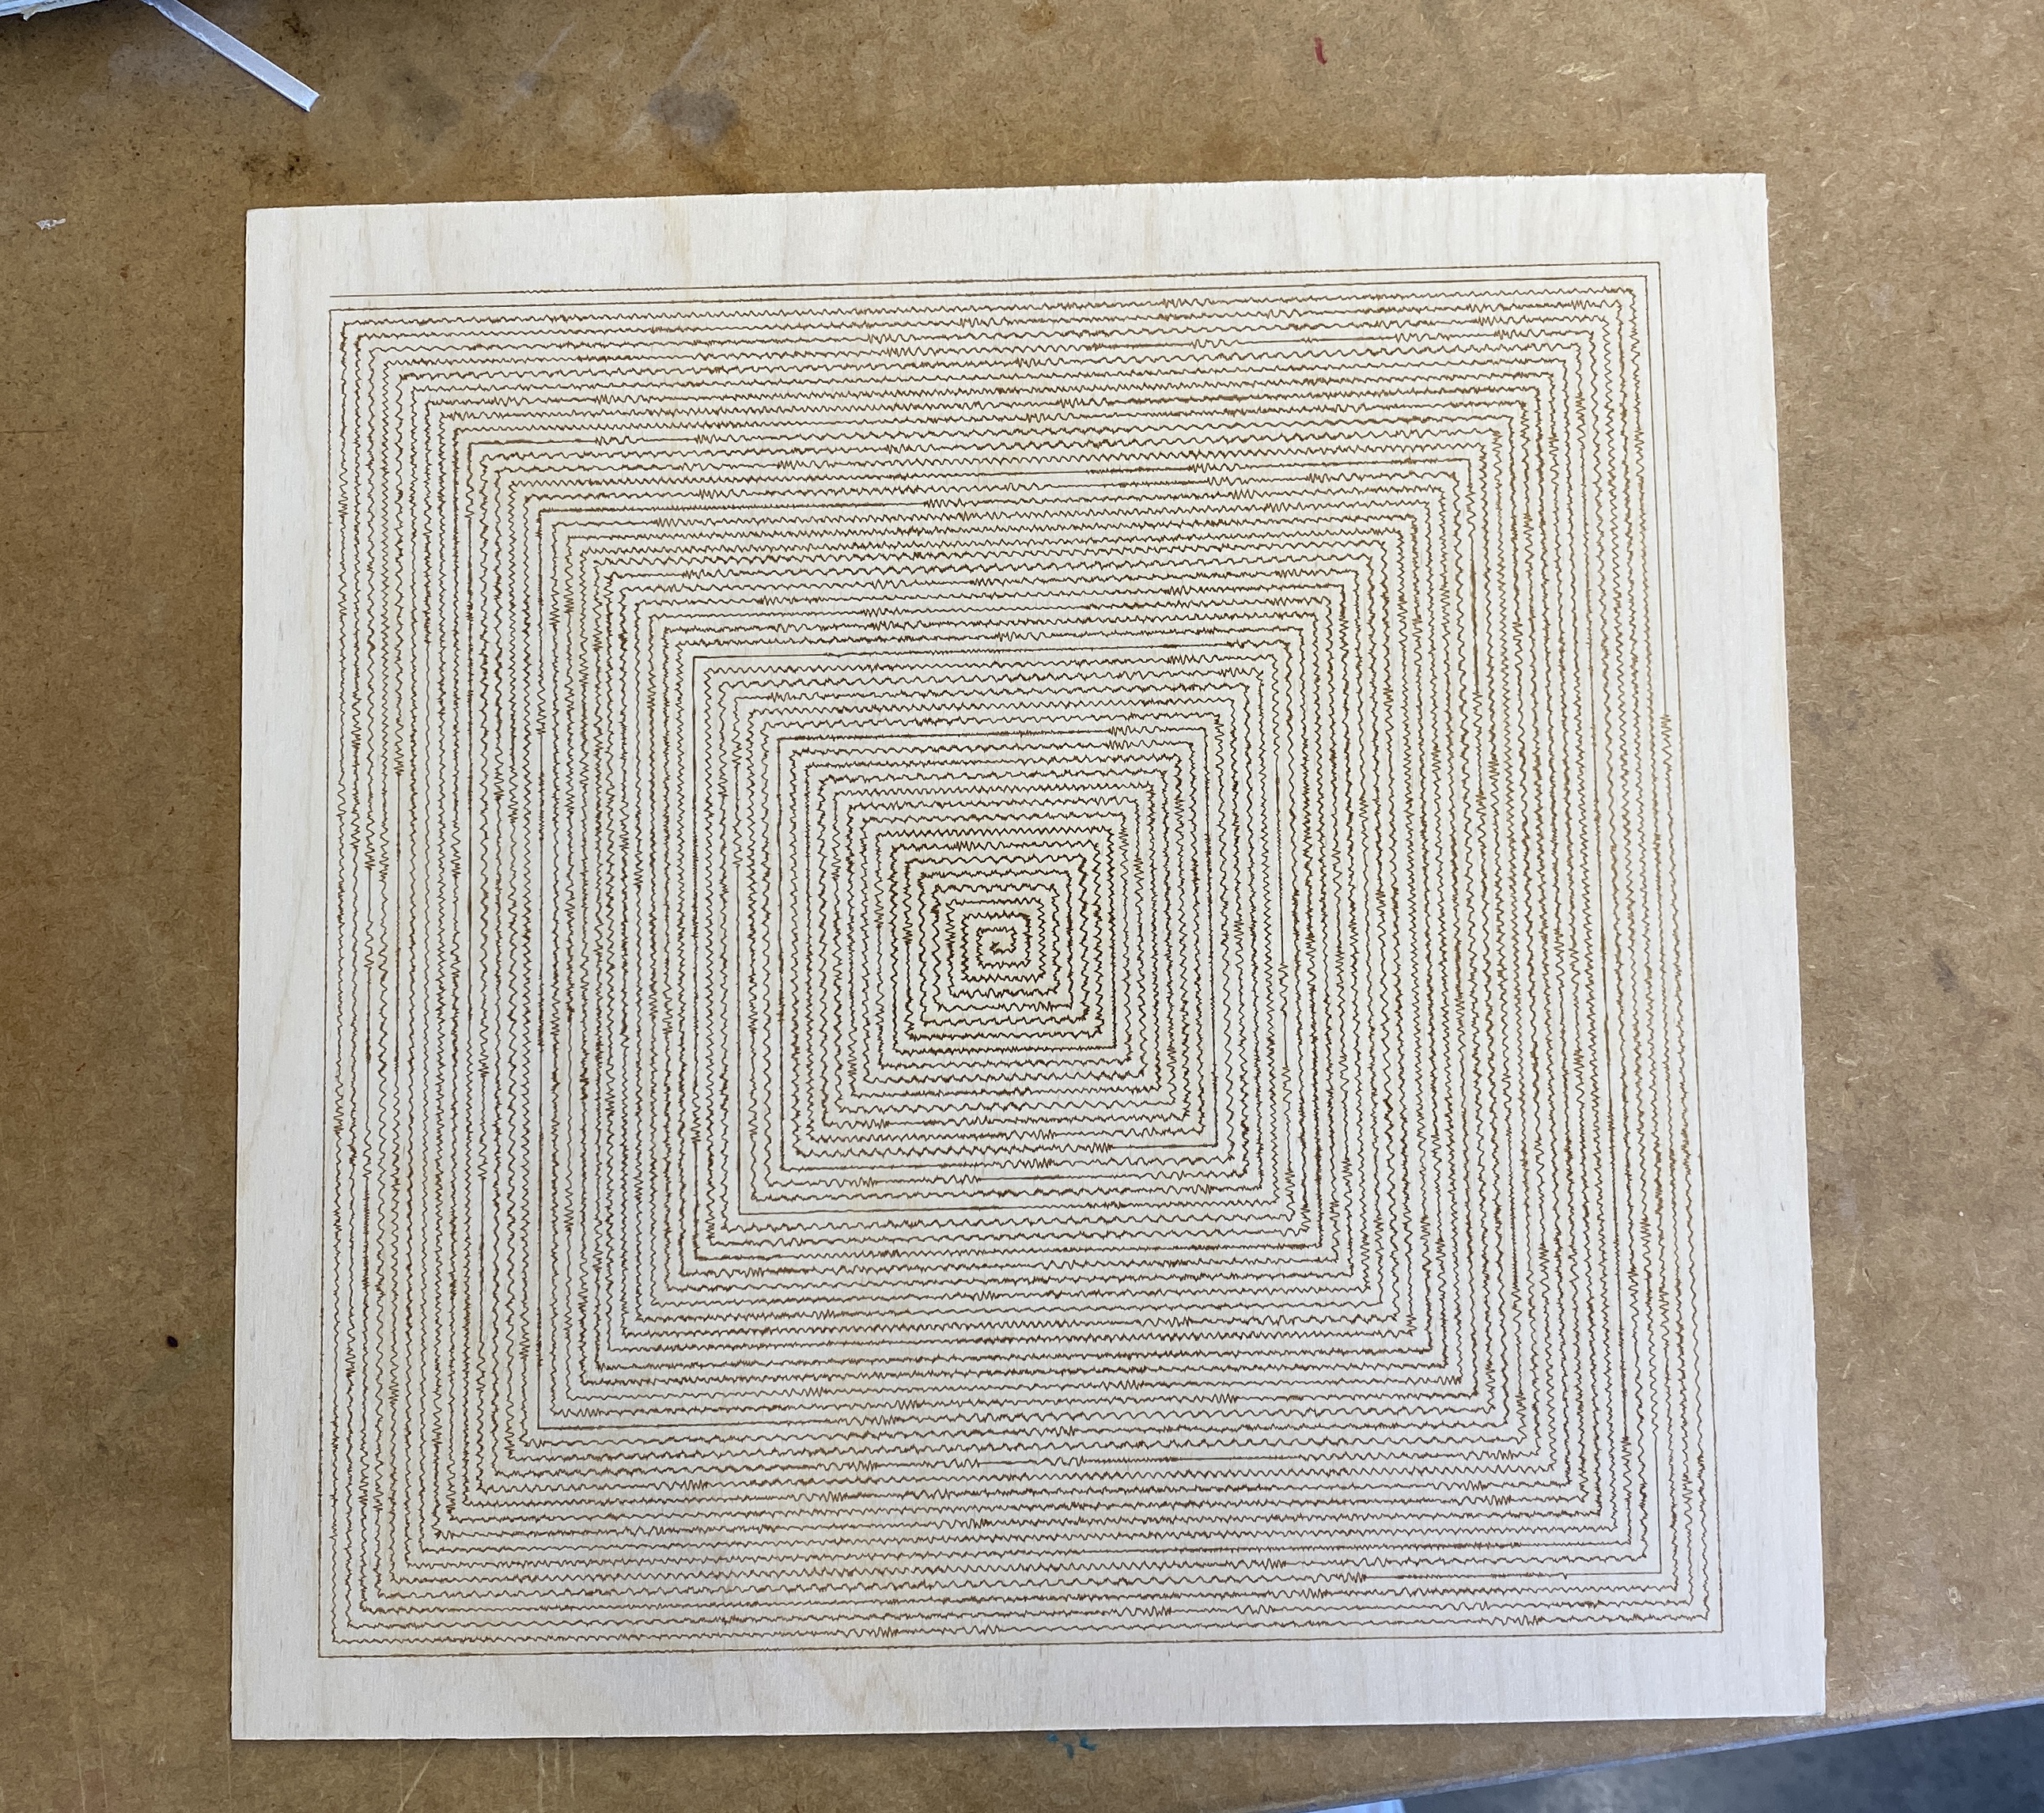
See a more complete gallery of this artwork on the Second String Studios website
Project update posted at Laser cut audio pt. II
After losing shop access from Pier 9 because of COVID and then subsequently leaving Autodesk, I’ve been at a bit of a standstill for my fabrication projects. I recently moved back to San Francisco and joined Humanmade, and one thing I’ve been working on a lot is using a laser cutter to display audio waveforms in unique ways.
Design
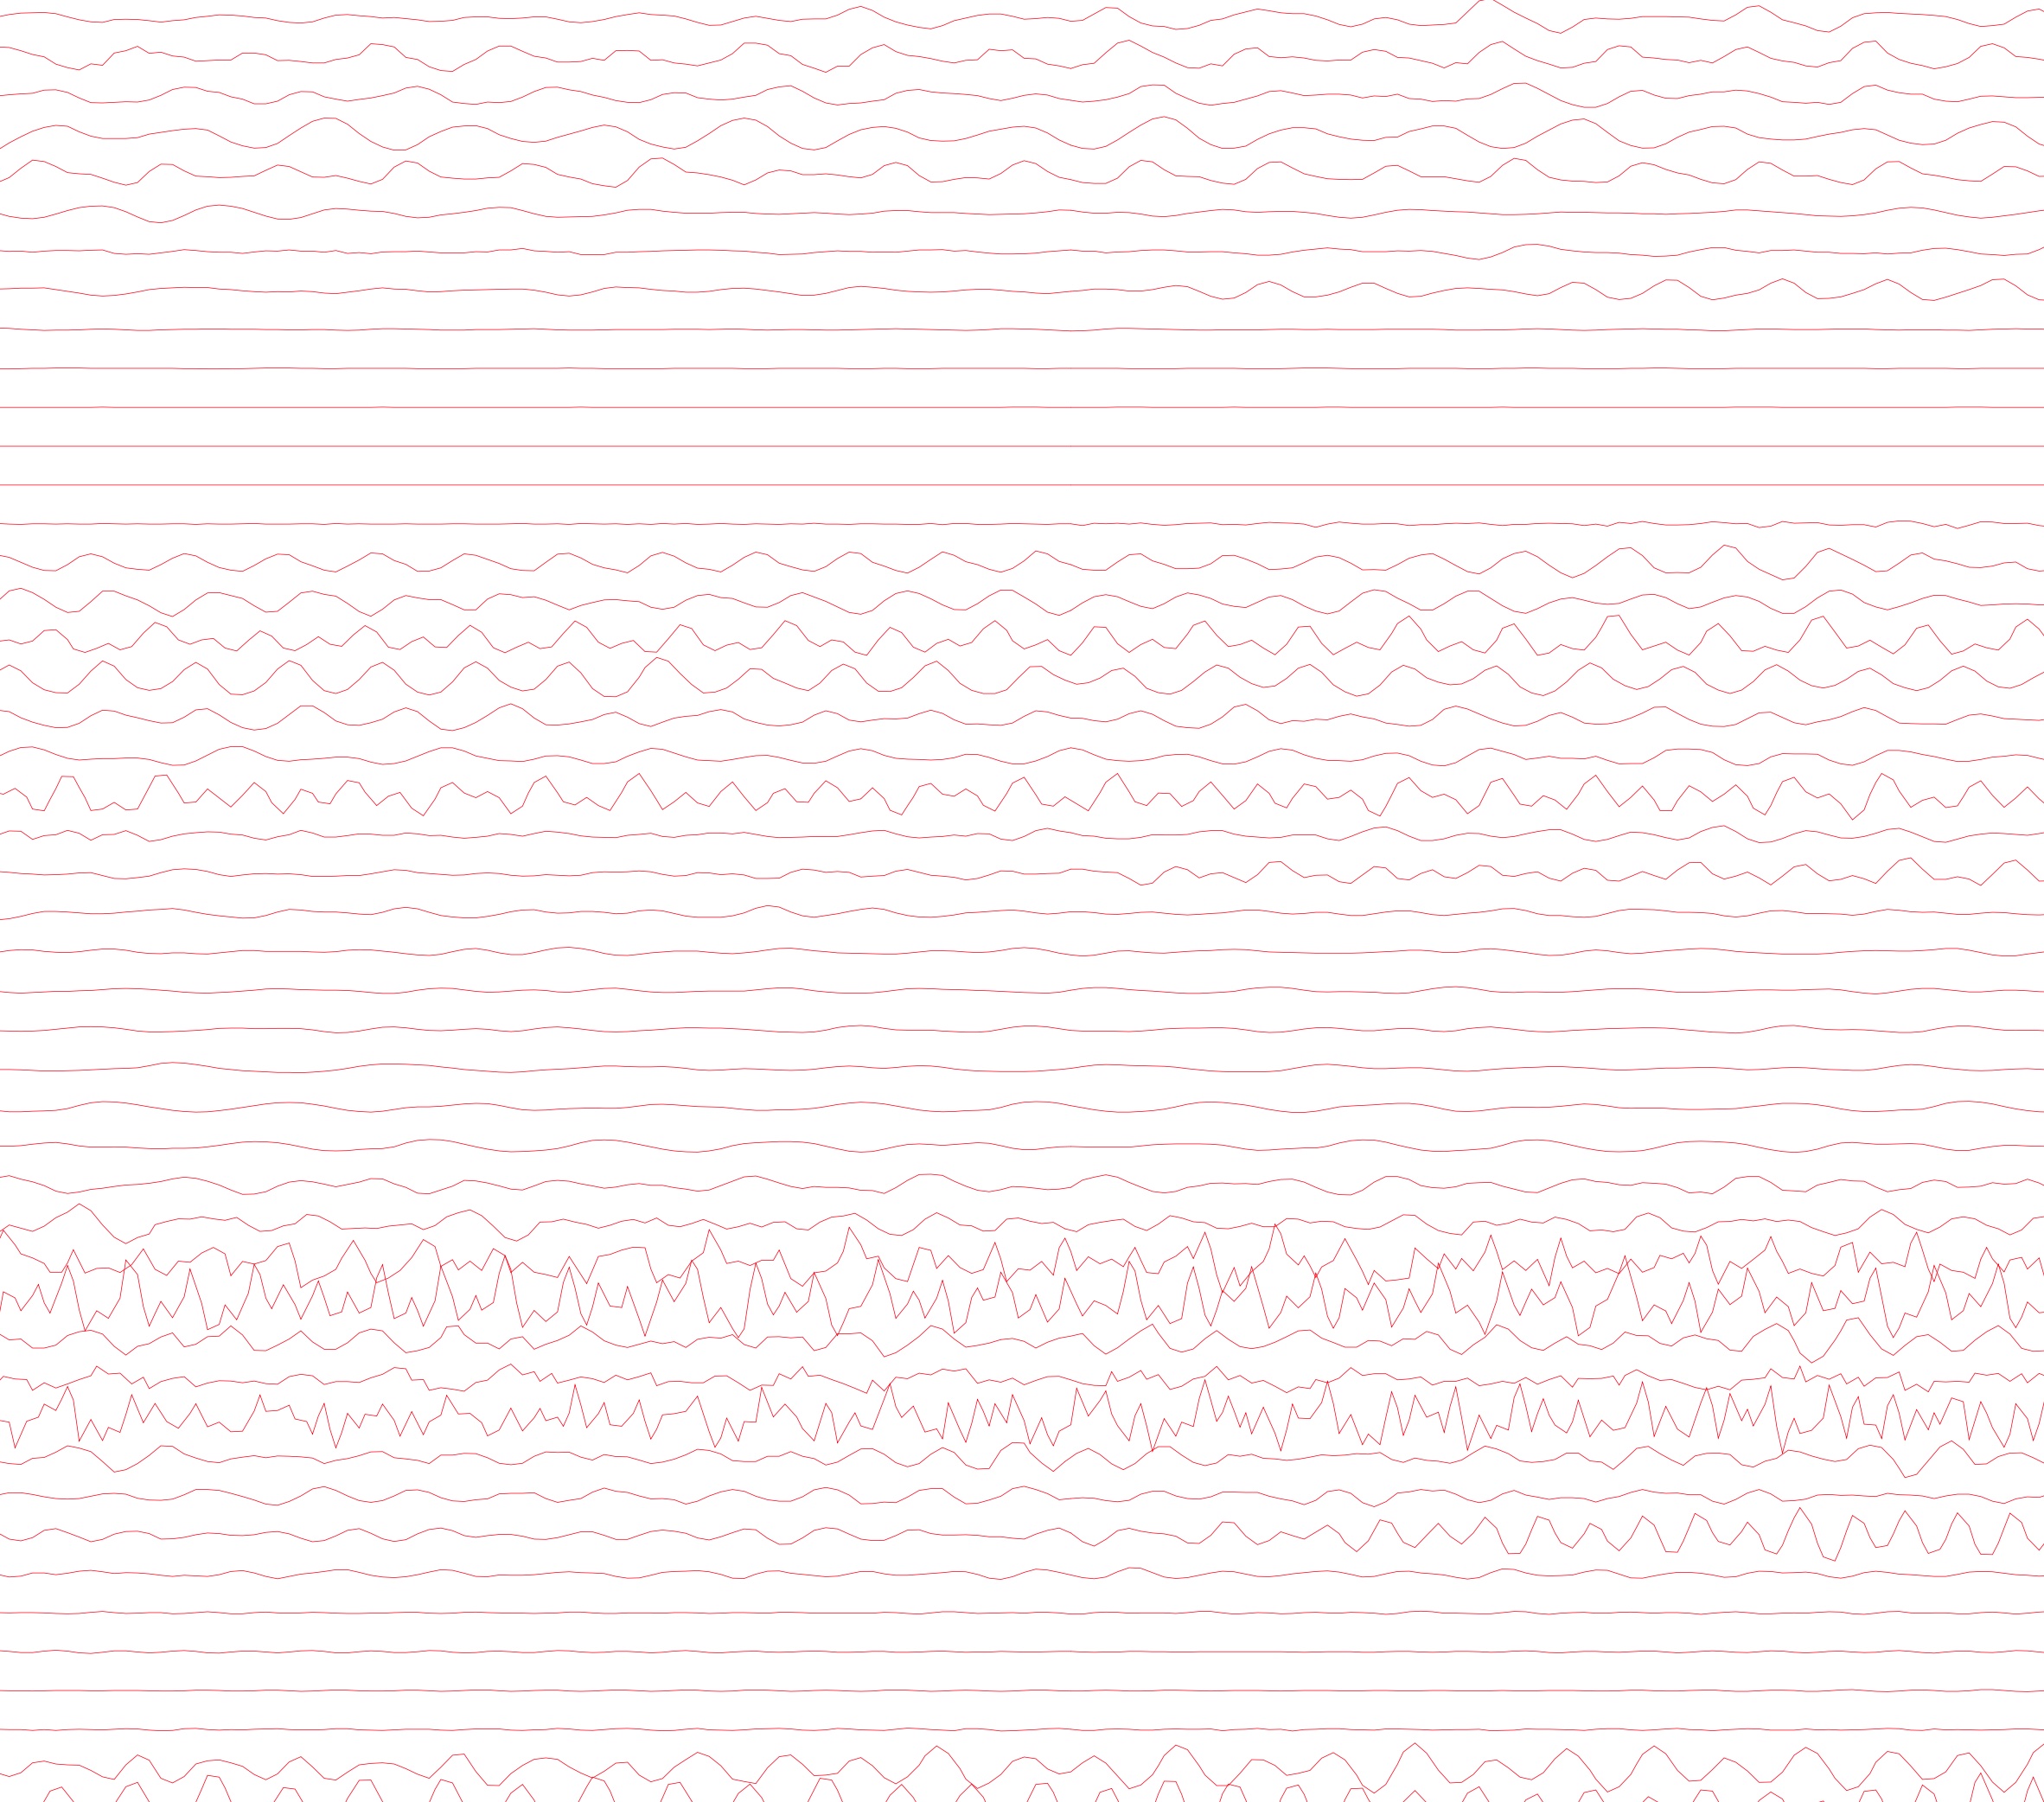
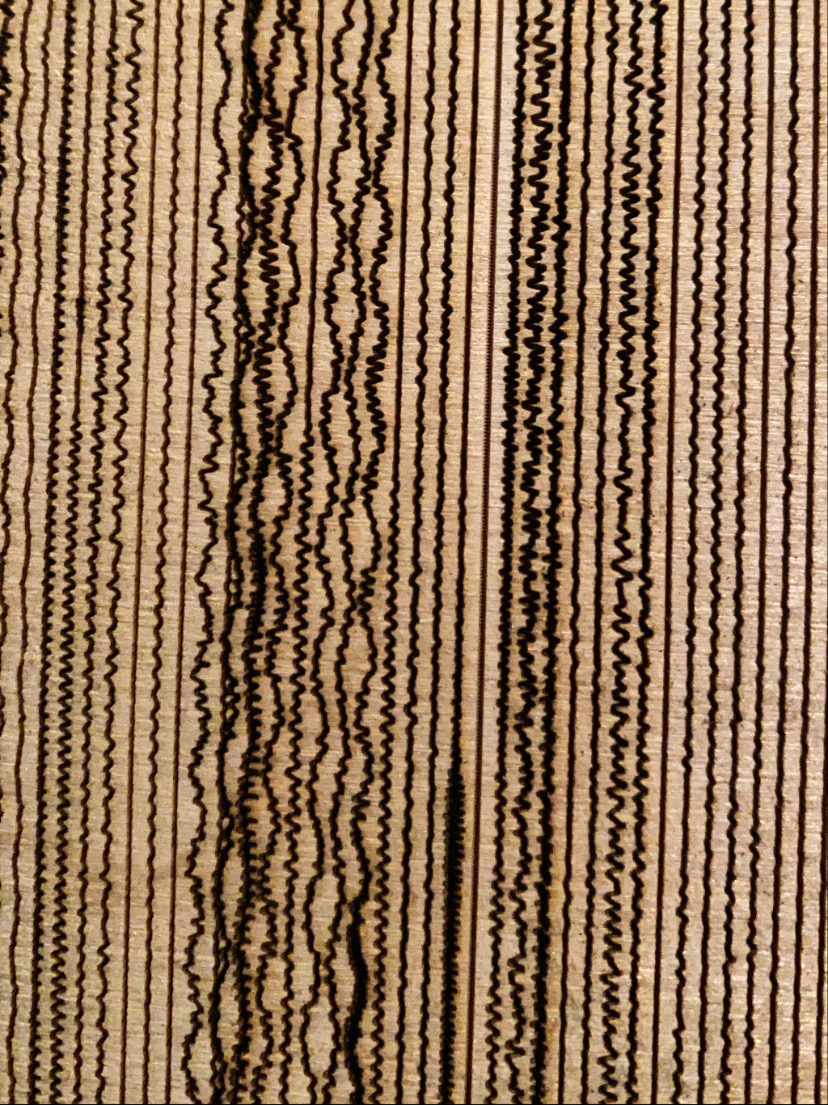
If you think about how sound is typically portrayed, a dense and spiky bar of jagged lines probably comes to mind. If you take the coordinate points of these lines and spread them much further apart horizontally (essentially zooming in on the data), it becomes a simpler-looking display of a bumpy, but continuous, single line traversing from left to right (almost like a stock market graph).
Audio signal for an entire six-minute song The same song zoomed in on a 100ms section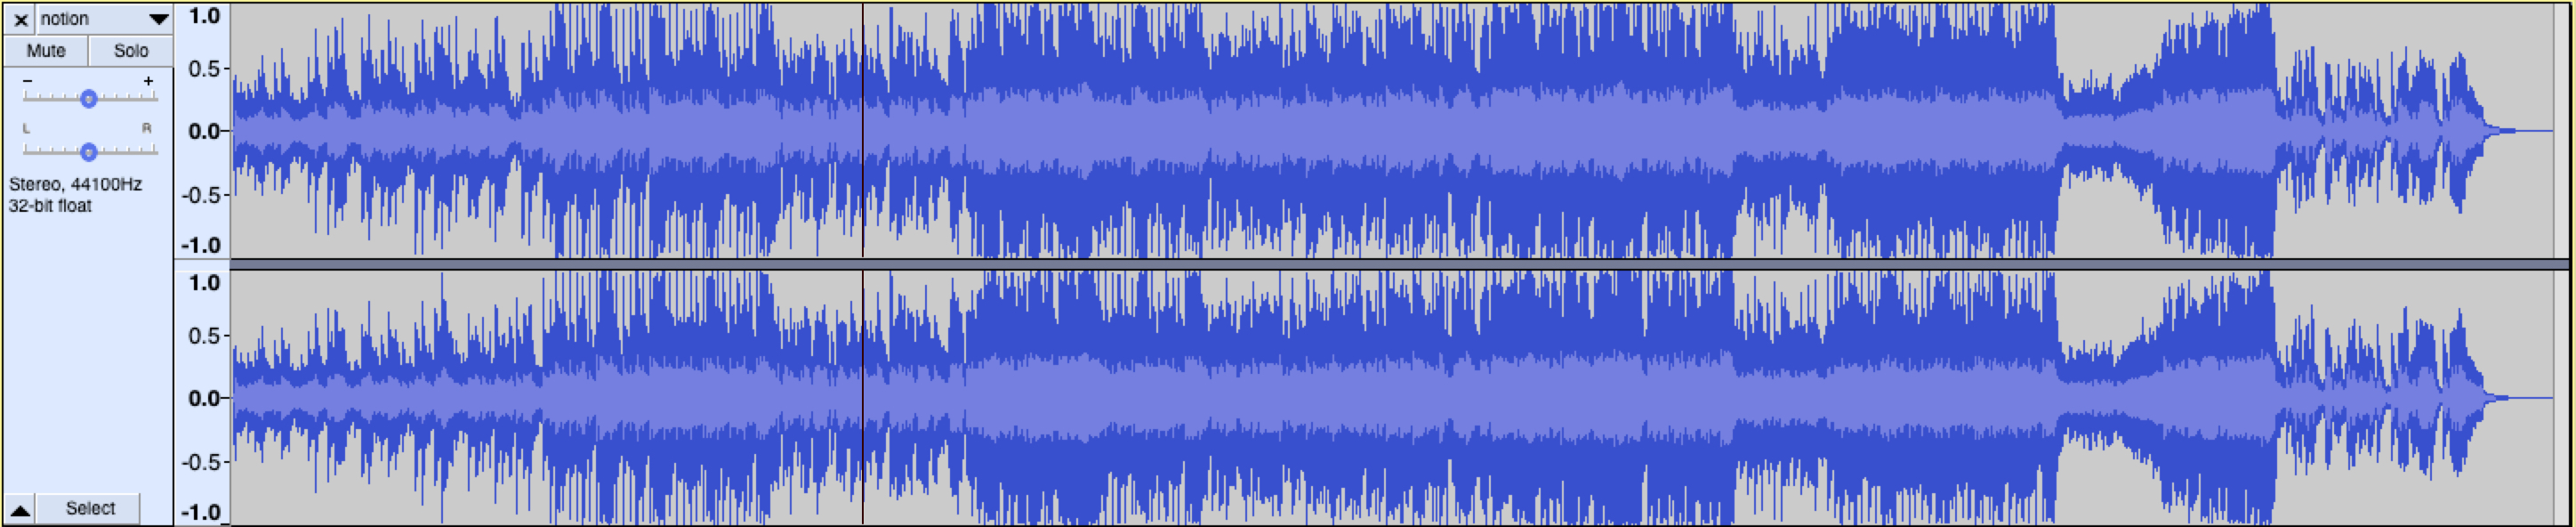
By “smoothing” this line out to a manageable state, you can use it in place of a regular straight or curved line in artwork to provide a subtle, underlying addition.
You can read a brief paragraph about my initial inspirations and thoughts about the process in my other post. I ended up re-writing the original author’s code entirely, which let me understand their algorithm and steps much more clearly. It also allowed me to create custom designs using the waveform, whereas her initial implementation only supported a vinyl record-esque spiral.
The first of two additional patterns I’ve created using audio data is a square with horizontal lines spaced evenly and vertically down the page. I think there’s a lot more that could be done with this, but I haven’t figured out a great set of parameters to make it the most aesthetically pleasing. I did find that the effect that the lower frequency undulating wave has in making the design look semi-topographical super interesting. It seems as though there are rows of mini “mountains” with the effect it causes.

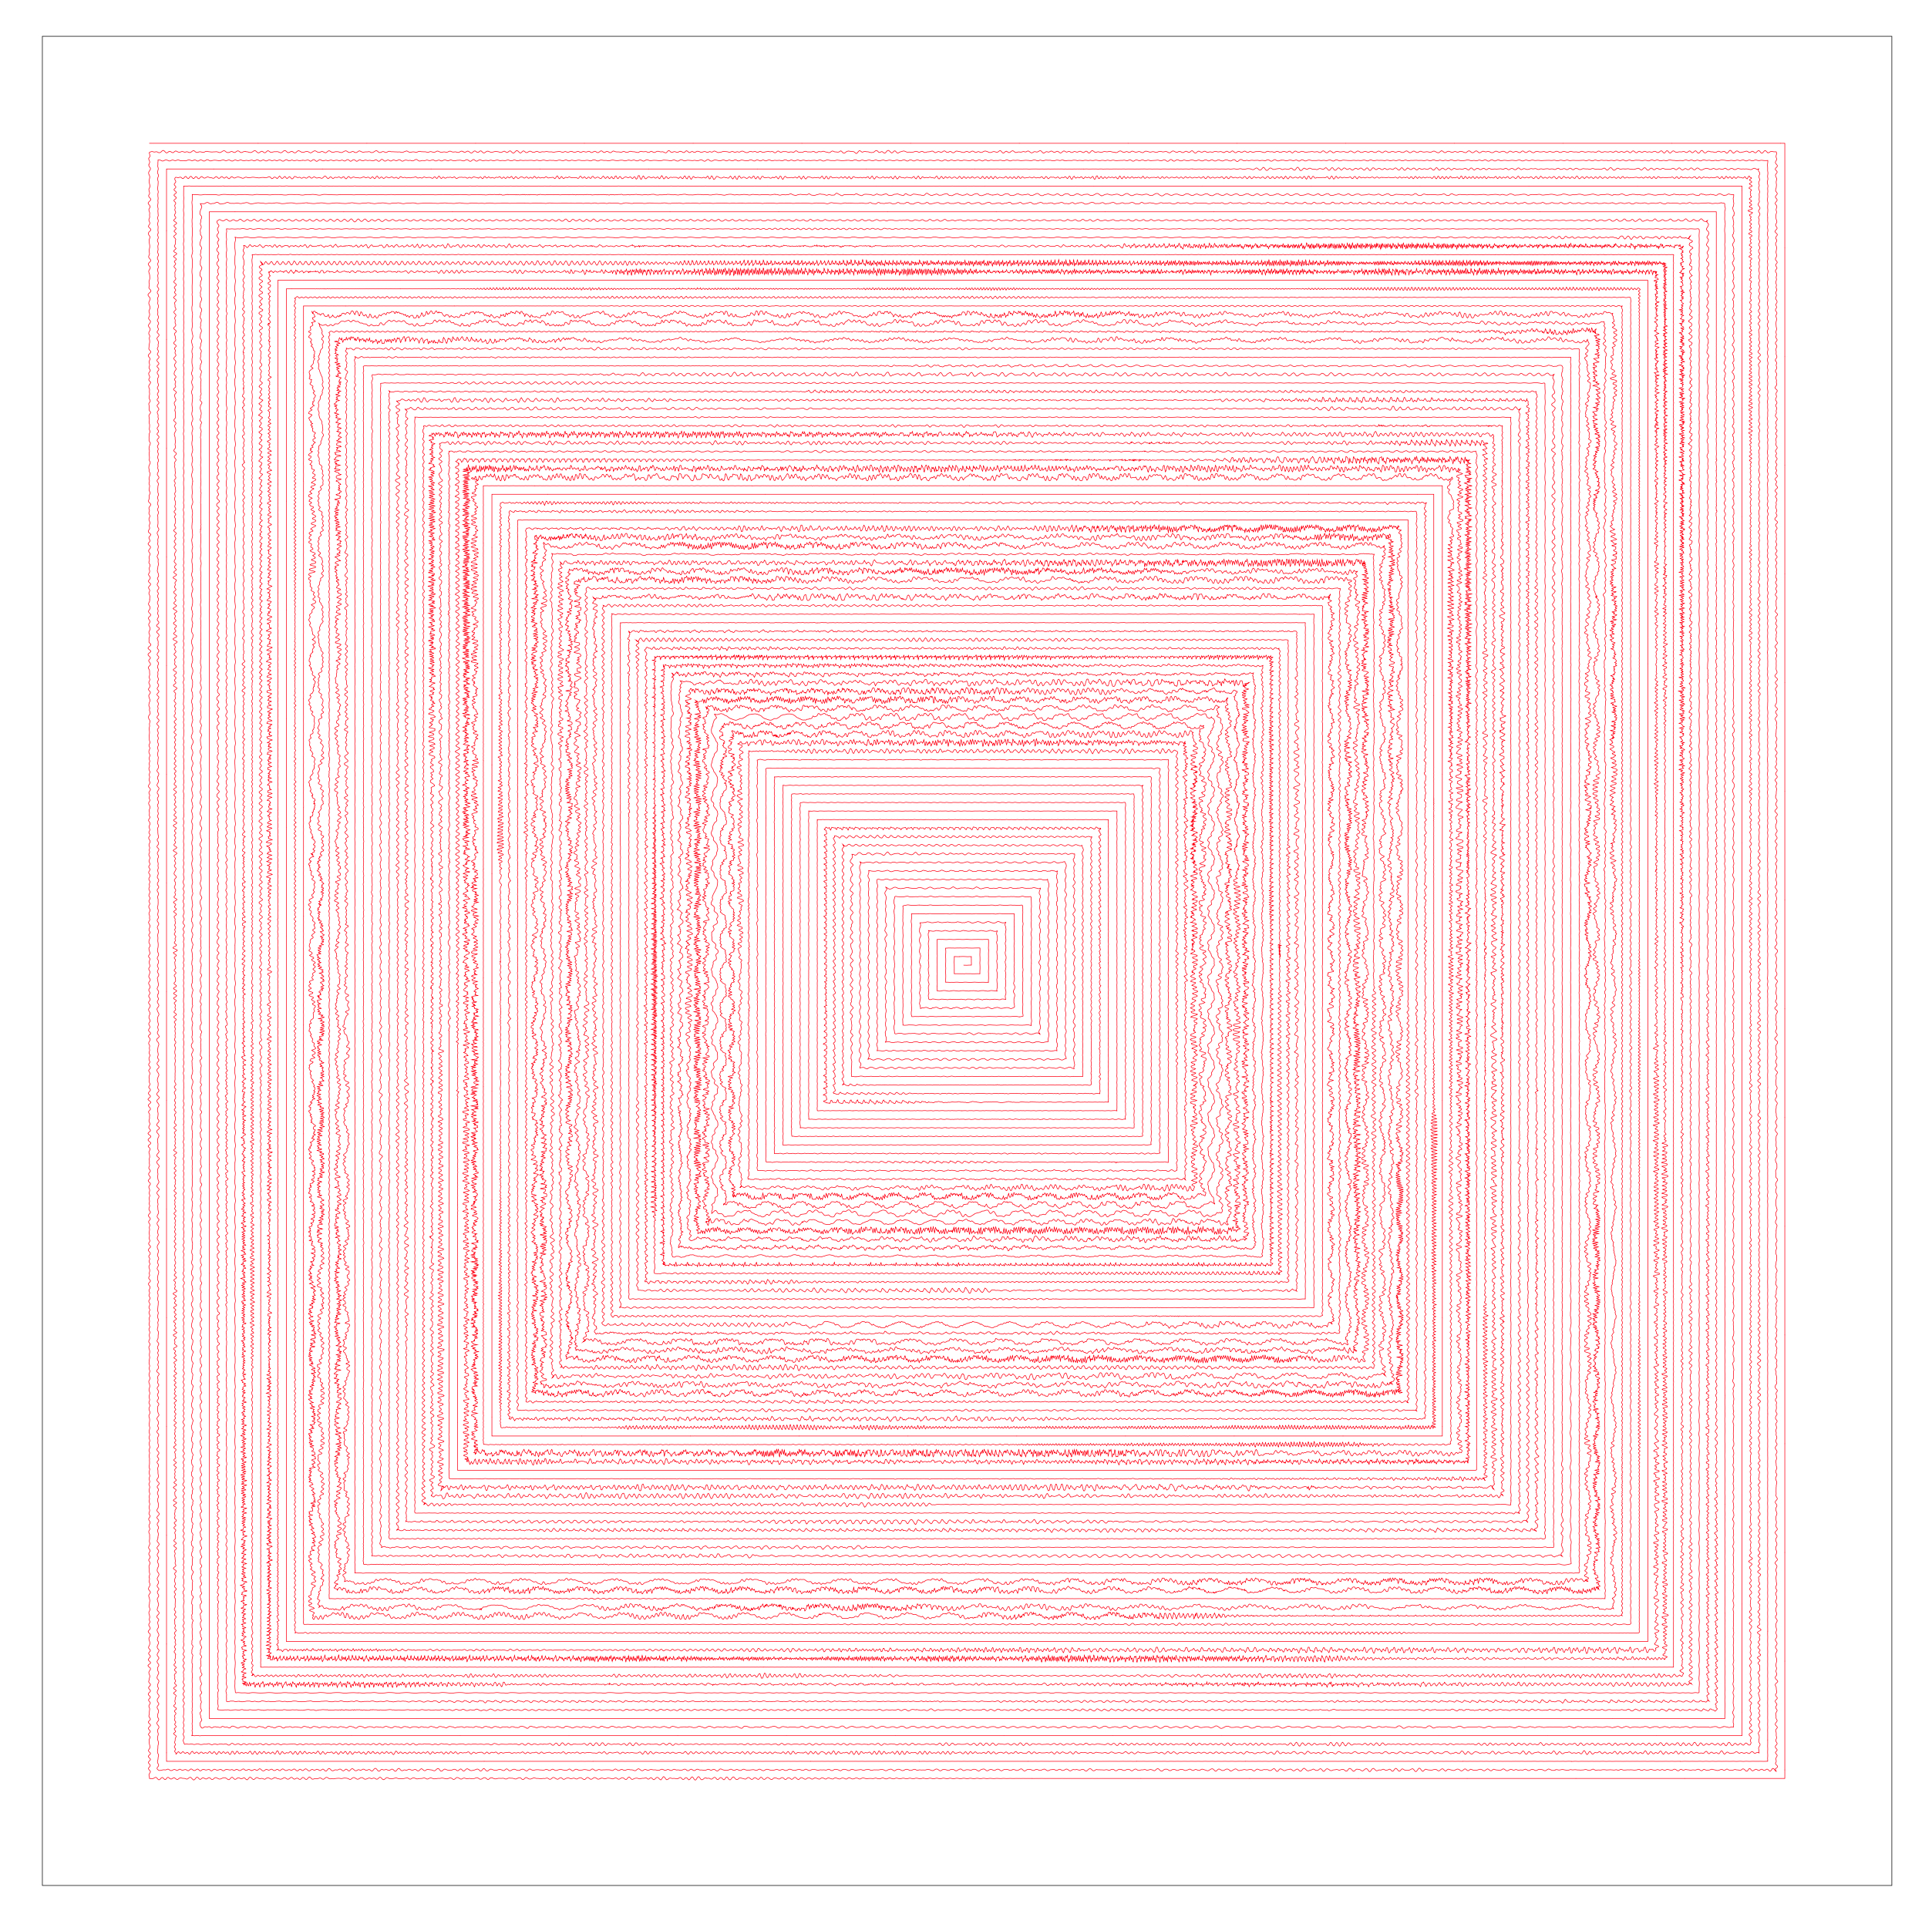
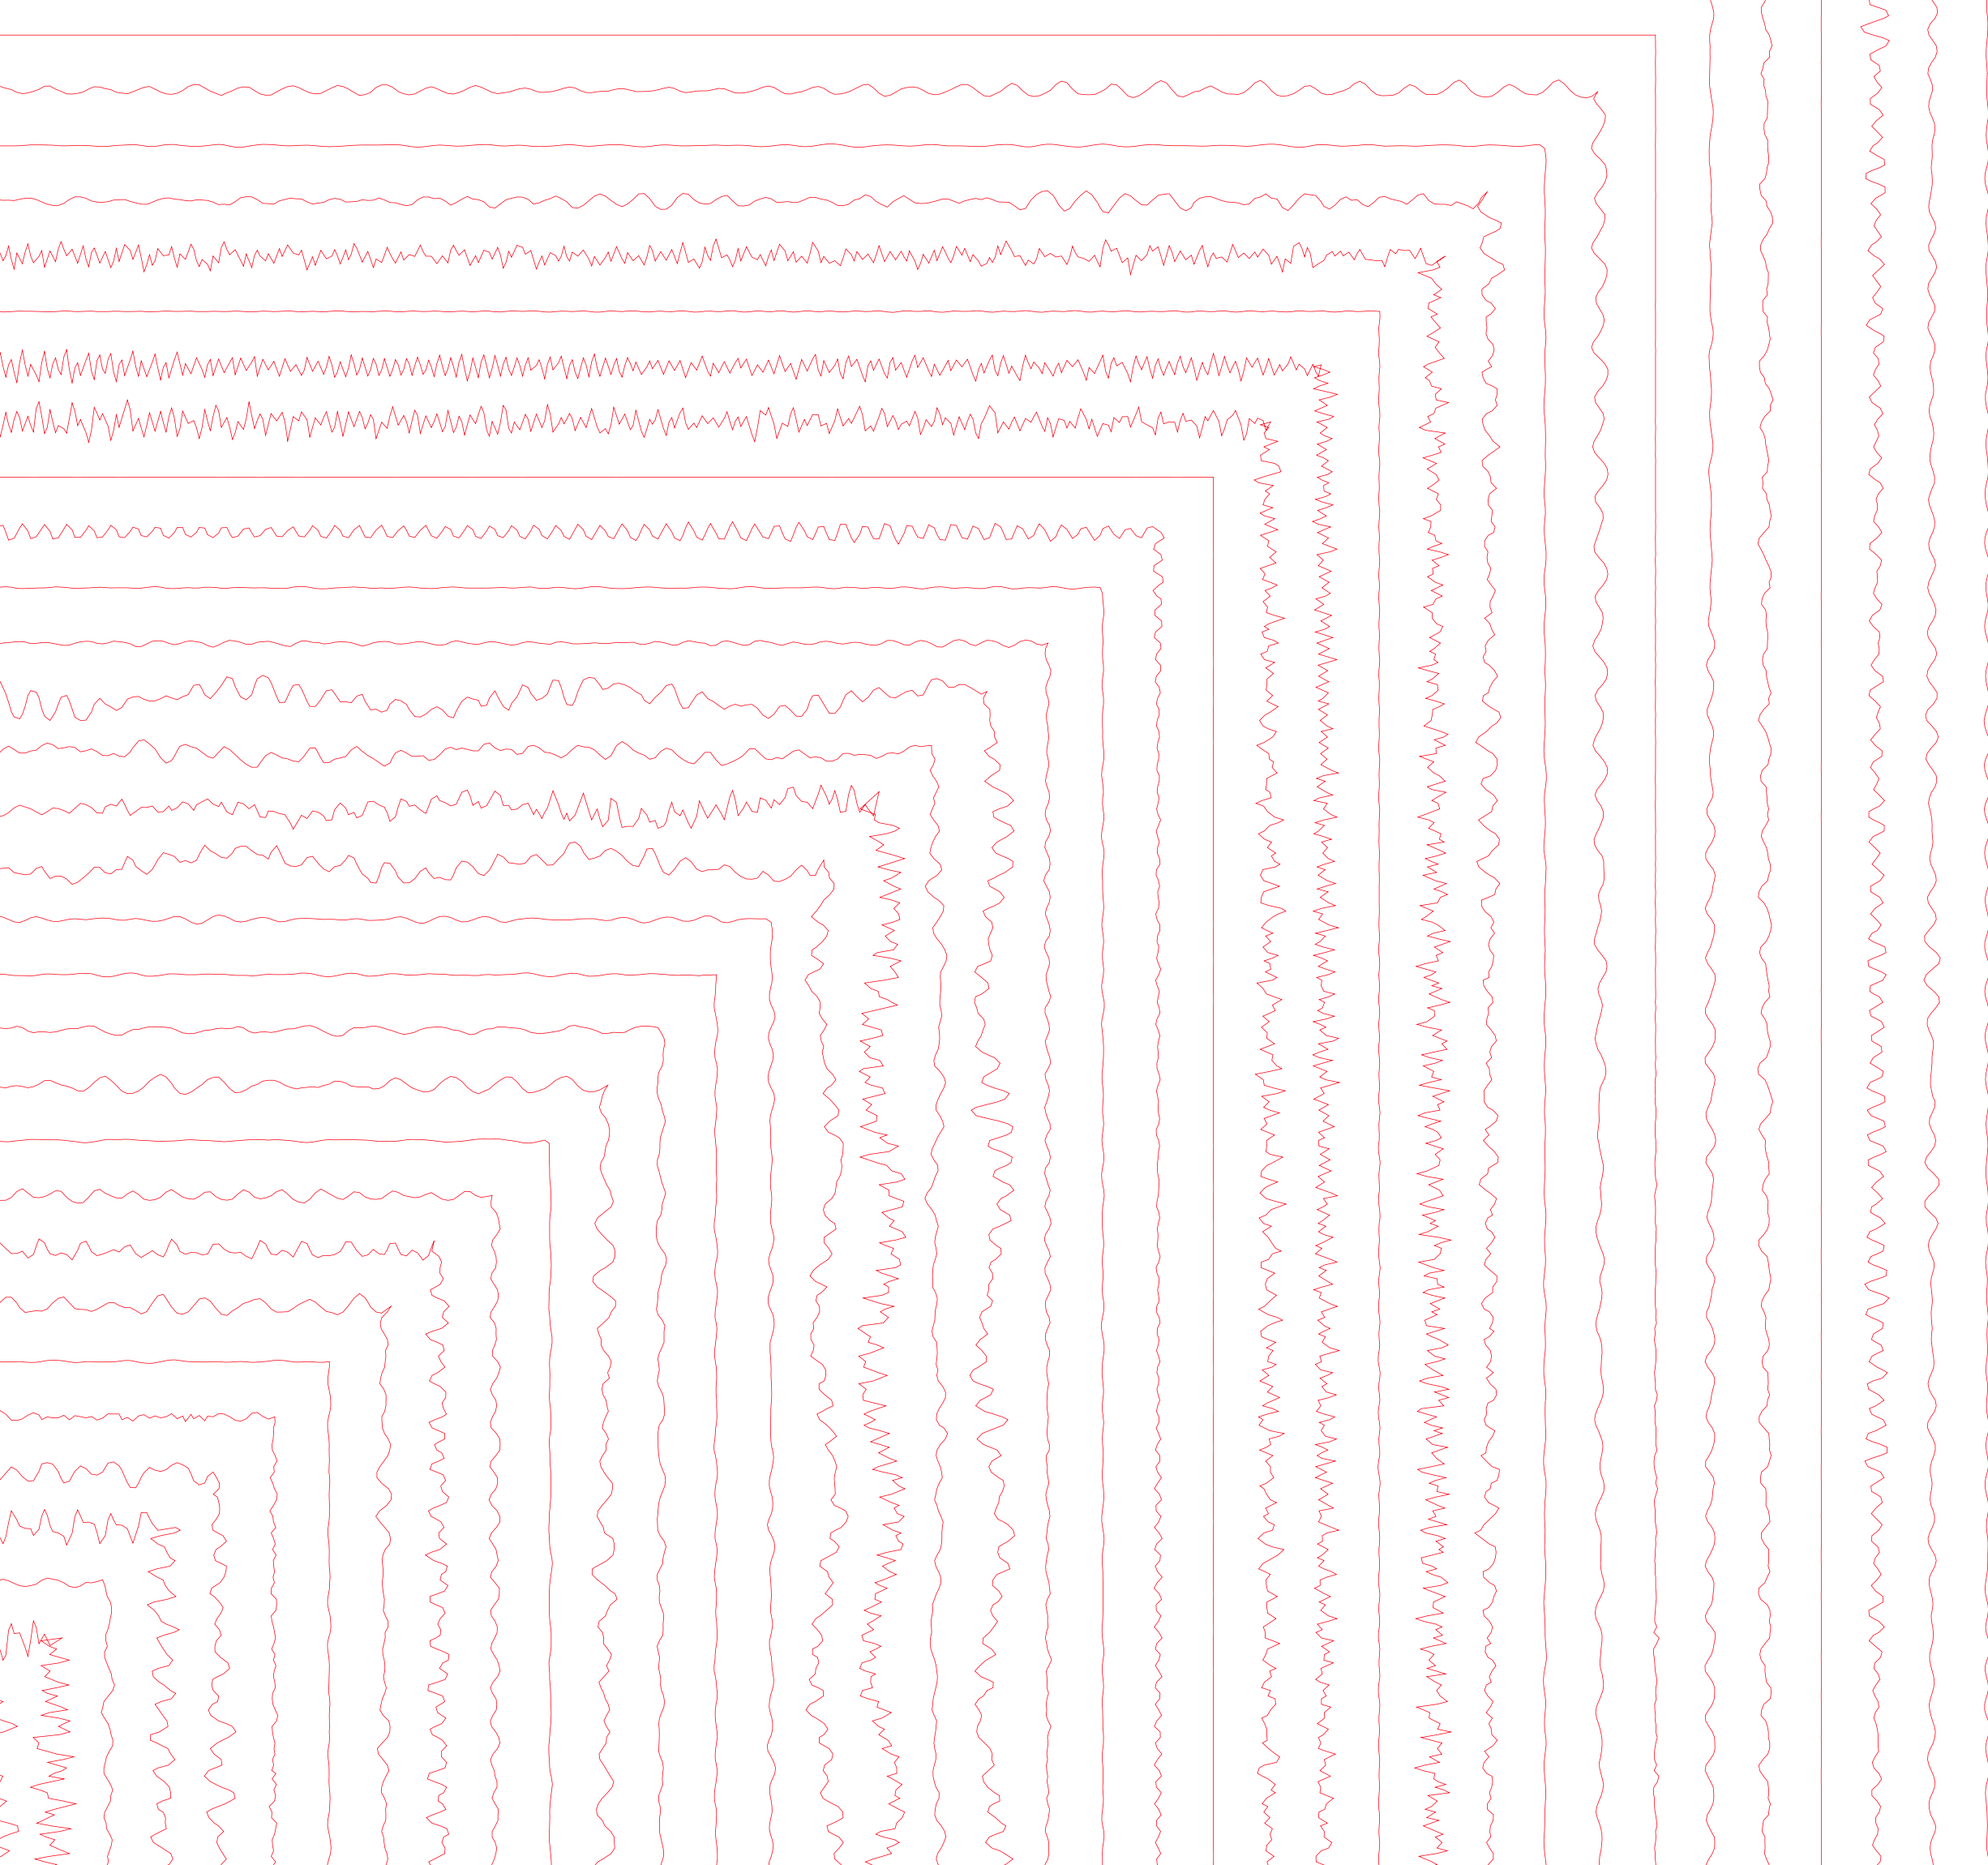
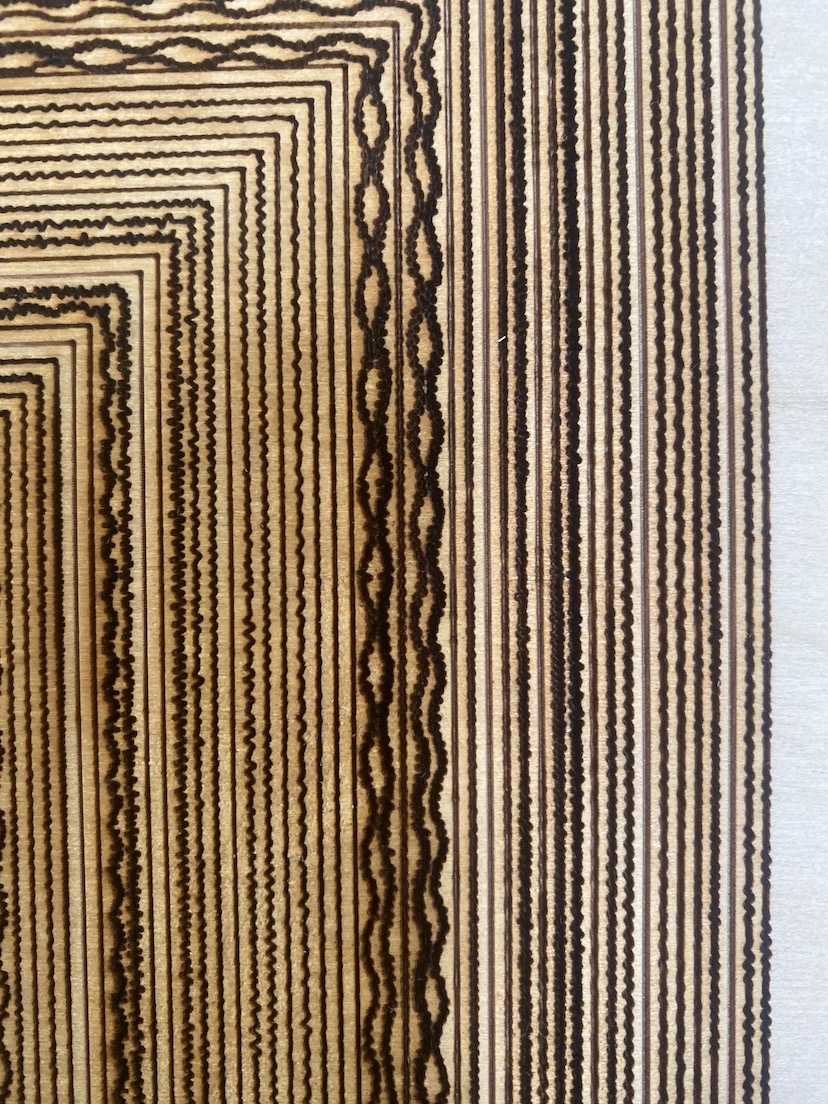
The second pattern, and the one I’ve been basing most of my prototyping off of, is a square spiral. This is similar to the original implementation of a round spiral, but I especially like the effect that the sharp corners have in creating 4 pseudo-lines that radiate outward from the center to the corners.
Material
My initial plan was to cut these designs into wood squares similar to how a record album cover would look. It took me a few iterations to land on the correct power and speed of the laser to balance having the lines dark enough that you could see them if you were standing four or five feet from the design but not too dark that the laser kerf burned too much wood surrounding the line and lost precision. I cut the wood squares using a vector-based line since I assumed the tiny variations in line amplitude would be shown clearest by the laser cutting straight along the path. I found that raster designs that were etched by the laser on wood did not come out dark enough, but I think there’s room for more experimentation there.
A closeup of less visible, but cleaner lines
A closeup of darker, but less precise burned lines
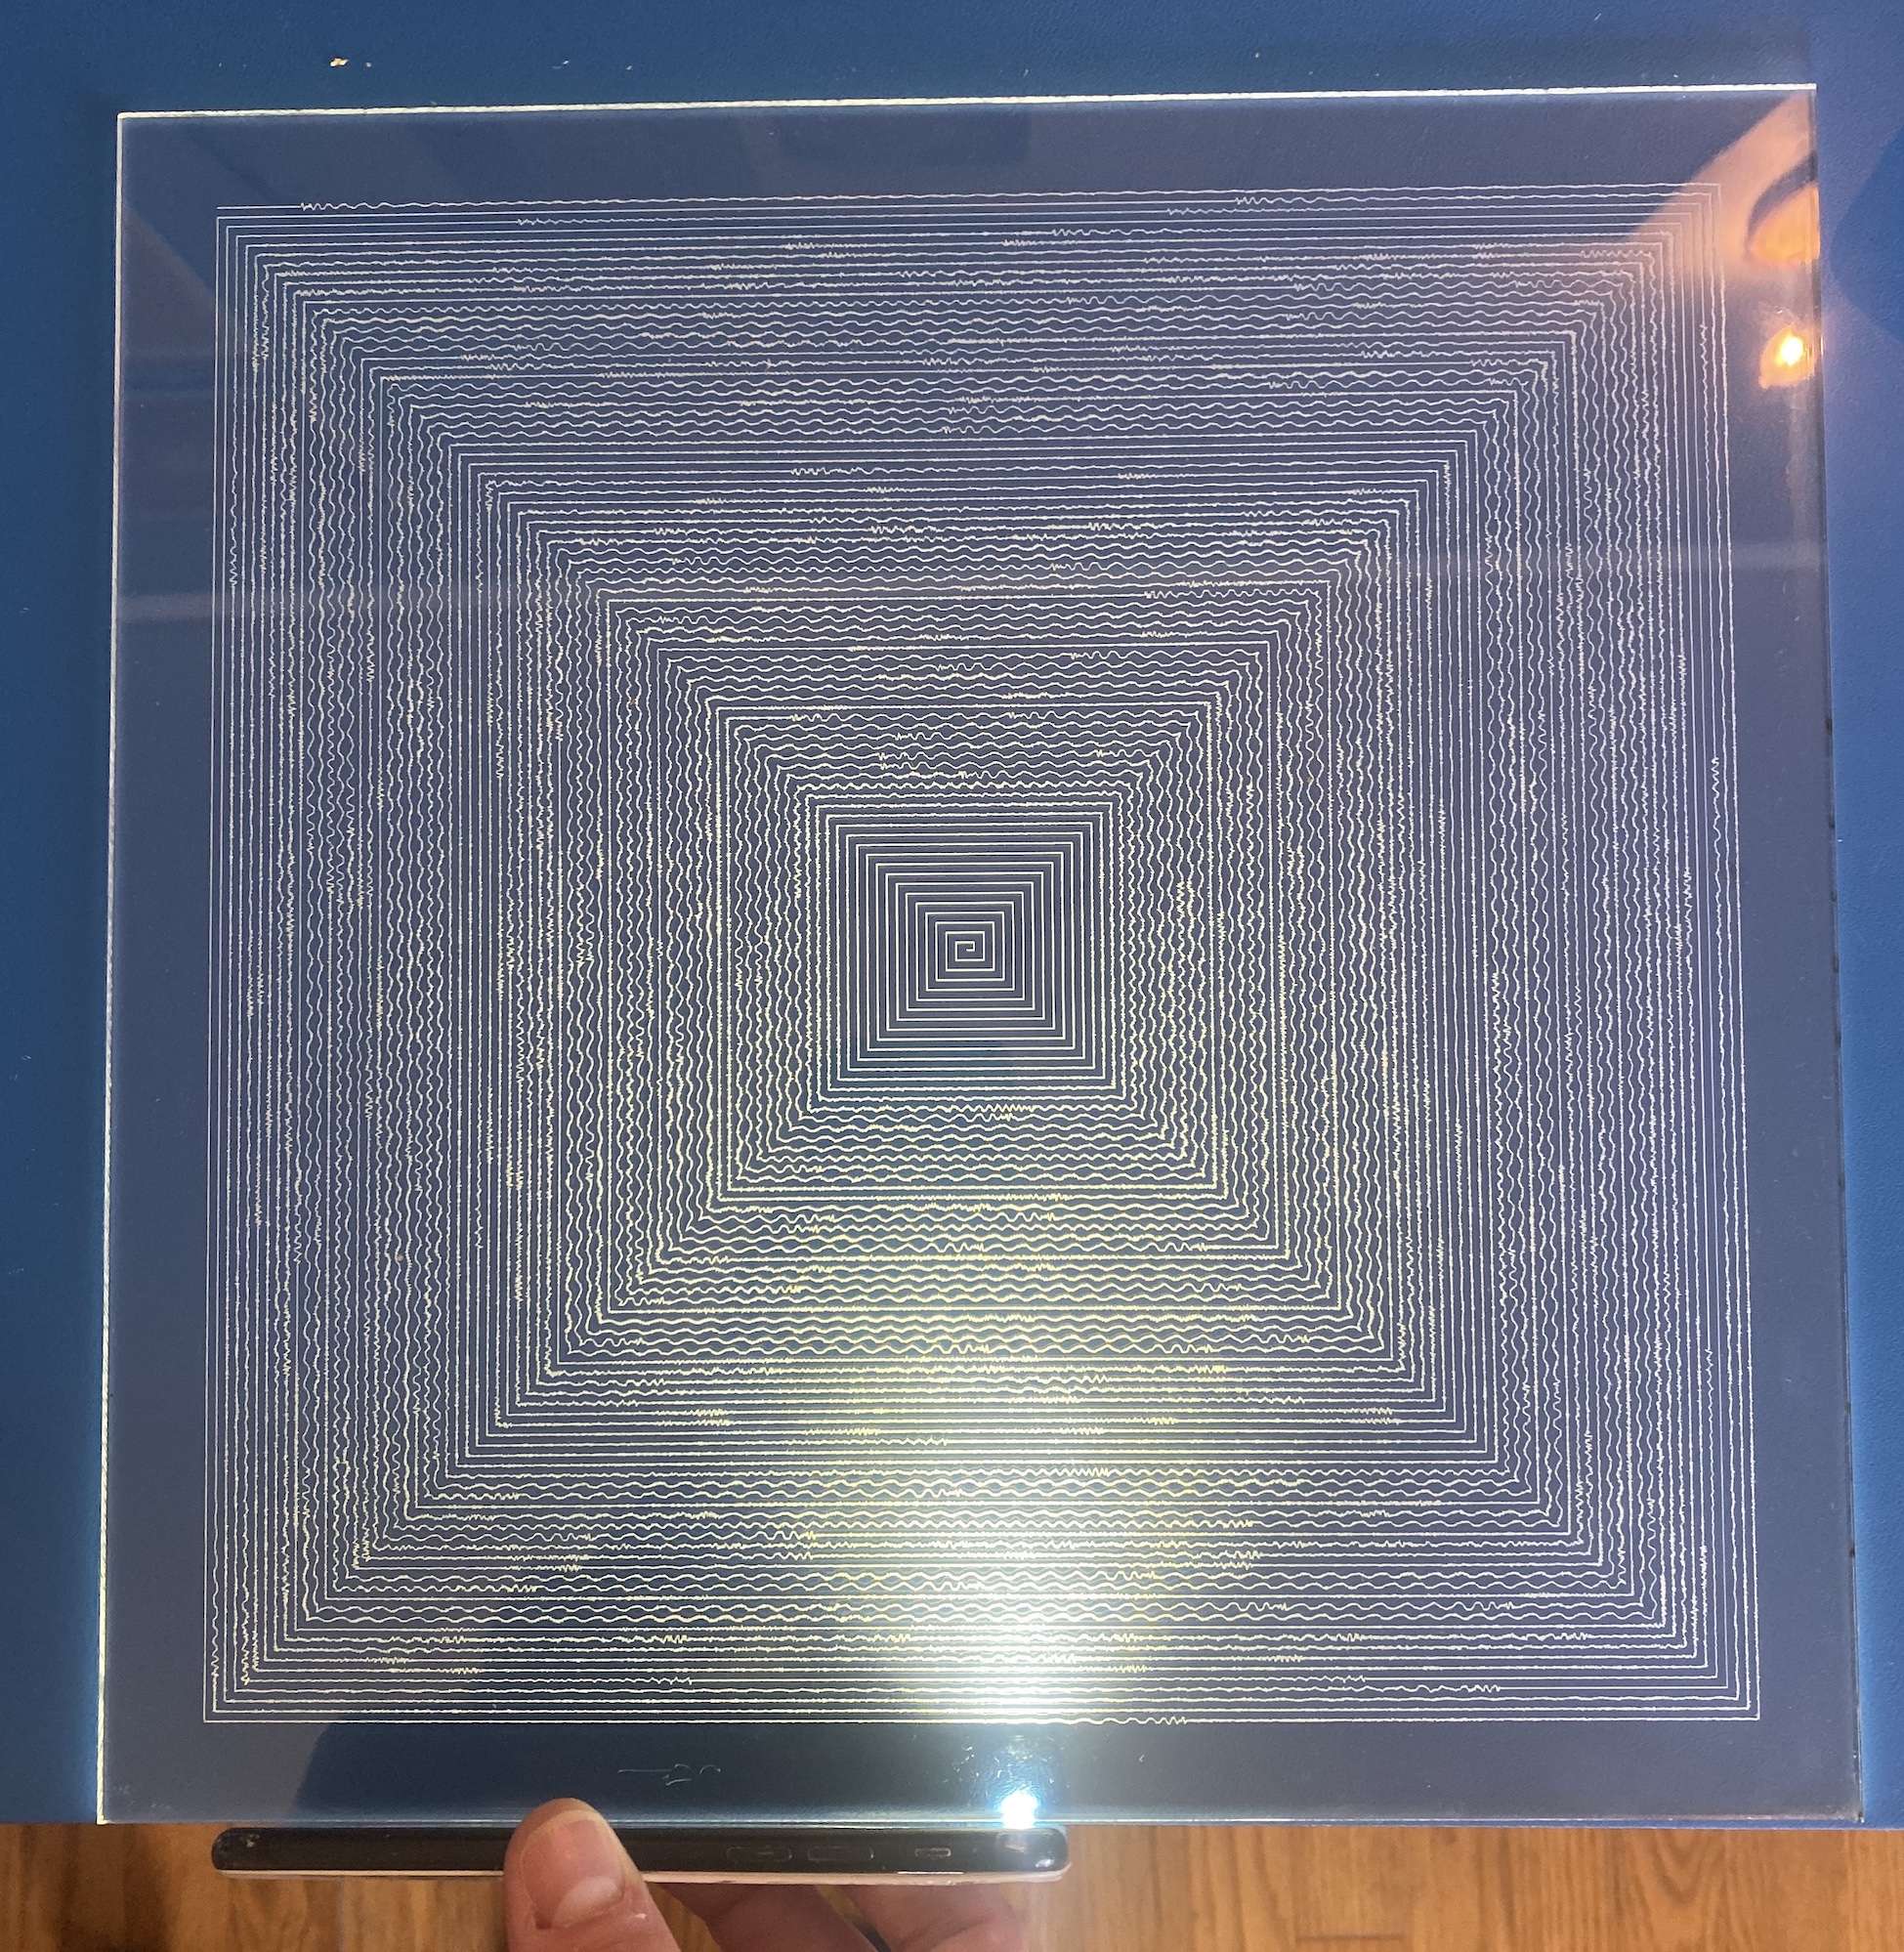
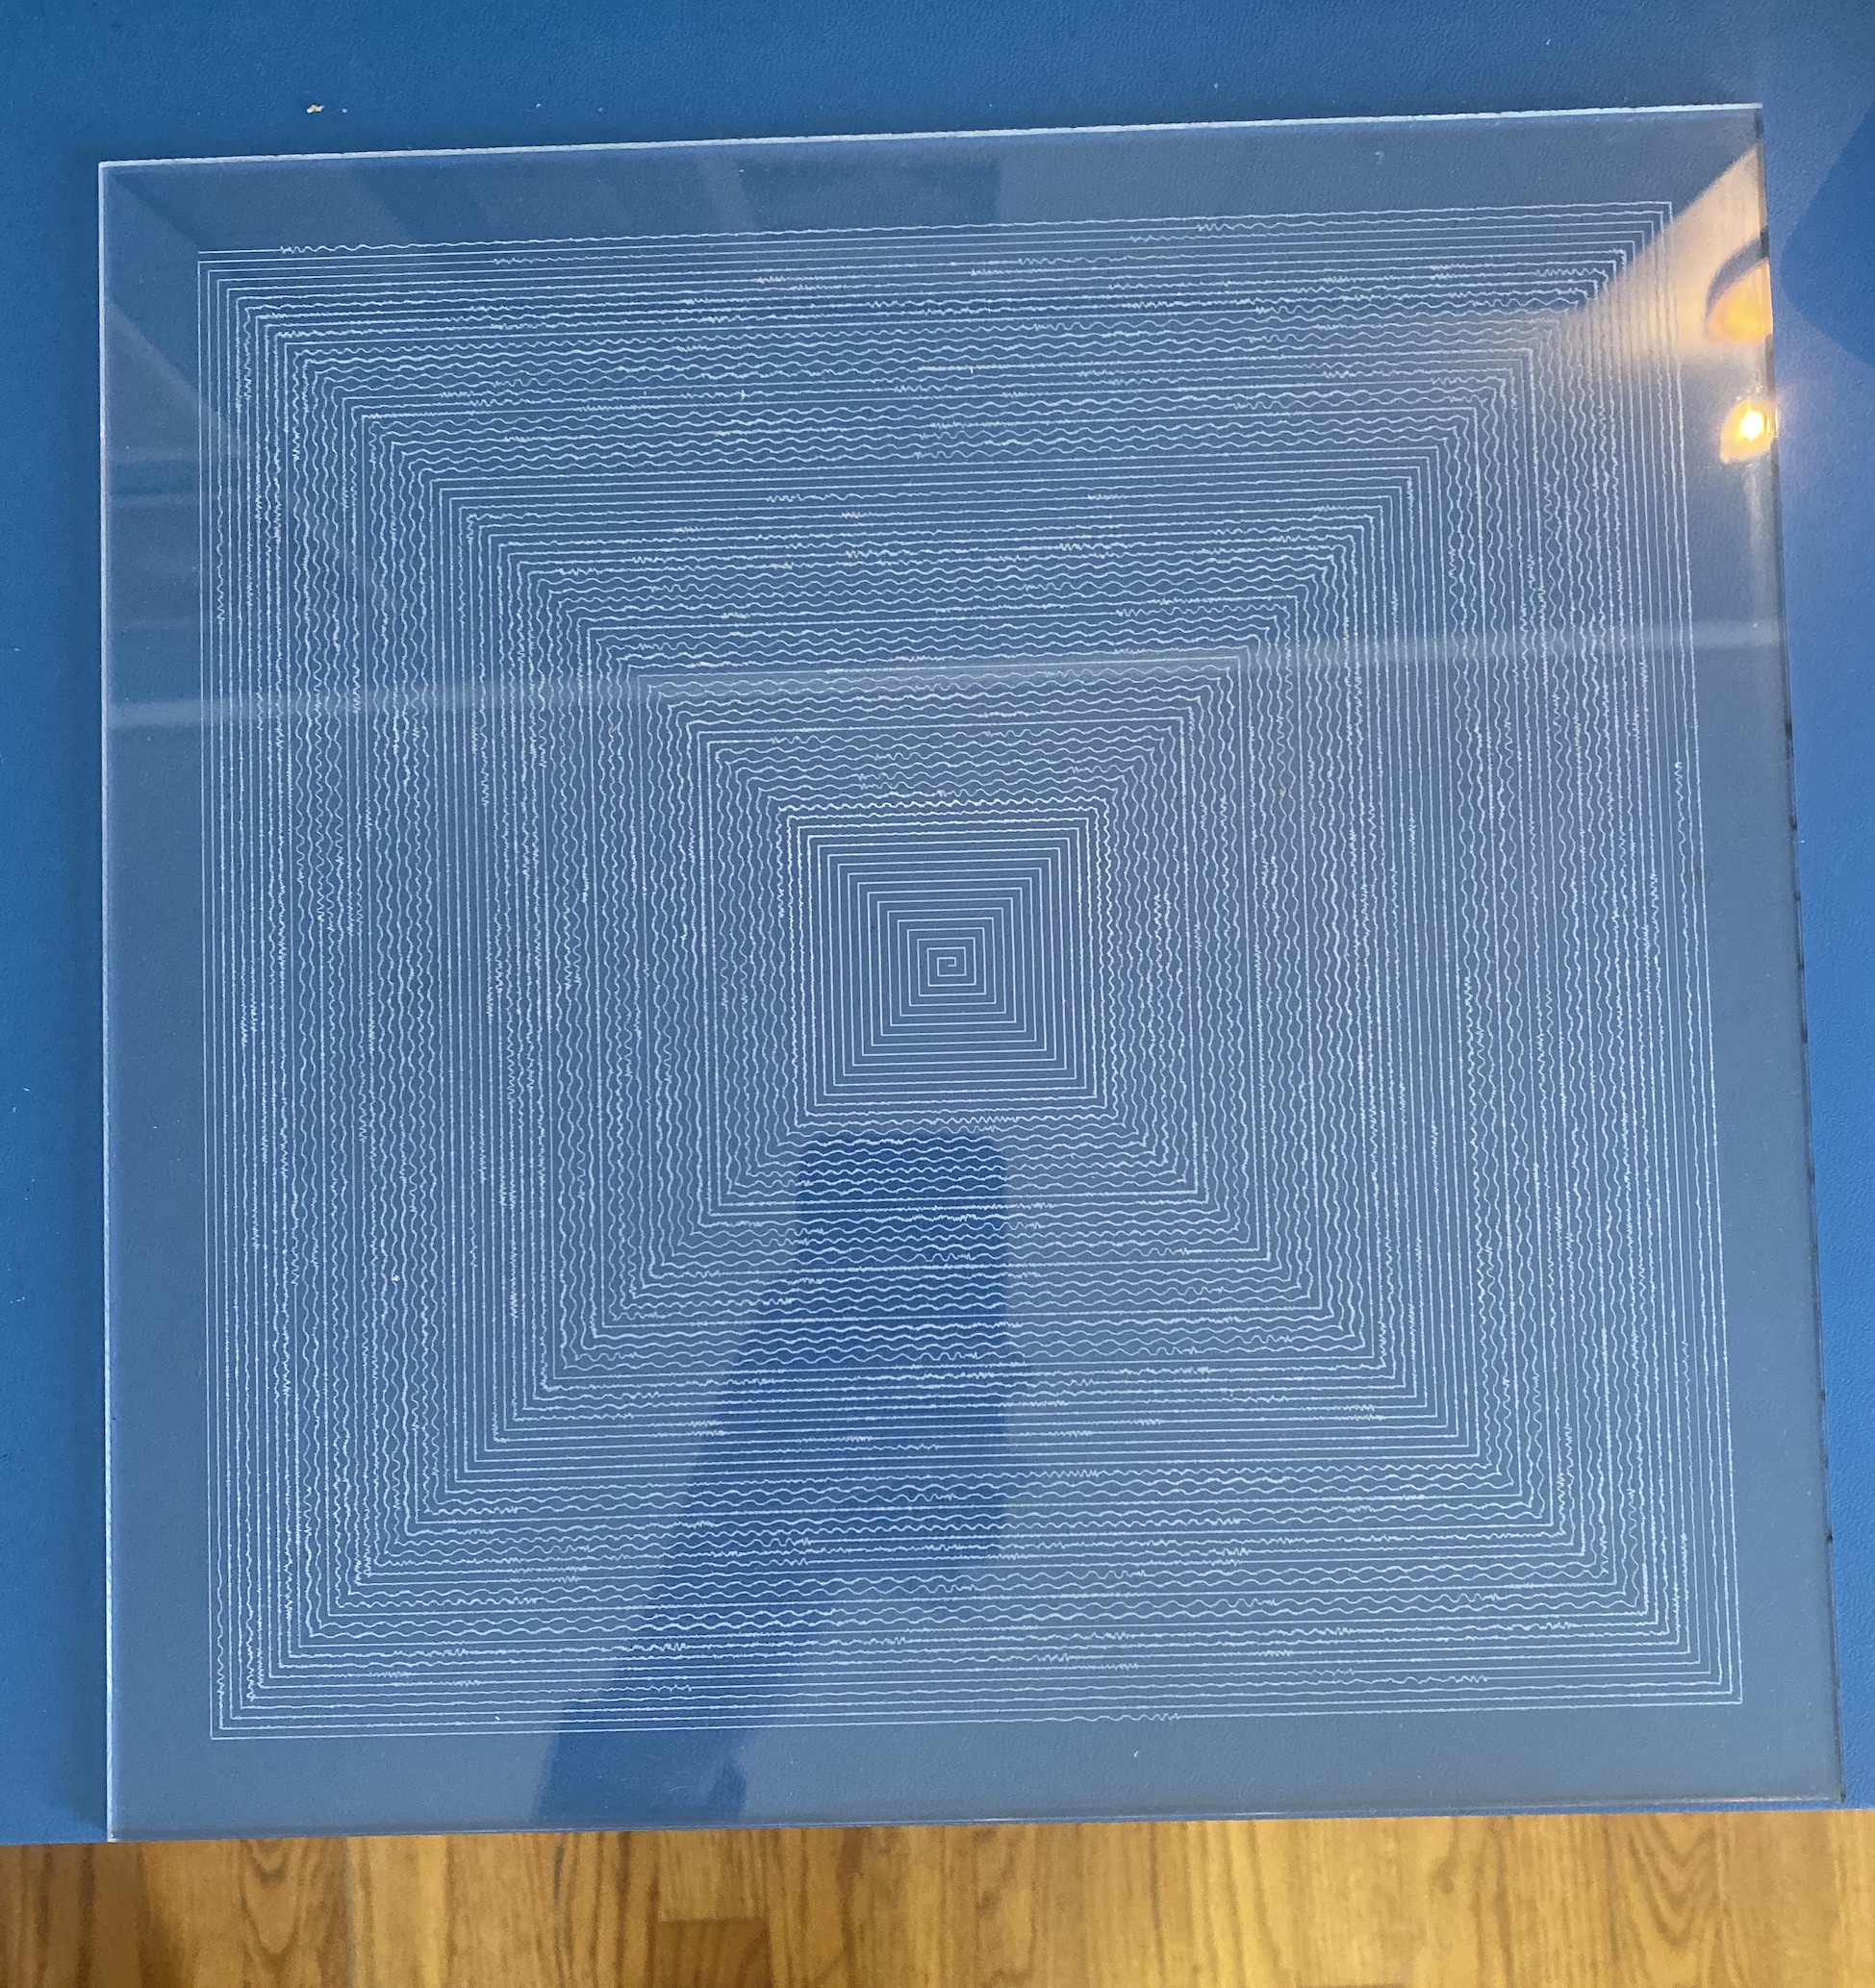
After several (mostly) successful wood designs I switched to acrylic and saw some great improvements. I ran some test cuts on a piece of black scrap acrylic with the laser etching instead of cutting and it produced very visible, super accurate, whitened lines with none of the burn-in issue of vectored wood. I etched two squares out of a piece of clear acrylic, and with my initial tests of adding basic side lighting (seen in the image at the top of the page), they look awesome.
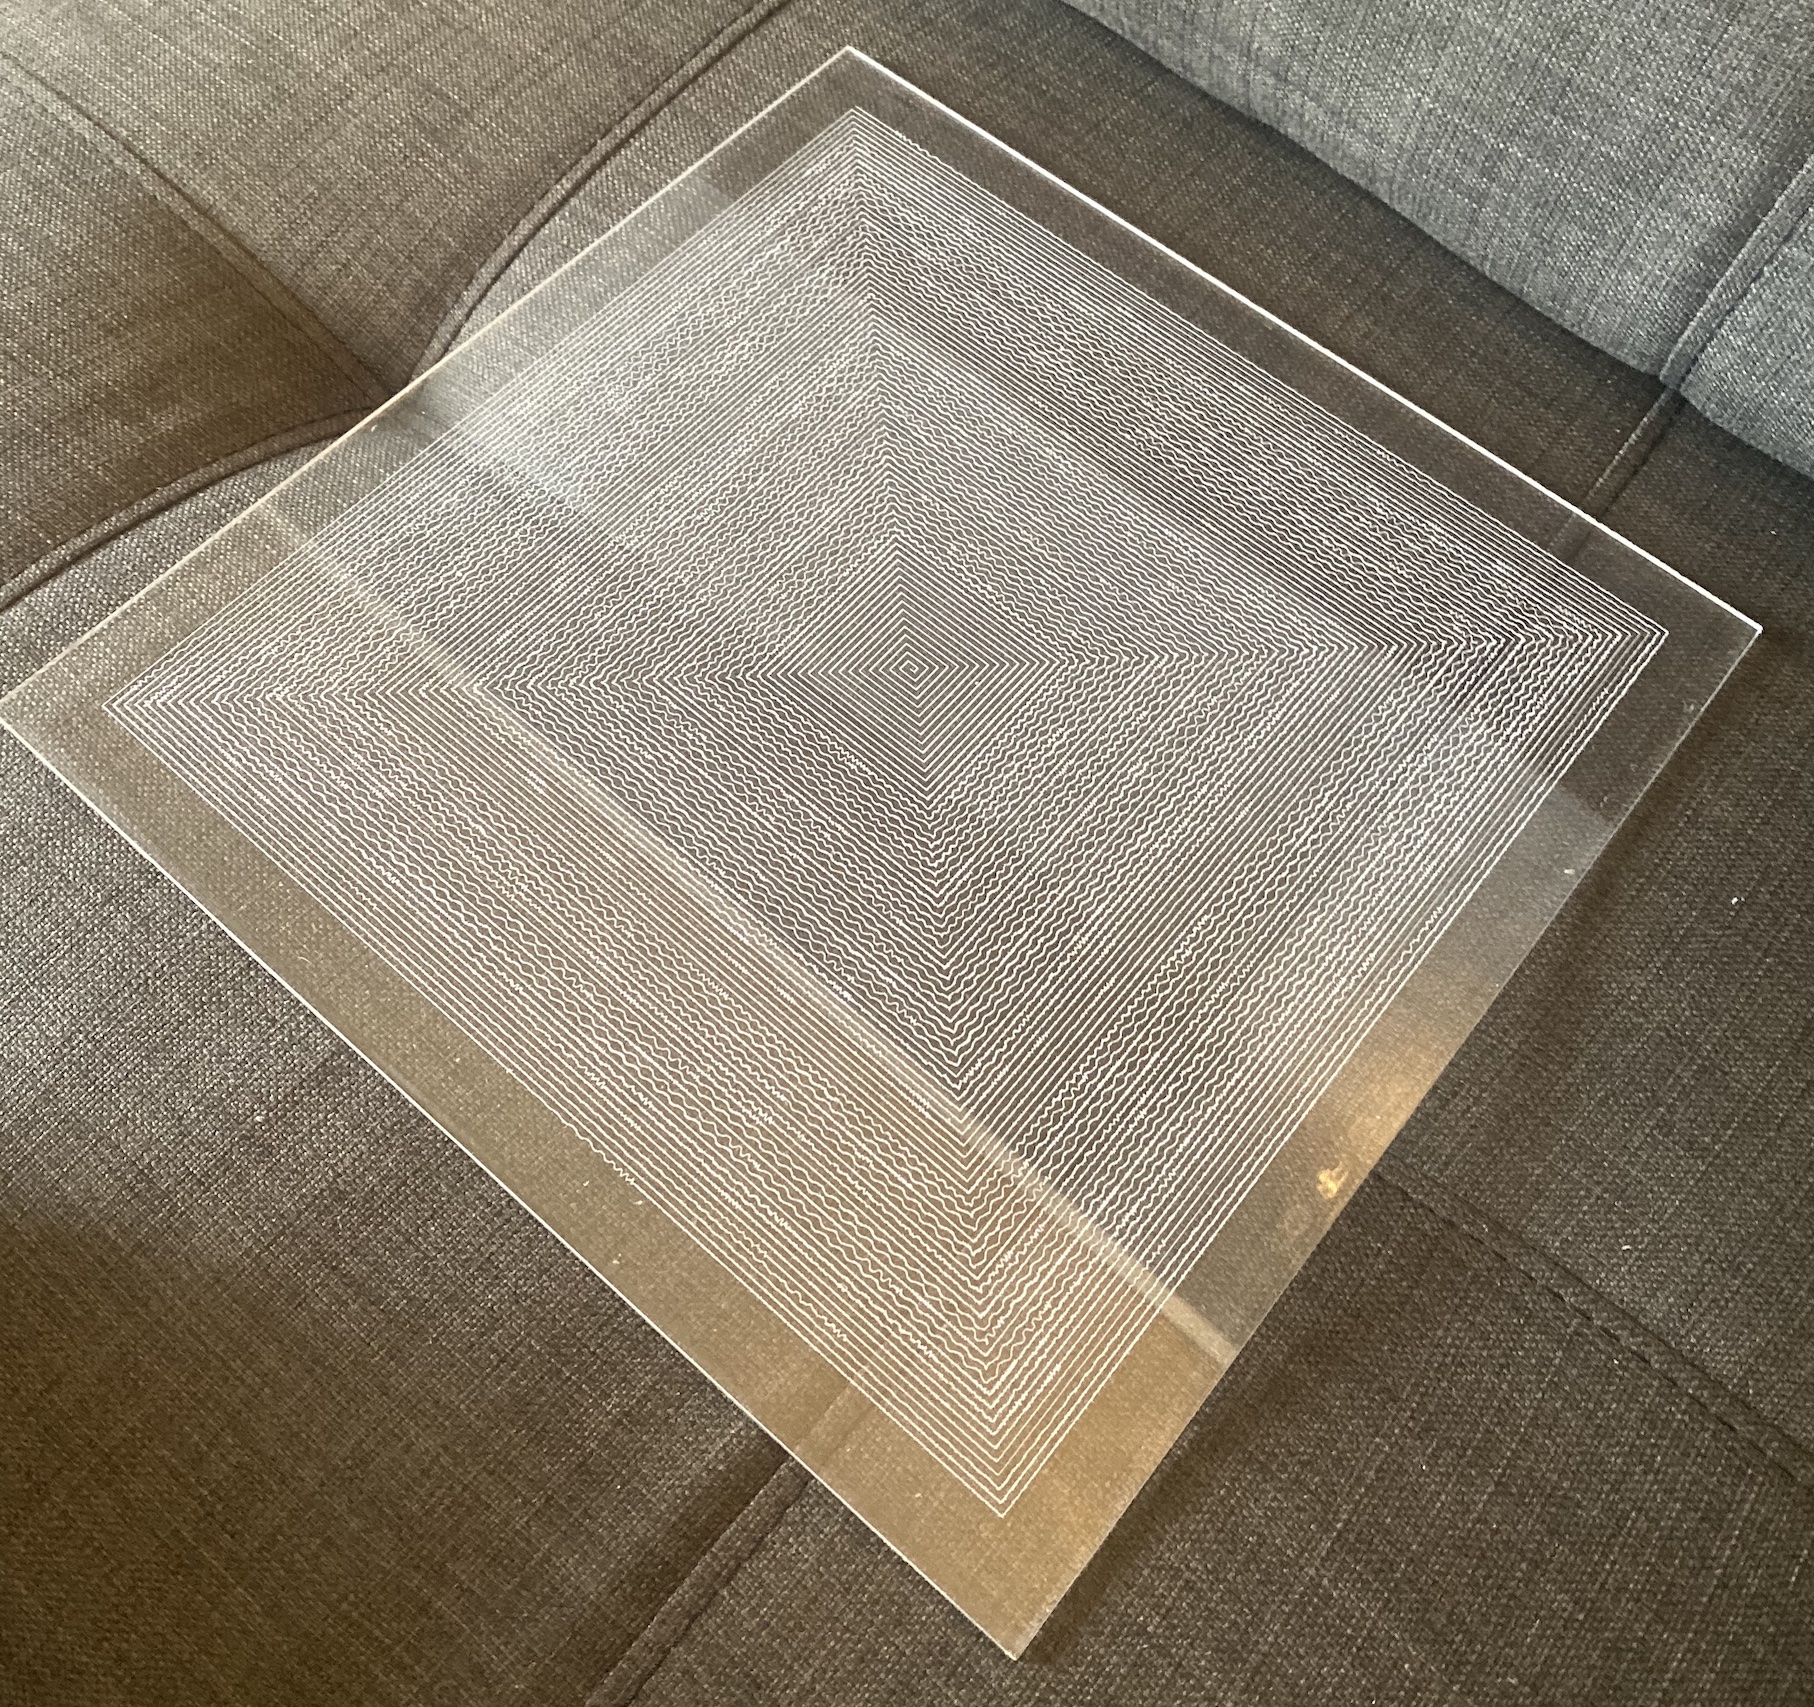
An un-lit clear piece of etched acrylic
Next steps
I think material-wise, most of my work going forward will be on acrylic. Unfortunately is a fair amount more expensive than wood, but the results are worth the price in my opinion. I want to experiment with some clear acrylic with ingrained particulate to better scatter light throughout (like this) as well as different opaque colors of acrylic.
Now that I’ve seen how well even the thin lines pop when etched and side-lit, I want to develop a simple base that will bottom light the piece along a full side and support it vertically. I’ll probably power it with DC wall power at first to be used as a shelf or table decoration, but I also want to look into how well I can manage the LED current draw to potentially add a rechargable USB pack. That way it could be used as a wireless wall decoration with an on/off switch.
I’m also planning on expanding the design itself. Instead of simple shapes, I want to either generate more complex designs and images or use existing “single-line” drawings and then trace those paths while manipulating the amplitude of the line to match the audio data. This will involve multiple steps, including being able to trace an existing SVG path within code and also knowing the current angle the followed line is at to correctly know what is “straight up” or “straight down” to plot the ups and downs of the audio signal.
Overall, I’m happy with how this has turned out so far and have plans to continue both the representation of the data as well as the medium it’s represented through.