Surfboard bike rack
You can skip to the Overview at the bottom for the total cost and the end verdict
Background
I grew up in SoCal about a 10-minute bike ride from the beach, so like every other kid, I spent the vast majority of my free time from elementary school to college there. For some reason, I never really surfed that much, preferring to bodysurf with friends in the afternoons. About a year ago, I picked it back up in SF and have been going a ton, especially since I’ve been back home in Newport because of COVID.
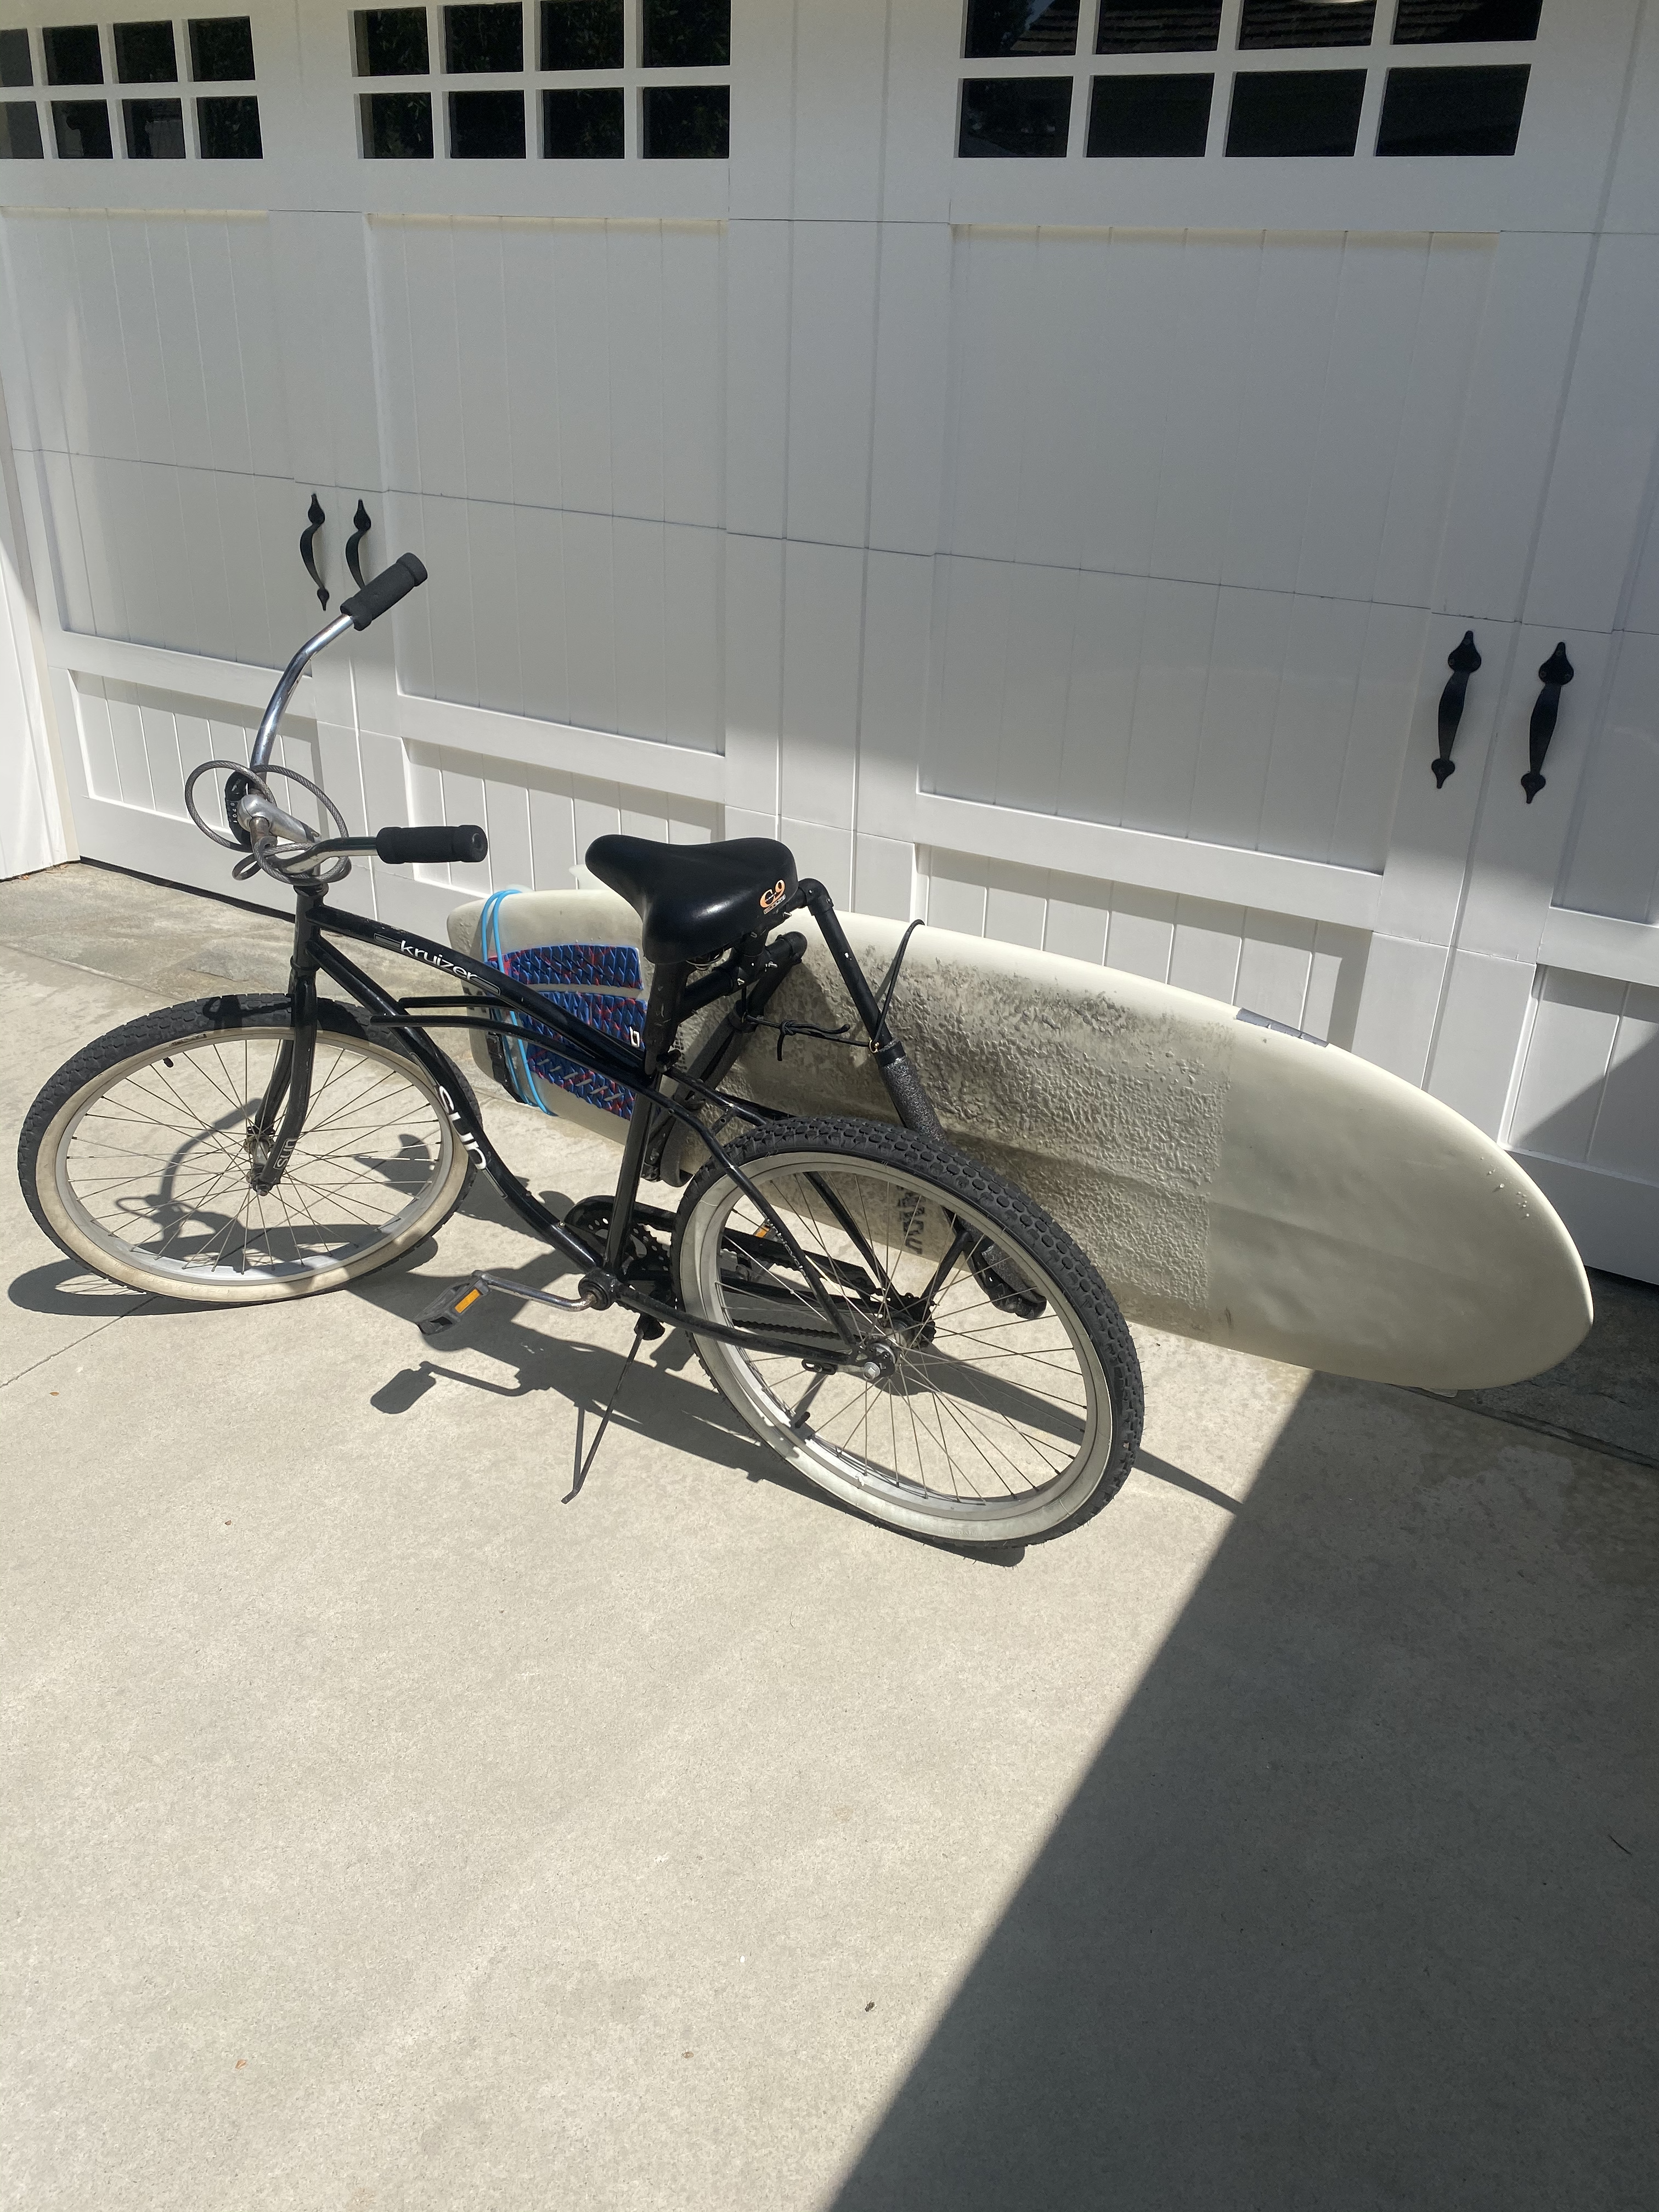
Because I didn’t surf that much growing up, I never needed one of the surfboard-carrier racks that many people have on their bikes. Usually, for weekday mornings I don’t have any problems with driving and parking since I’m on the peninsula early enough to get a session in before work. On the days where a great swell or a holiday is coming up though, it can be horrible even at like 6:45 am.
I didn’t feel like shelling out ~$90 to buy something that seemed fairly simple to me, so I poked around a bit and decided I could build a simple one myself. I also wanted to be able to throw my big Wavestorm foamie in it, which a lot of the reviews for manufactured racks said was too heavy for theirs. A couple DIY posts are floating around like this and this. I borrowed a couple of design pieces from each, but mine ended up being a bit more detailed than the other two.
Design & build
Load bearing joint
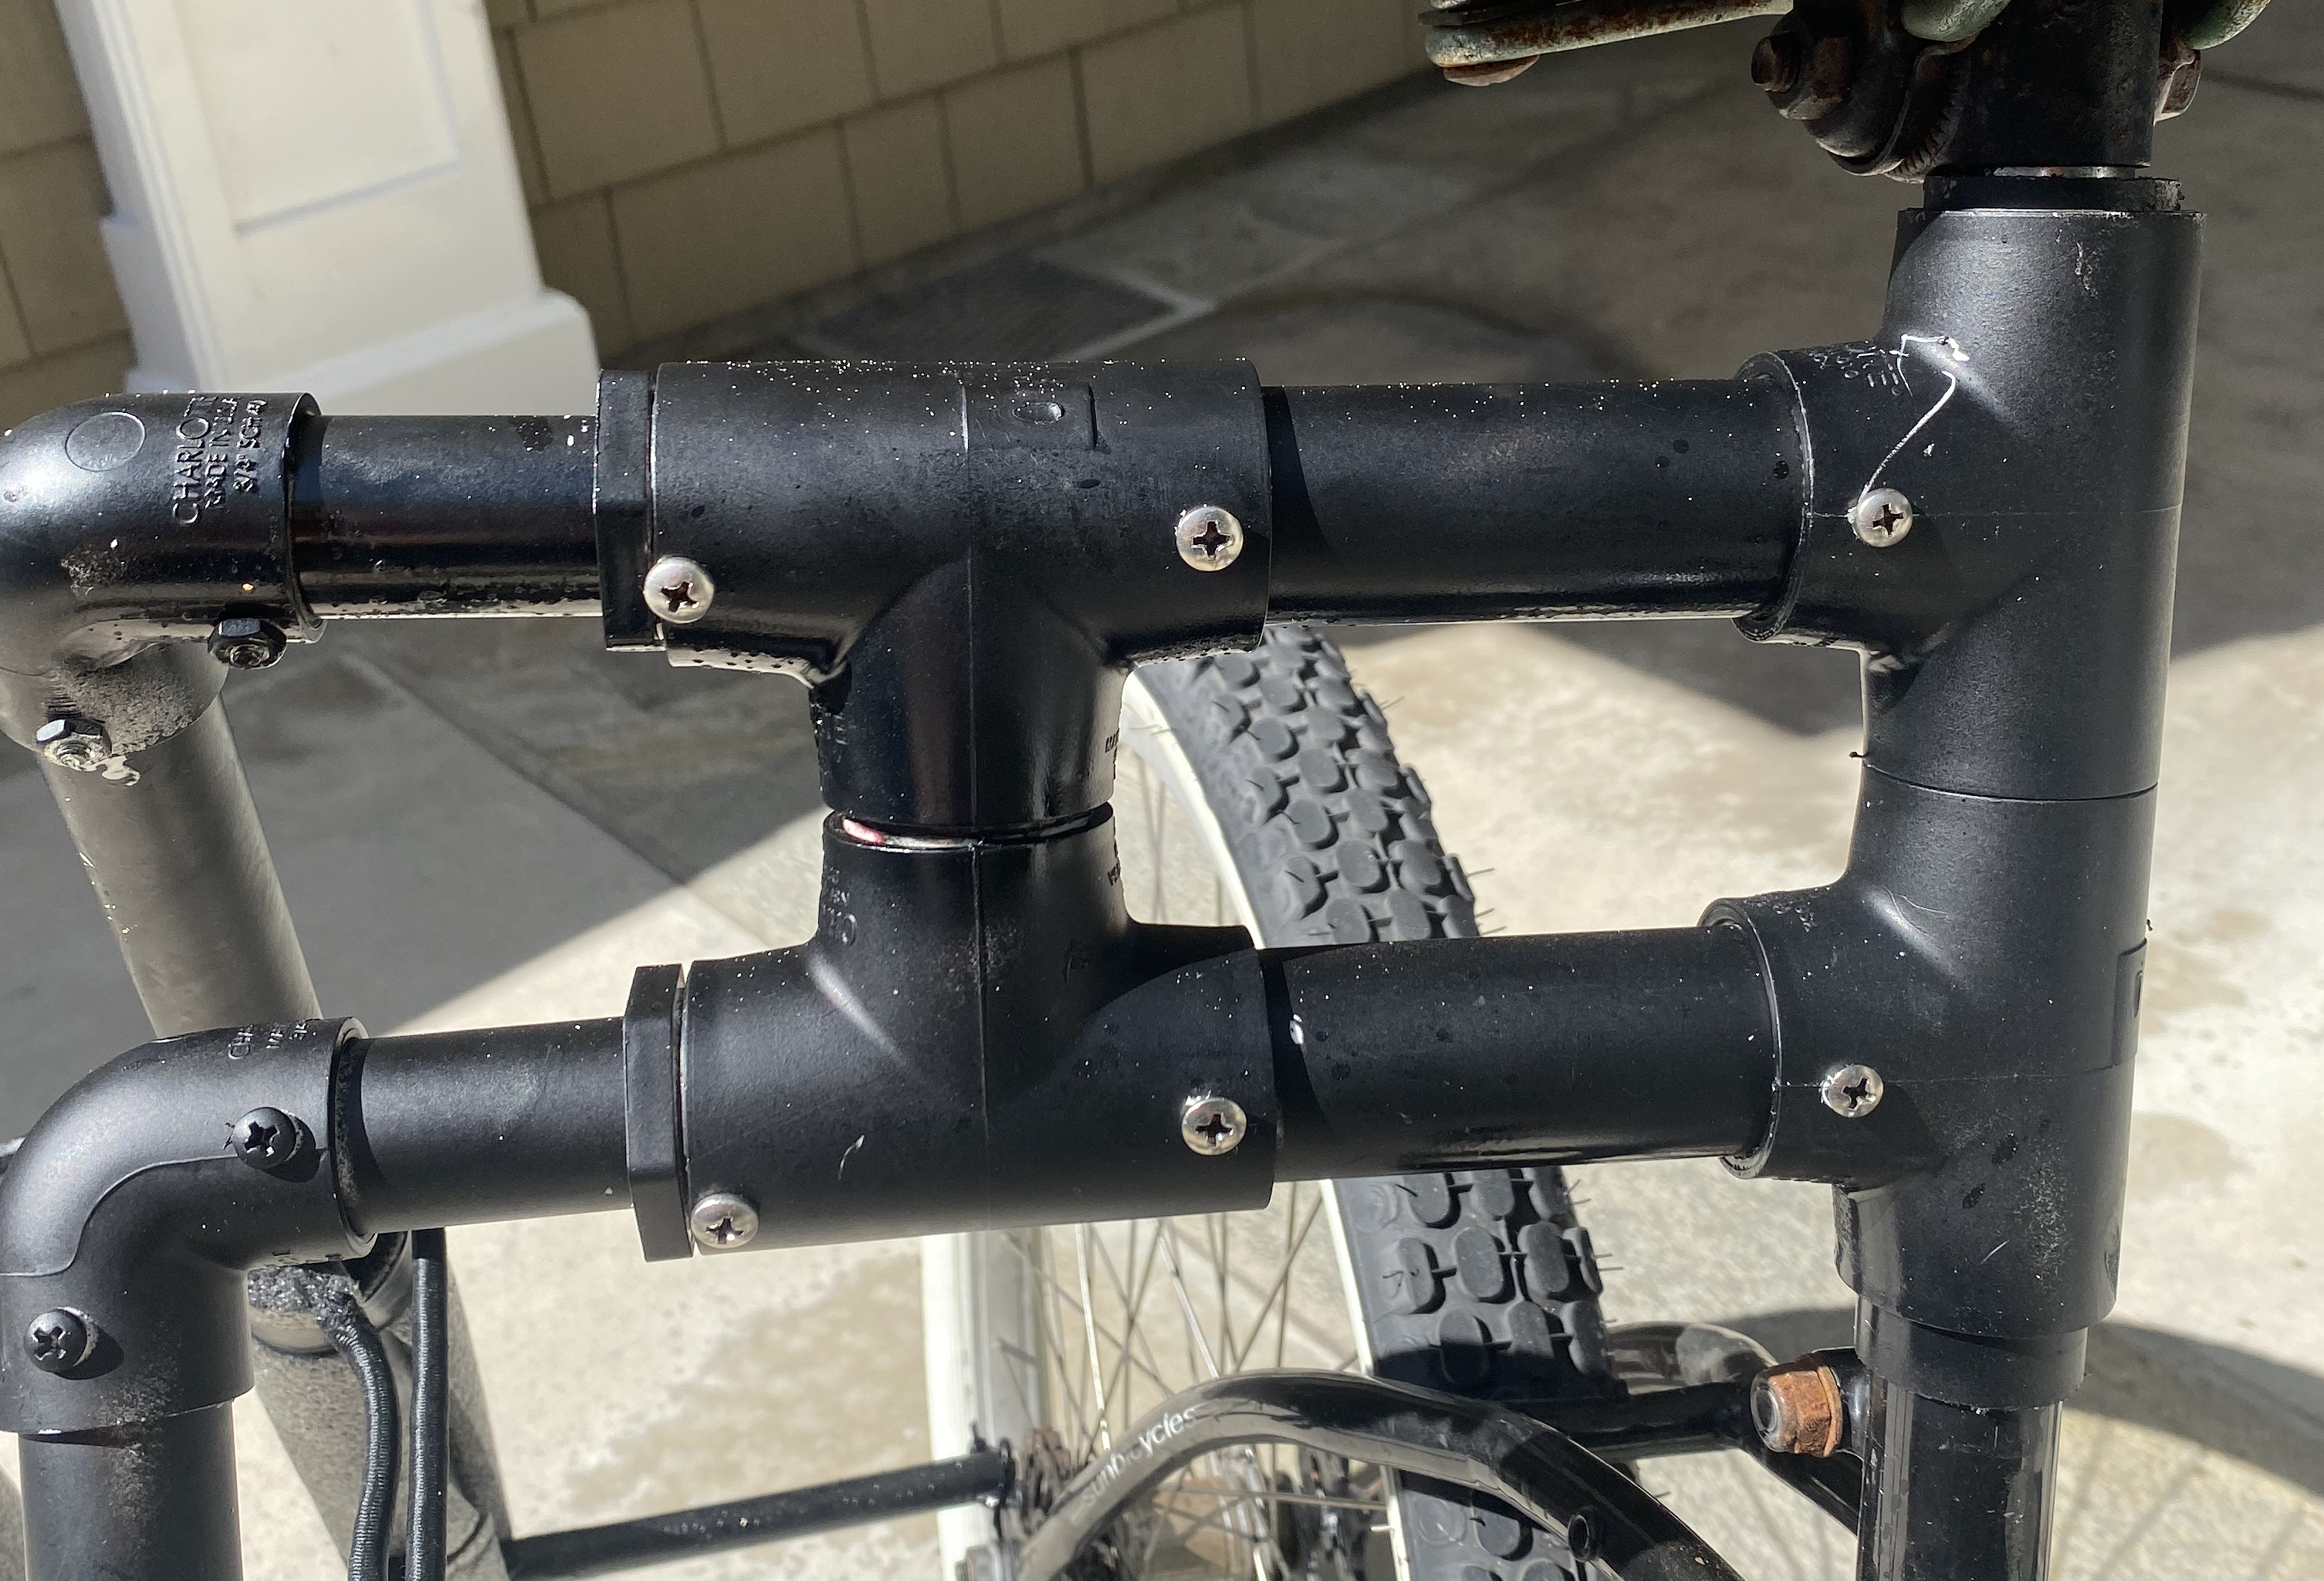
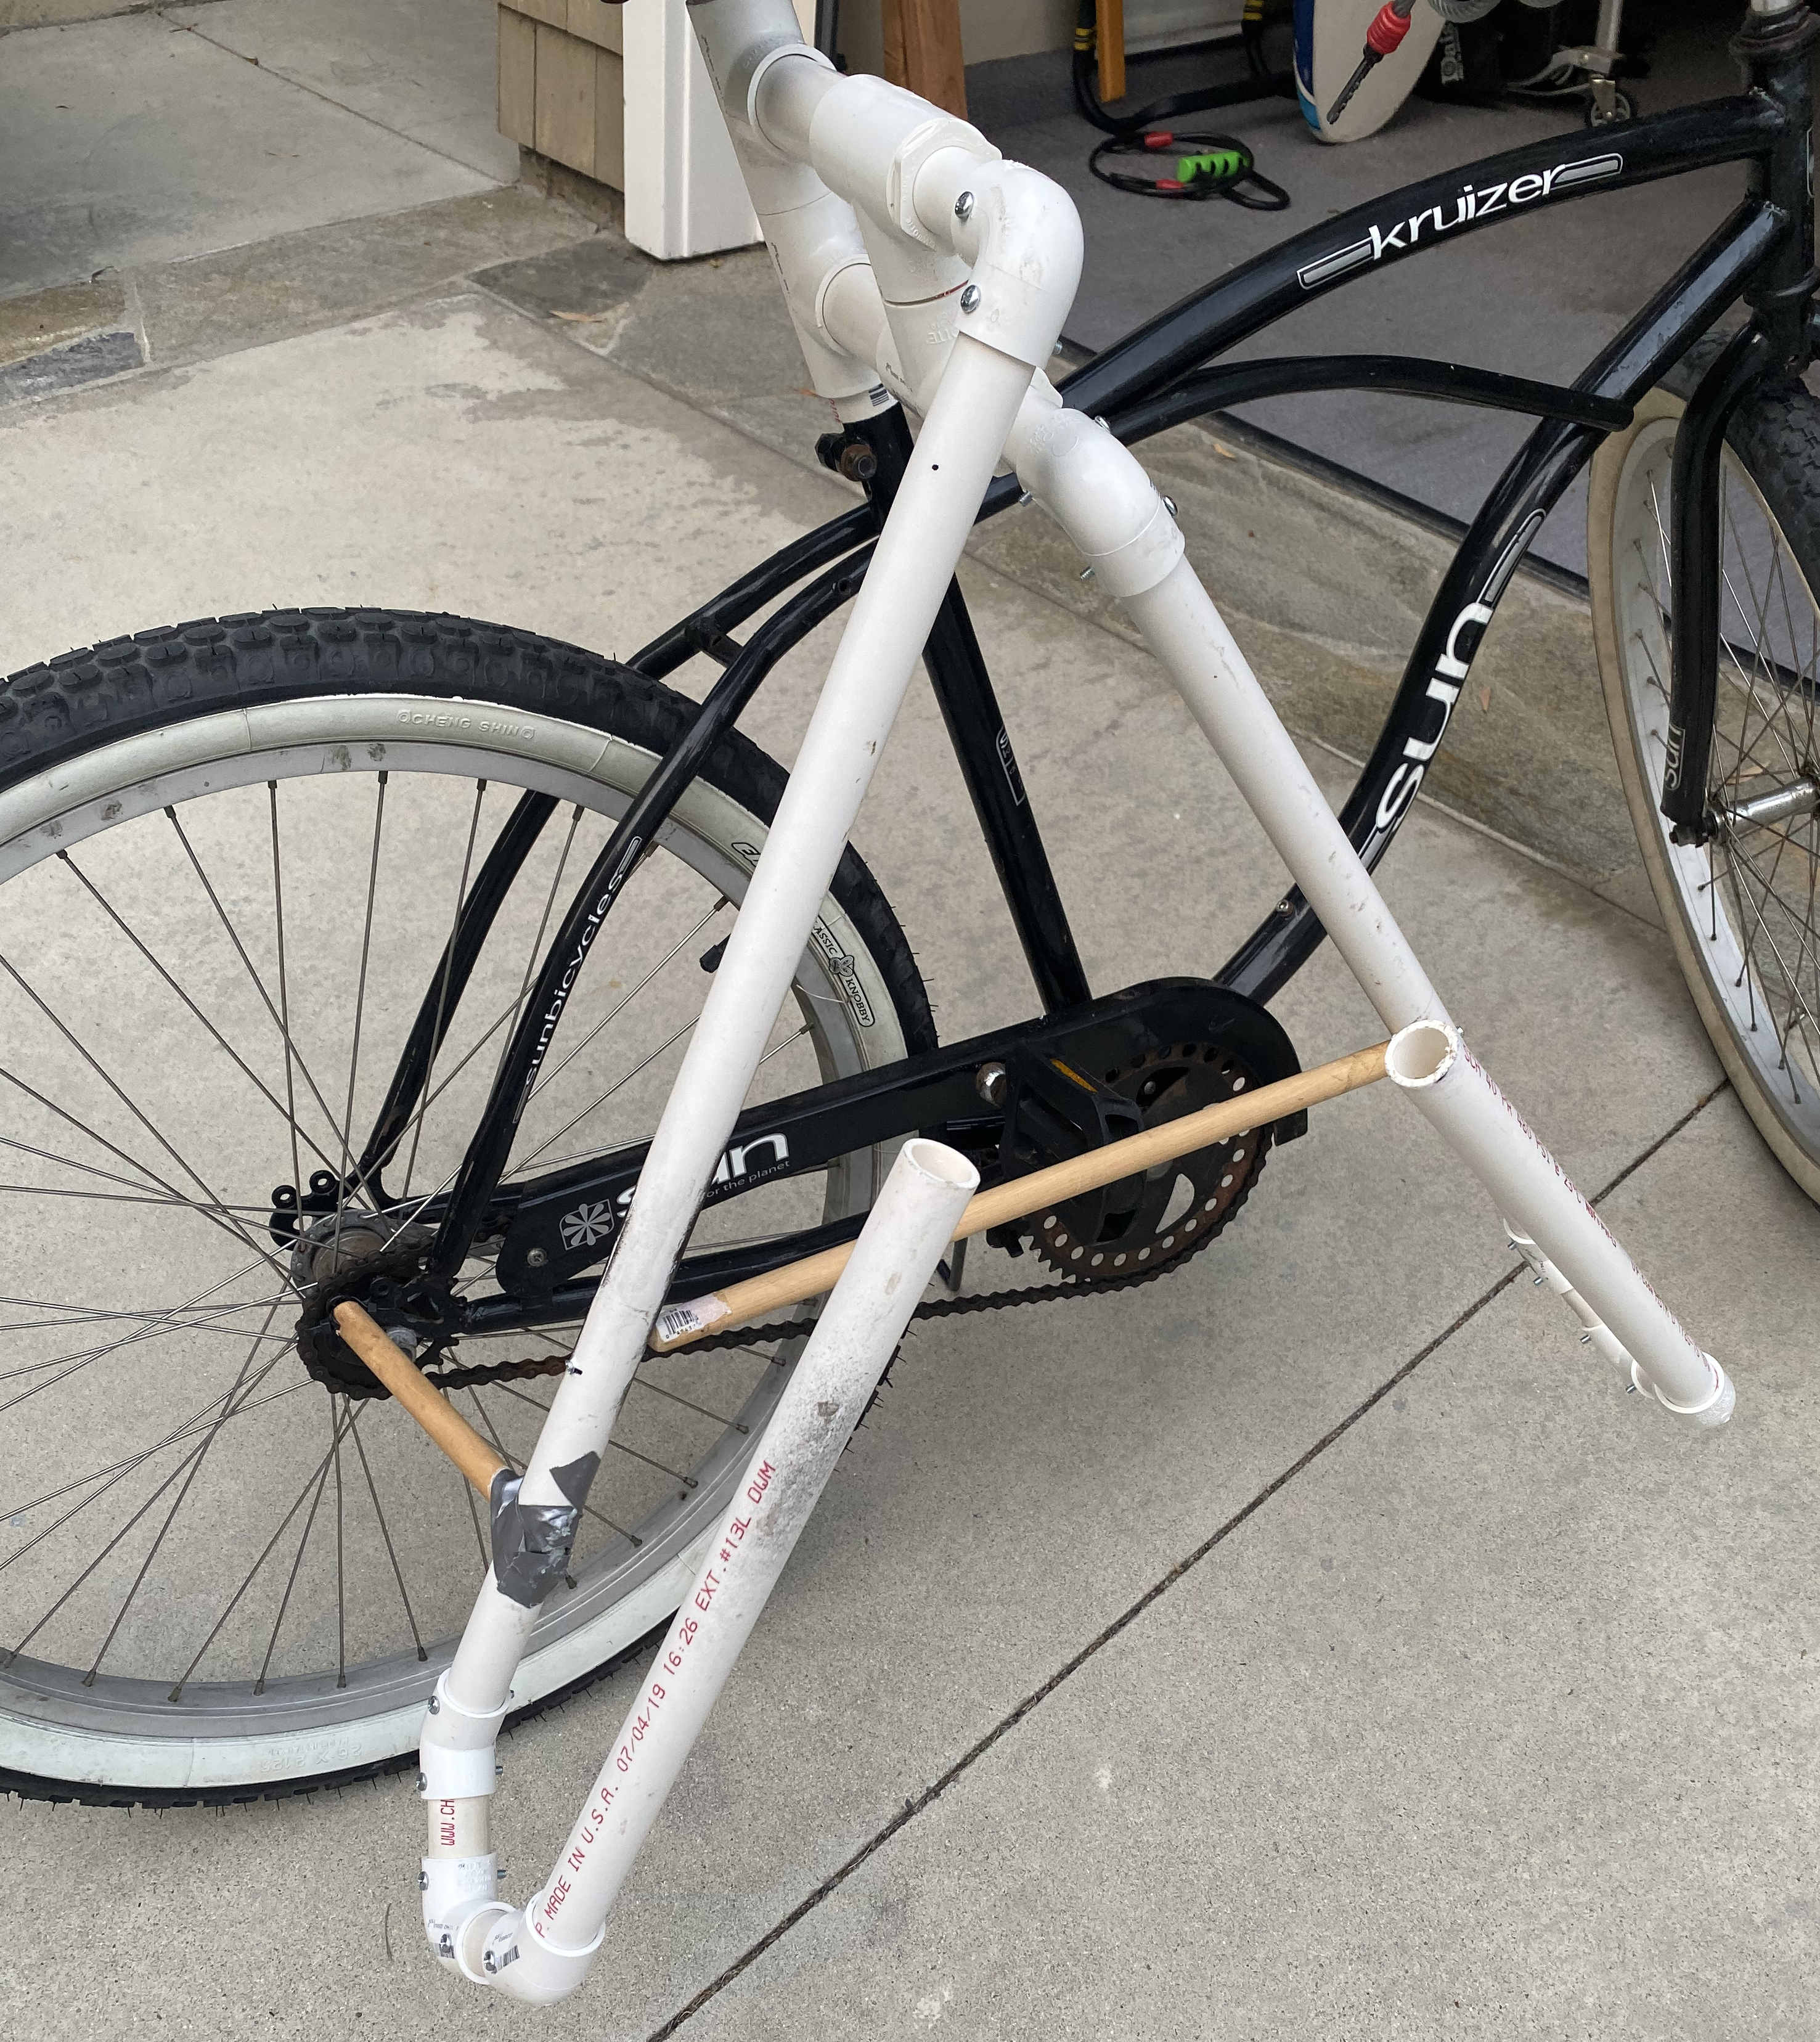
The main point of contact of the rack with the bike is on the seat post. There are a few different ways to affix it, but I discovered that a 3/4" PVC pipe fits perfectly around the diameter of my seat post. It was snug enough that it wouldn’t rattle but not so snug that I couldn’t slide it on. Another possibility is to choose something too small to fit, cut a vertical section out of it, and cinch that tight around the post.
One of the main ideas that I took from someone else’s online writeup was the double-pipe reinforcement for the horizontal section coming off of the seat post. Since I used PVC, I was extra conscious of flex and weight-tolerance, and two solidly-joined sections of 1" pipe were plenty stiff to prevent any sag in the horizontal off of the seat post. Each piece came out of a T-joint from below the seat, connected vertically together with another T-joint about 5 inches out, and then split off into their individual vertical sections.
I decided to go with 3/4" PVC for the ‘arms’ half of the rack to lessen the weight. In hindsight, I think doing everything out of 1" would be a better call. It’s heavier, but mitigates a lot of the flex and springiness that occurs with the 3/4", especially when there’s a bigger board in it.
You want to triple-check you have enough sideways clearance to still pedal after the vertical arms are attached. I was a little to close for comfort, so I had to re-cut the sideways pieces to get it far enough out from the bike.
Err on the side of too far here: with a board in the rack, the vertical arms will naturally want to flex back towards the bike with the weight distribution, so it won’t be a perfect vertical plane straight down from where you have the top joints.
Vertical arms and board holder
For both the vertical length and angle between the arms, I eyeball-measured everything. I’m sure you could do some simple trig and figure out the optimal length compared to angle to get the right horizontal distance between each arm while also making it deep enough, but this was not that kind of project for me.
Each vertical pipe has to be a different length since the top joints are stacked at different heights, but since you can adjust how high off the ground they reach by increasing or decreasing the angle between the arms, it doesn’t need to be super precise. The two main things to keep in mind are that you want them long enough to keep your center of gravity as low as possible but also short enough that they (or your board) are not in danger of hitting the ground when you turn and lean your bike.
One area in which I deviated from most of the racks I saw was the U shape at the bottom of the arms. The manufactured ones were all nicely curved metal, but the homemade ones were just a square with two 90º joints. At first, I went with four separate 45º joints for both the front and back. This drove up both the price and the weight, but it was a nice smooth angle transition all the way through. Eventually, I decided against it. Even with the minimal amount of piping connecting each joint so they were flush against each other, the U was pretty wide even when holding the Wavestorm.
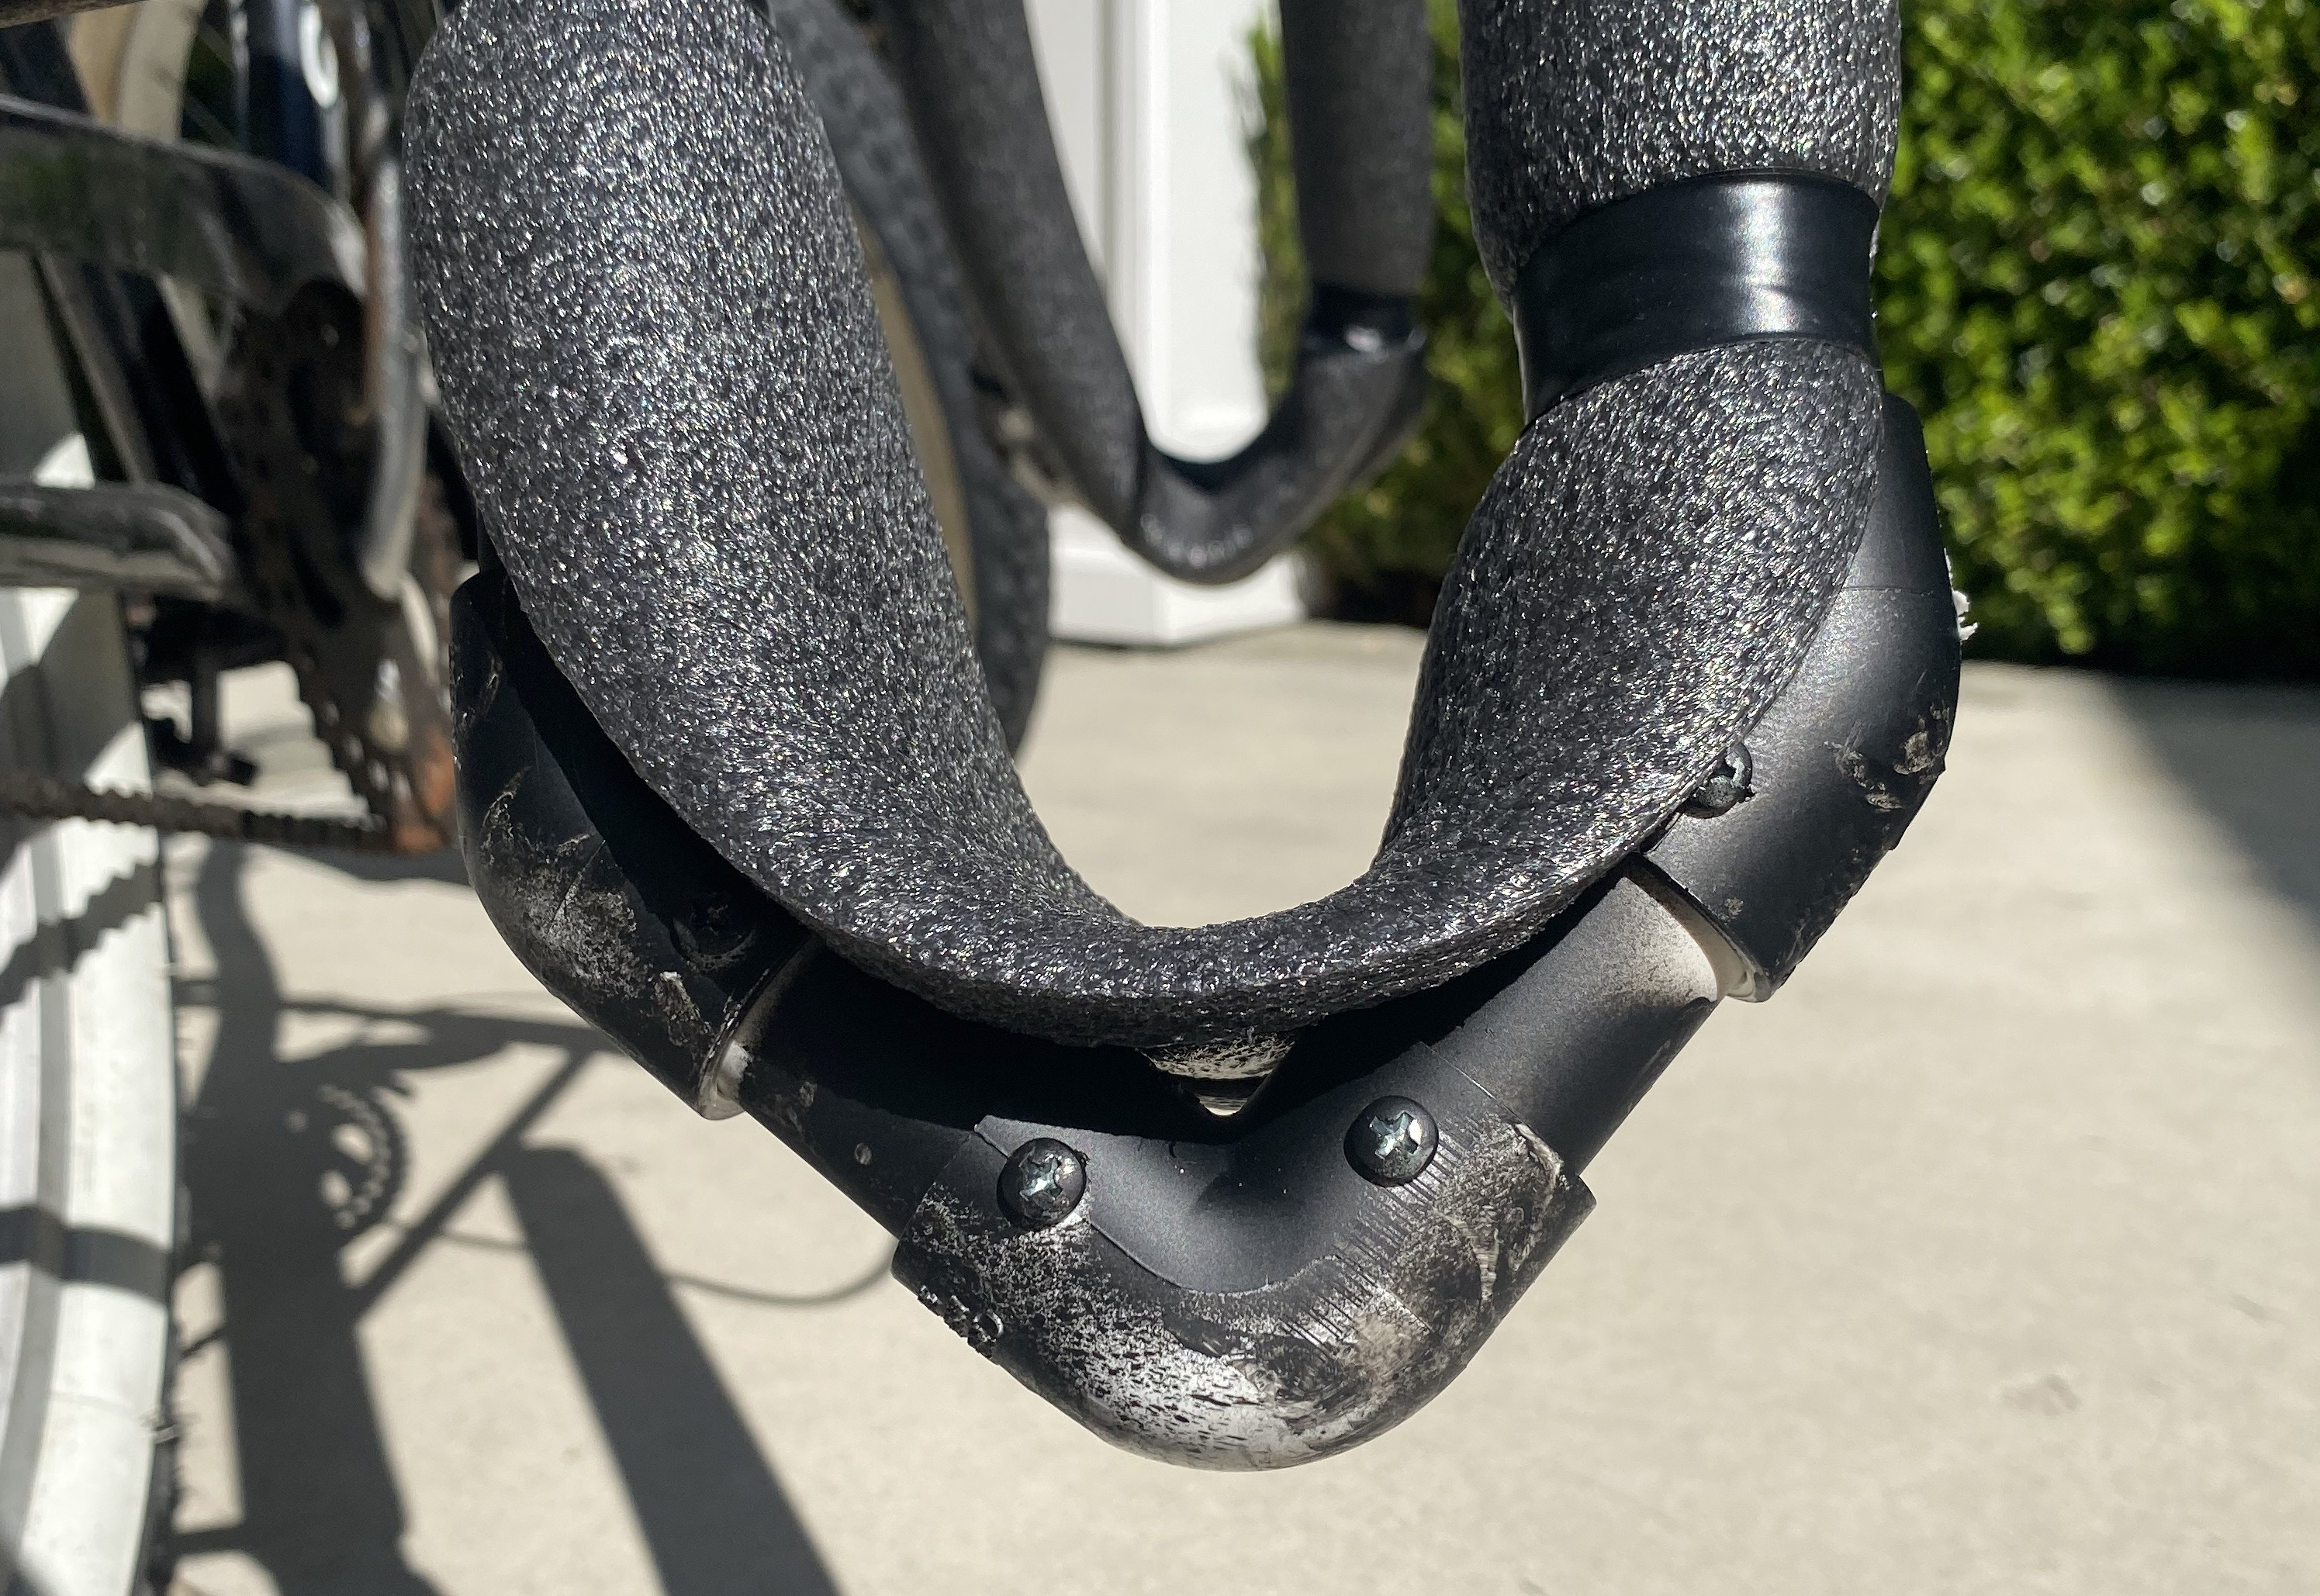
I ended up with a hybrid approach: two 45º joints connected each vertical piece (inside and outside) to the U, and then a single 90º joint in the center of the U. The diagram below shows the original attempt on the left and what I ended up deciding to do on the right.
X              X        X           X
X              X        X           X
X              X        X           X
 X            X           X       X
    X      X                X   X
      XXXX                    X
Please do not ask me how long this beautiful art took me
I like this a lot, since the foam padding still adds a decently U-like shape to it, but the board is more coerced to sit in the center spot. If you’re trying to keep costs super-duper low, the |_| boxy shape will work just fine.
Vertical arm angle
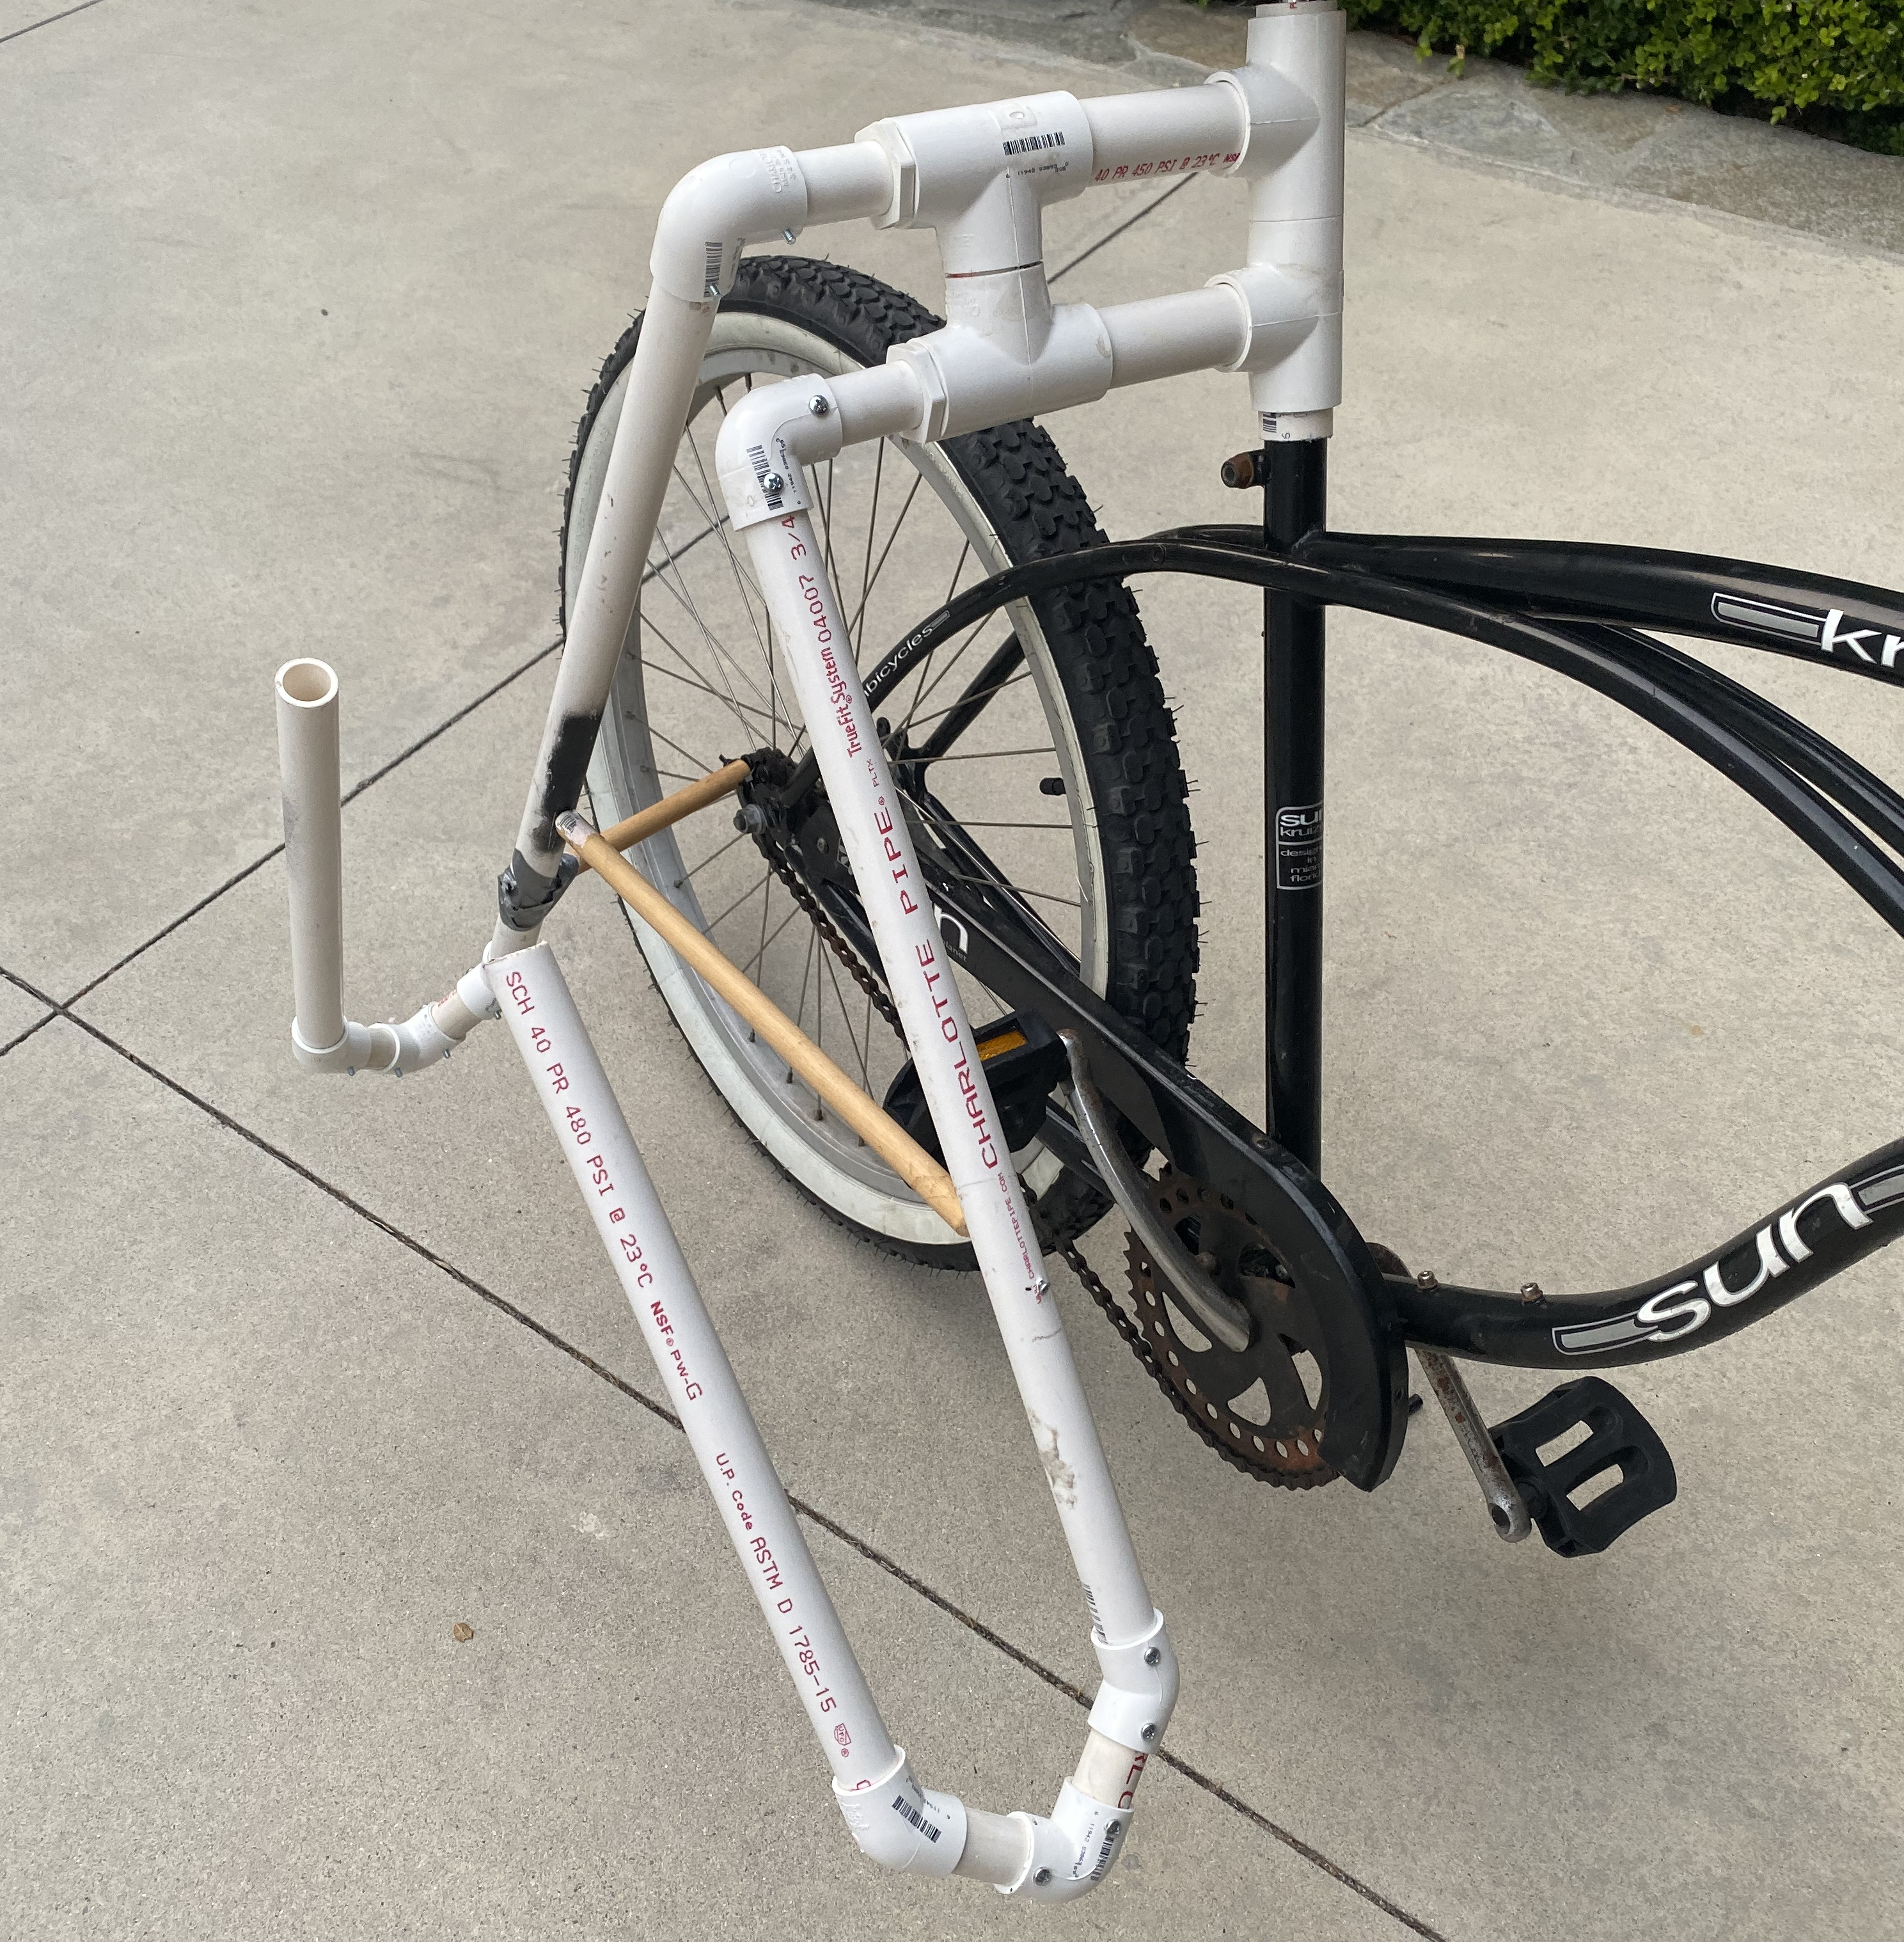
When weight rests on the arms at an angle, they naturally want to rotate inward (when looking directly at them from the side) to be perfectly vertical. It’s simply ~*~* physics *~*~. I still wasn’t sure how I wanted to keep all the piping and joints together (glue or another solution), but I knew that I didn’t want that rotational stress to be entirely on the joints at the top. I ended up drilling horizontal holes in each arm about halfway down and screwing a wooden dowel between them. This kept them apart and at the correct angle in a minimal torque fashion.
I waffled on whether this was the best move since I was trying to keep the flexibility to tweak or alter the setup a priority throughout the entire design. Both because I wasn’t sure if I was going to change the design but also because when I didn’t need the rack, I wanted to be able to break it down out of the way as much as possible. With some of the manufactured racks, you can rotate the front arm backward along the same plane of the bike so both arms are parallel, angled to the rear, and fully out of the way of the pedaling area. Eventually, I decided I’d live with it at a fixed angle for now.
Z-axis rotation
The next issue to tackle arose from my initial decision about the attachment point at the seat post. The 3/4" piping was tight enough to be snug on the seat post, but not enough to prevent rotation. That meant that the setup kept rotating about the Z-axis (the seat post) towards the back of the bike, which would cause a board to hit the back tire or ground and the end of the board facing the front to swing way out wide. The fact that cruiser bike seats are canted backward at a decent angle and not straight up and down exacerbated this (AKA that wild thing called gravity).
If I had gone a similar route as others and cut out a section of the piping to be able to band it onto the metal post super tight, I wouldn’t have had this issue, or it would at least have been semi mitigated. I tried to buy one of the metal hose clamps, but since I was still clamping on the full circumference of the 3/4" pipe, it didn’t really do much good (that’s the point of cutting out a section, it flexes it inward).
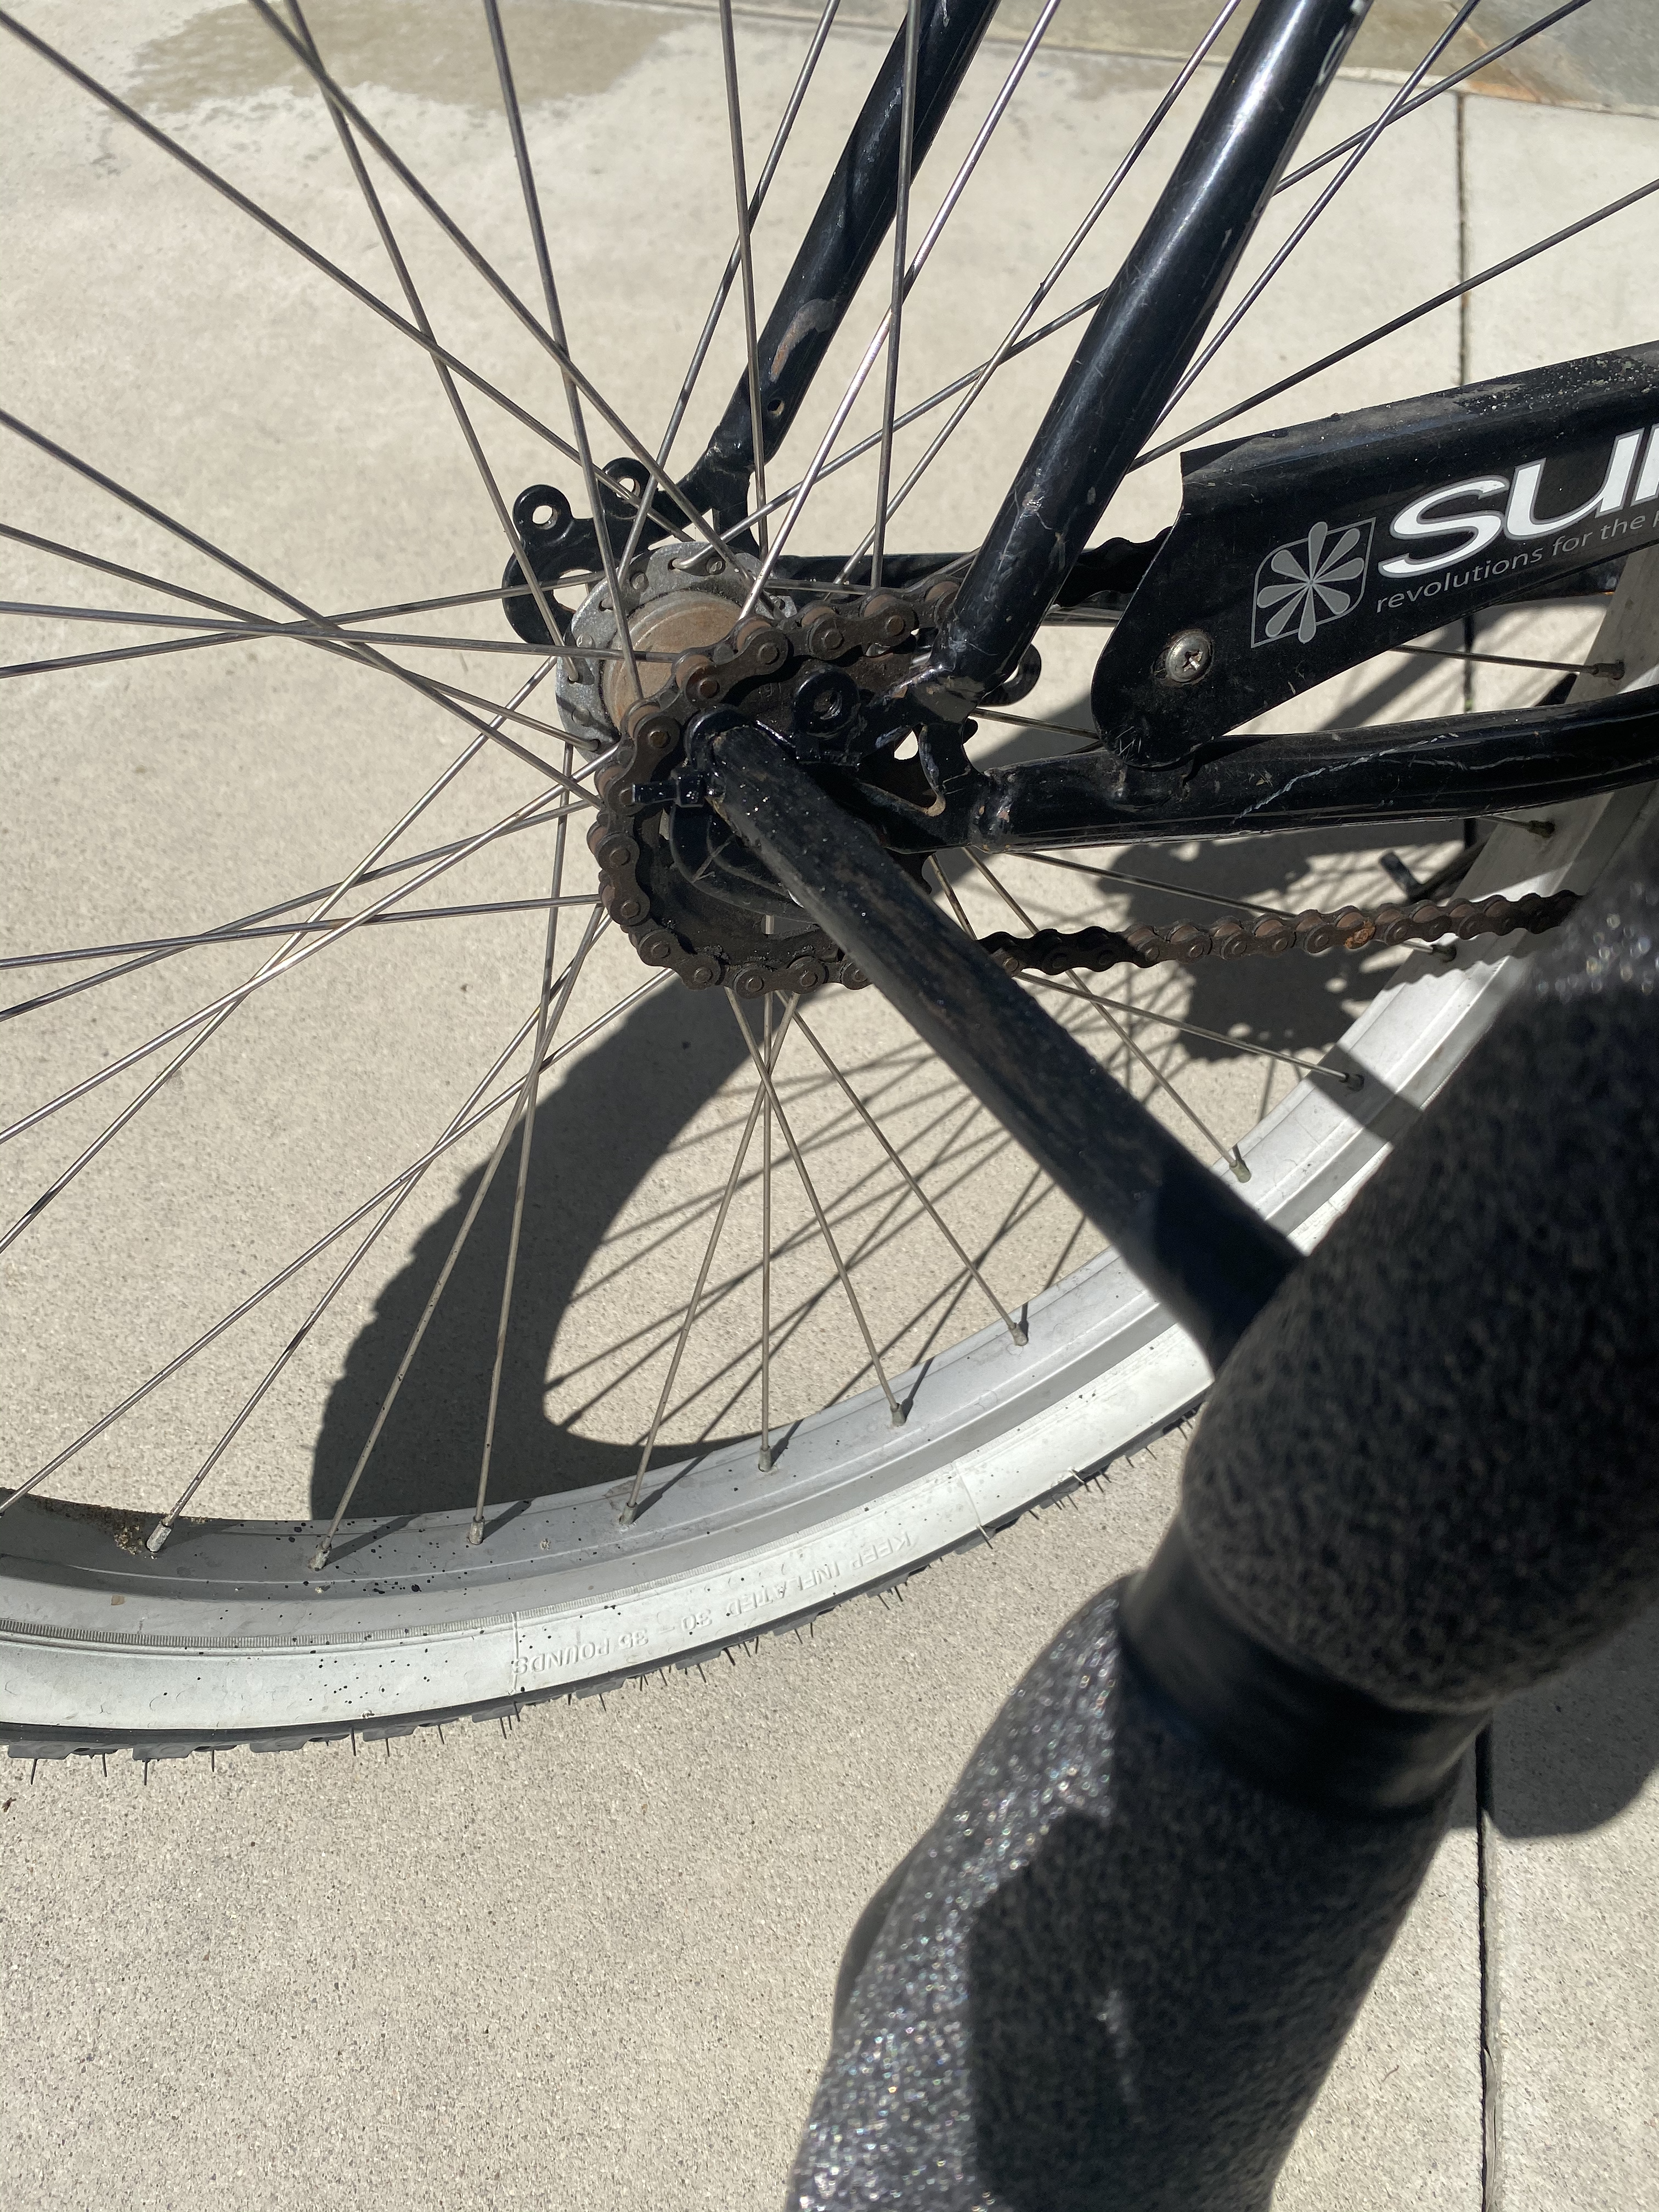
If I couldn’t keep it from rotating from the attachment point, I either needed to hold it forward from the front or push it out from the back. Since anything on the front would have interfered with the pedal rotation, I decided to use another dowel to hold the back arm away from the rear end of the bike. I drilled through the back arm in the direction of the bike, and then screwed that onto the end of a shorter dowel section. This dowel was then affixed to the furthest rear point on the bike frame by drilling sideways through it, looping zip ties through the hole, then zipping those ties to the two empty bolt holes on the frame (I assumed they were for a derailleur which my cruiser doesn’t have).
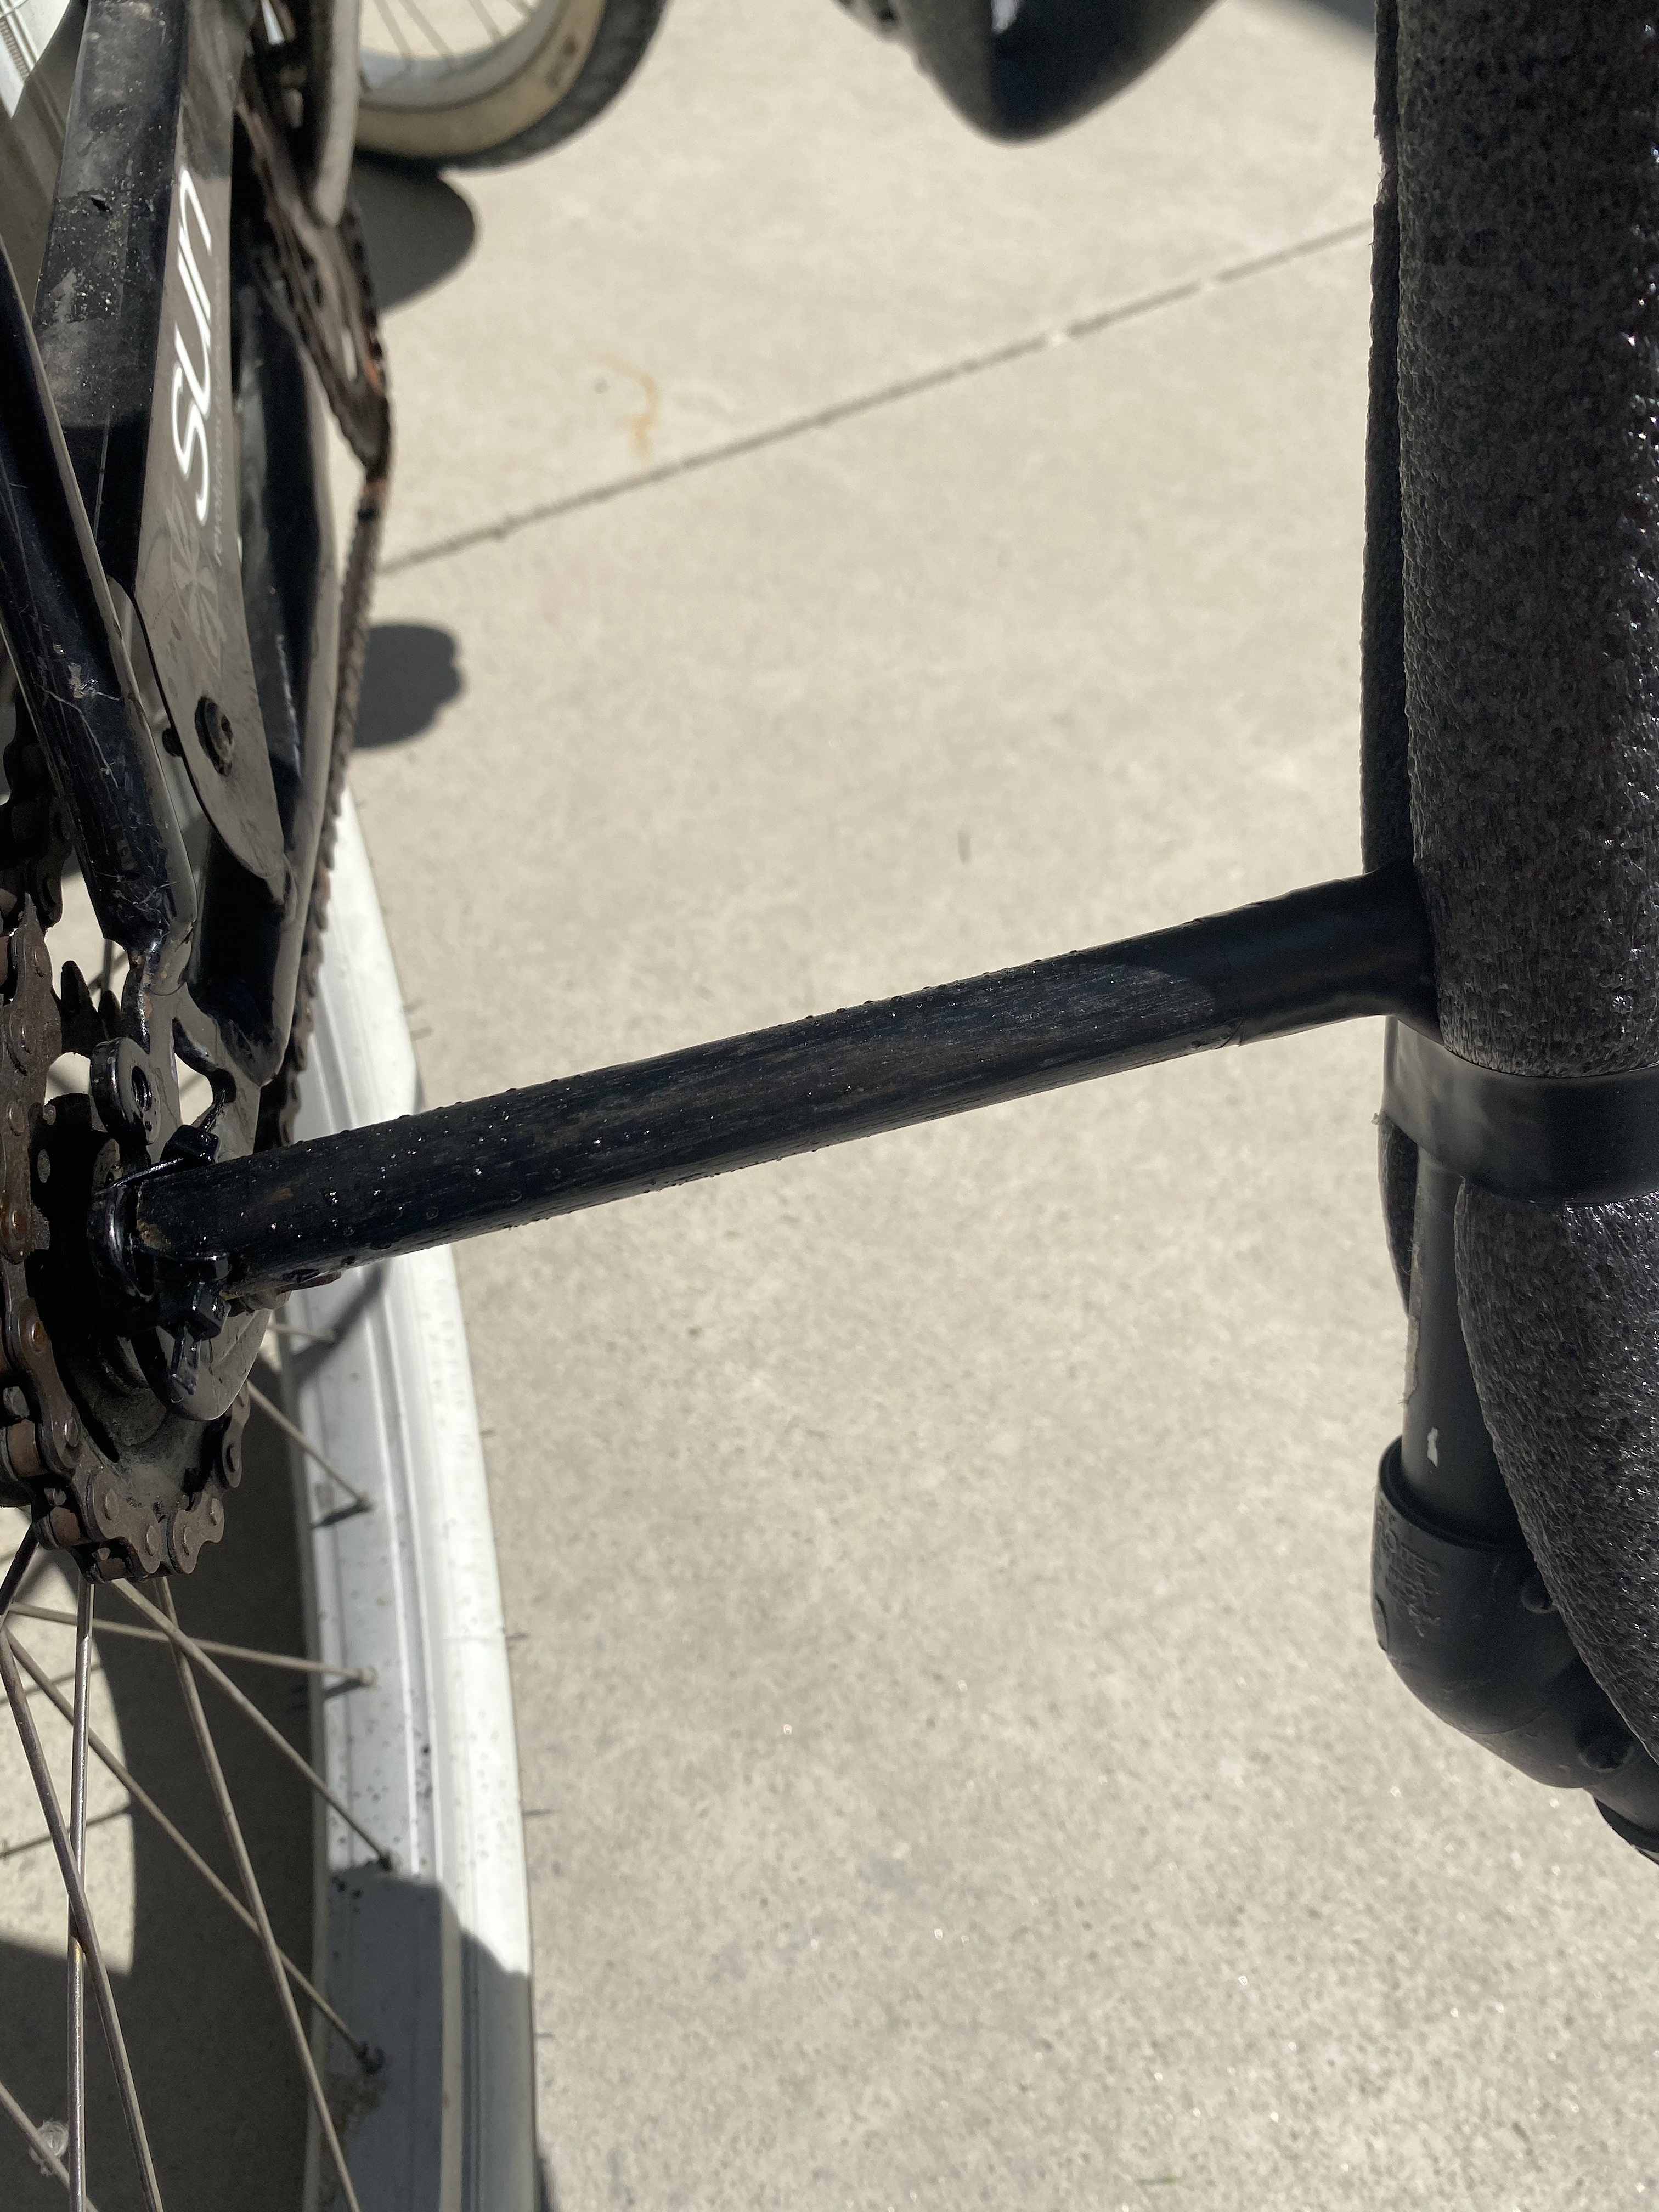
It is by no means a super-secure setup - the dowel isn’t coming off the bike with those zip ties, but the way the screw enters straight into the end of it from the rack allows some flex and wiggle. Since this is the only thing preventing rack rotation, there’s still some forward and back movement that flexes that dowel connection to the front or back. I braced it with some crossed electrical tape around the joint and I’ll have to see if it deteriorates over time. It seems to hold up well as long as the board weight is balanced in the rack and it doesn’t get thrown around to violently while biking.
Joint security
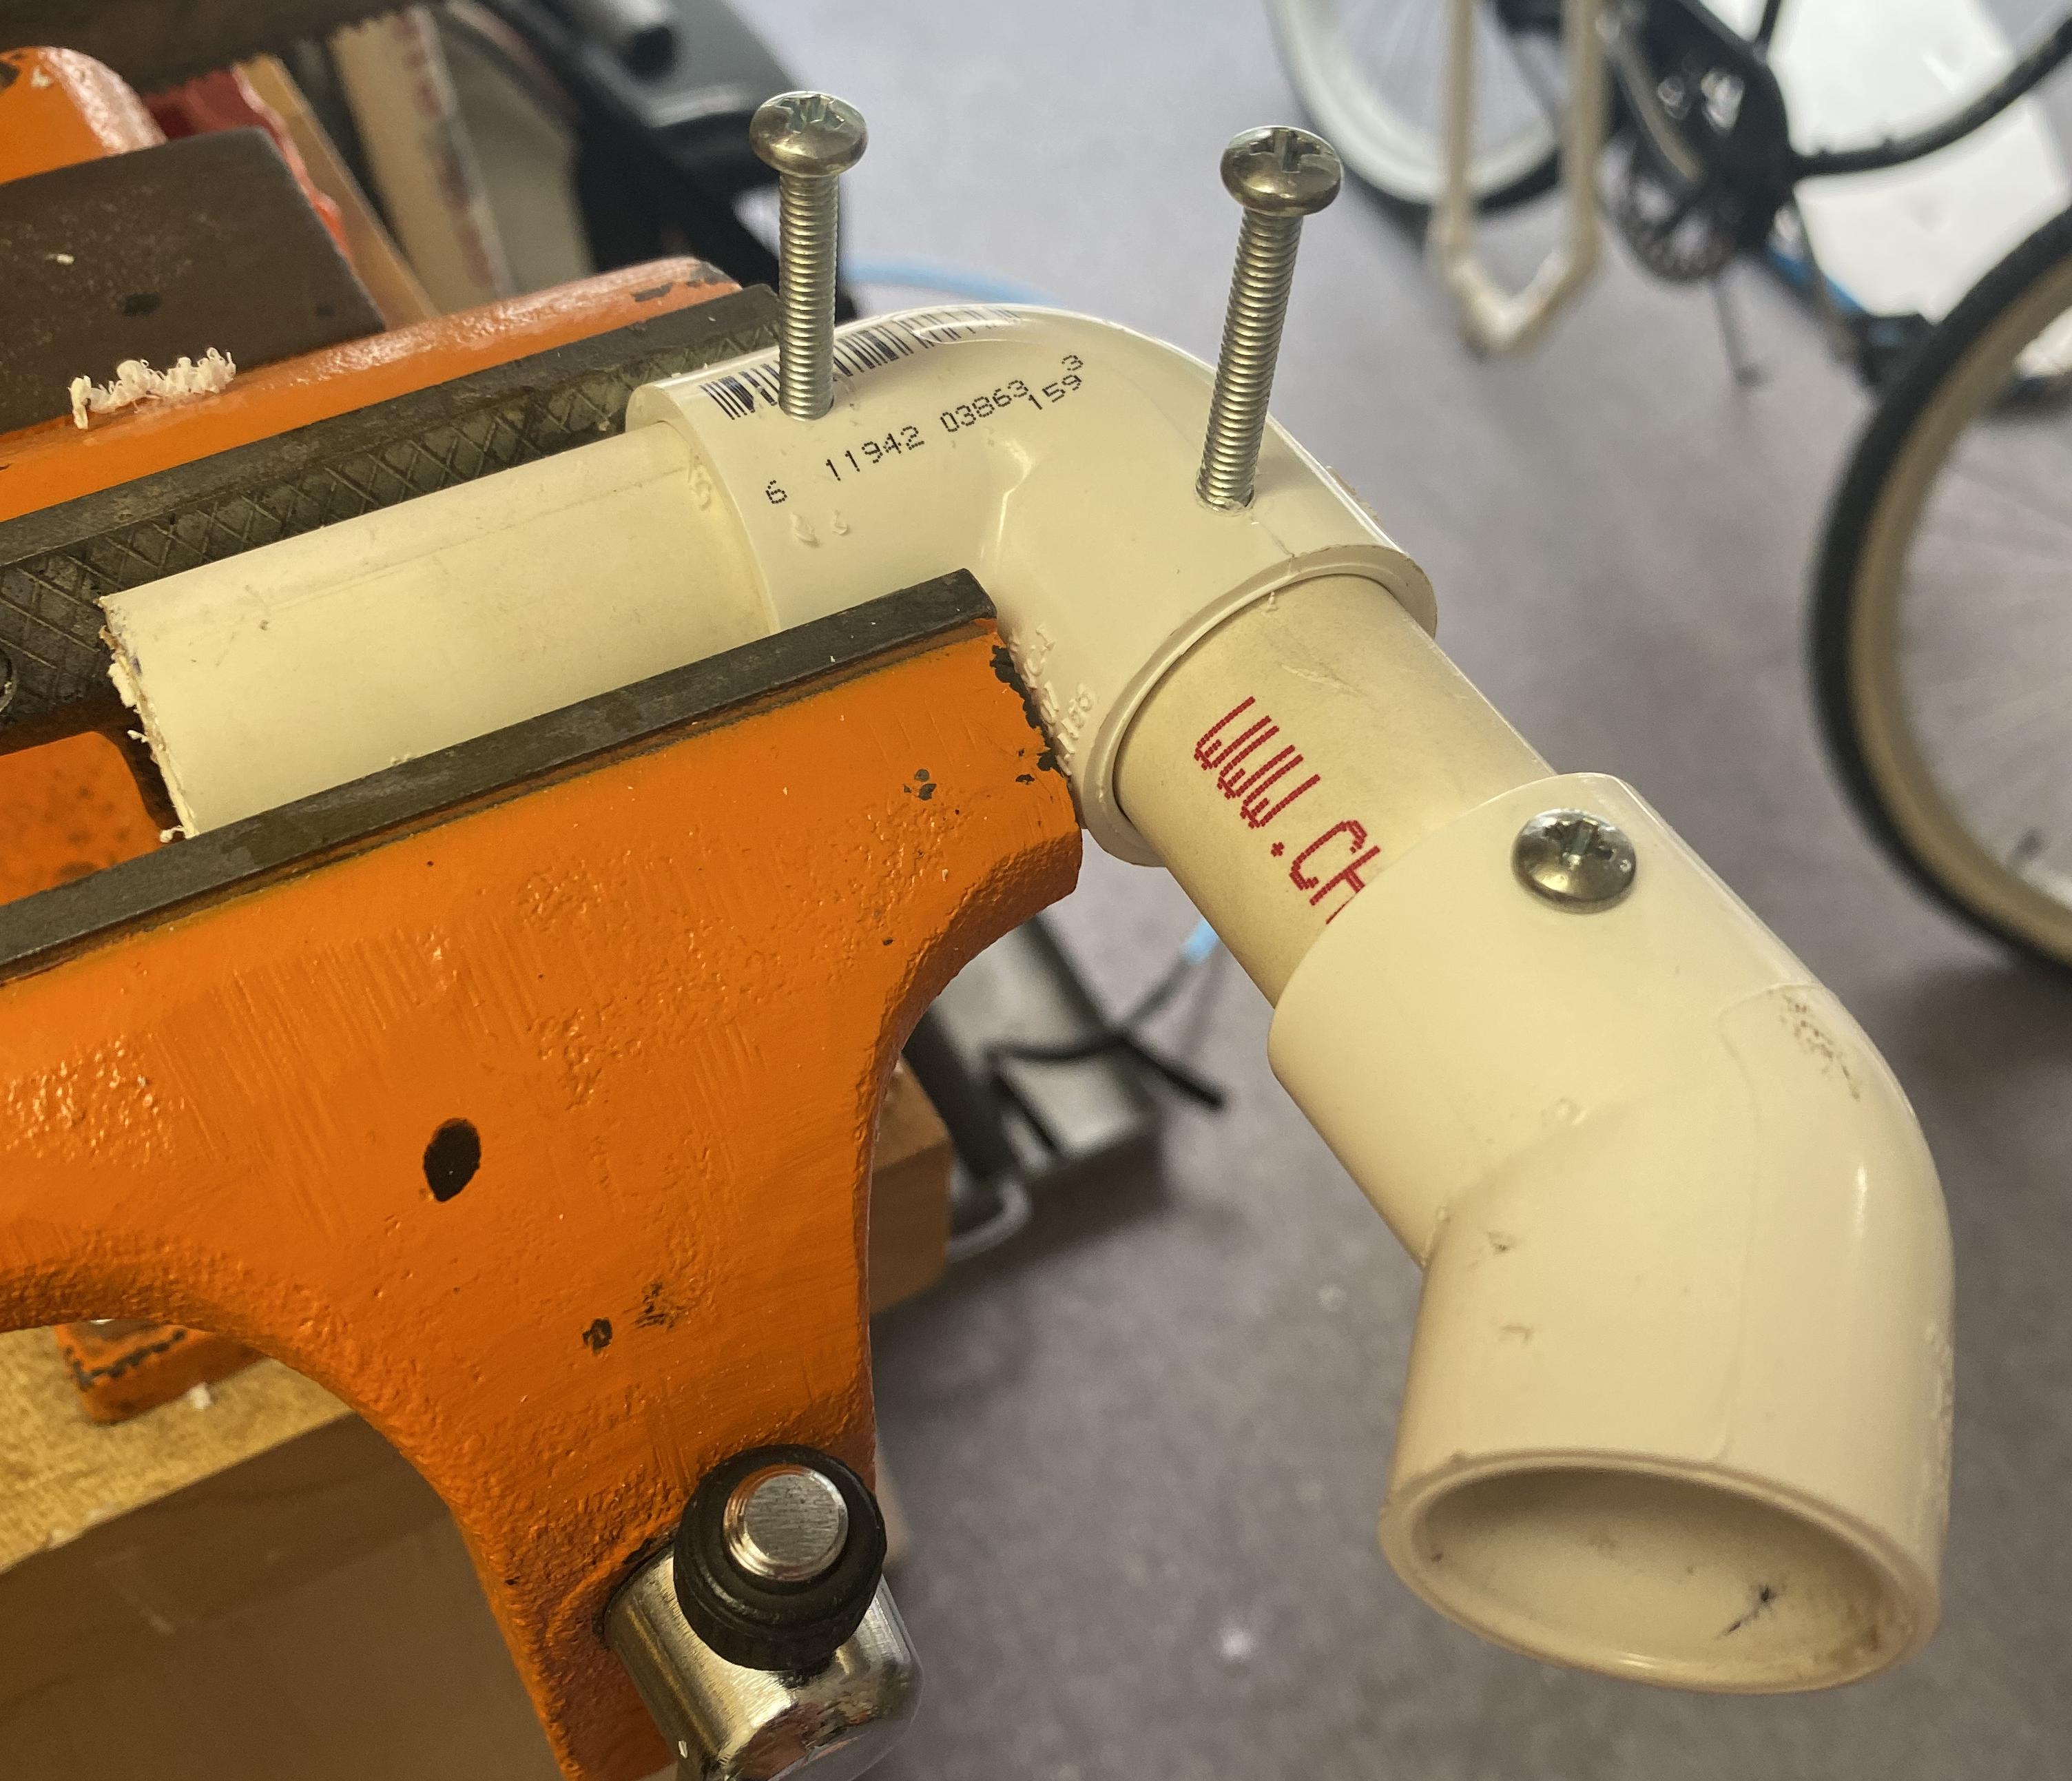
My biggest concern throughout the entire build was the strength of the PVC joints. Not in terms of shearing or snapping, but just keeping the PVC solidly affixed in each joint. They’re not threaded, just press-fit, and I knew that wouldn’t stand up to a board bouncing on them for more than a hundred yards. The last thing I wanted was to be biking 15mph hill and have my board slam into the asphalt and subsequently dragged along until I could stop.
In every other example I found, the joints were glued with either some sort of cement or epoxy. I tested a small amount of glue in a couple of inconsequential joints and found that I could still twist them apart fairly easily after it dried. Even if I tried a more liberal application of the glue I was uneasy about the result. Since the joints were tight to begin with, I felt that most of the glue would just get pushed further into the joint and never actually dry between the two pieces.
I trusted actual hardware a lot more than an invisible bond, so I drilled straight through each joint with a small bit while the piping was inserted. A simple bolt and nut through each was way more secure and held up wonderfully. I made sure to leave enough room on either side of the hole so there was a fair amount of plastic between it and the end of the inner pipe. If the hole gets drilled too close to the center or end of the joint, the small strip of plastic left either on the joint or inner pipe could potentially rip out.
This also let me keep the design flexibility that I wanted. When I don’t need the rack, I can unbolt the joints that meet the long inner vertical arms and rotate the U inwards to the bike, removing four to five inches of overall system width.
I stuck bolts through every joint starting with the top joints of the vertical arms and ending right before the last joint attaching the small outward vertical piece of the U, since that one pipe for each arm isn’t load-bearing. After my first use of the rack, I bolted all six ends of the T-joints used in the seat post attachment. I had previously glued these and thought they would be fine, but was proven wrong on my ride home when the rack decided to part ways with my bike (I had a hand on it and saved the board thankfully!). It makes sense when you see all the different flexing and pulling the board does in wind and bumpy cement - hindsight’s 2020 and all that jazz.
When in doubt, bolt it! It’s cheap and takes almost no time.
Board security & protection
This was the last thing that I thought about since it was the simplest and wasn’t directly related to board security. I bought PVC foam to fit the 3/4" pipe (they sell it in the same lengths as the pipe at the hardware store) and cut it in half. It fit perfectly for the two vertical and U sections of each arm. At the U curve, it gets a bit wonky from the bend. I think you could doctor it with some slits on the edge to get it to lie flat all the way around, but I found that the edges curling up on either side helped make more contact with the board and kept it in place better.
I only taped it at a couple spots along the arms and was glad for that since it needs to be able to flex some if you want to rotate the arms in and out. I recommend a tape at the two foam ends, right before the U starts on the outer vertical section, and right below the dowel on the inner vertical section. That leaves the inner corner free to rotate when you fold the arms in.
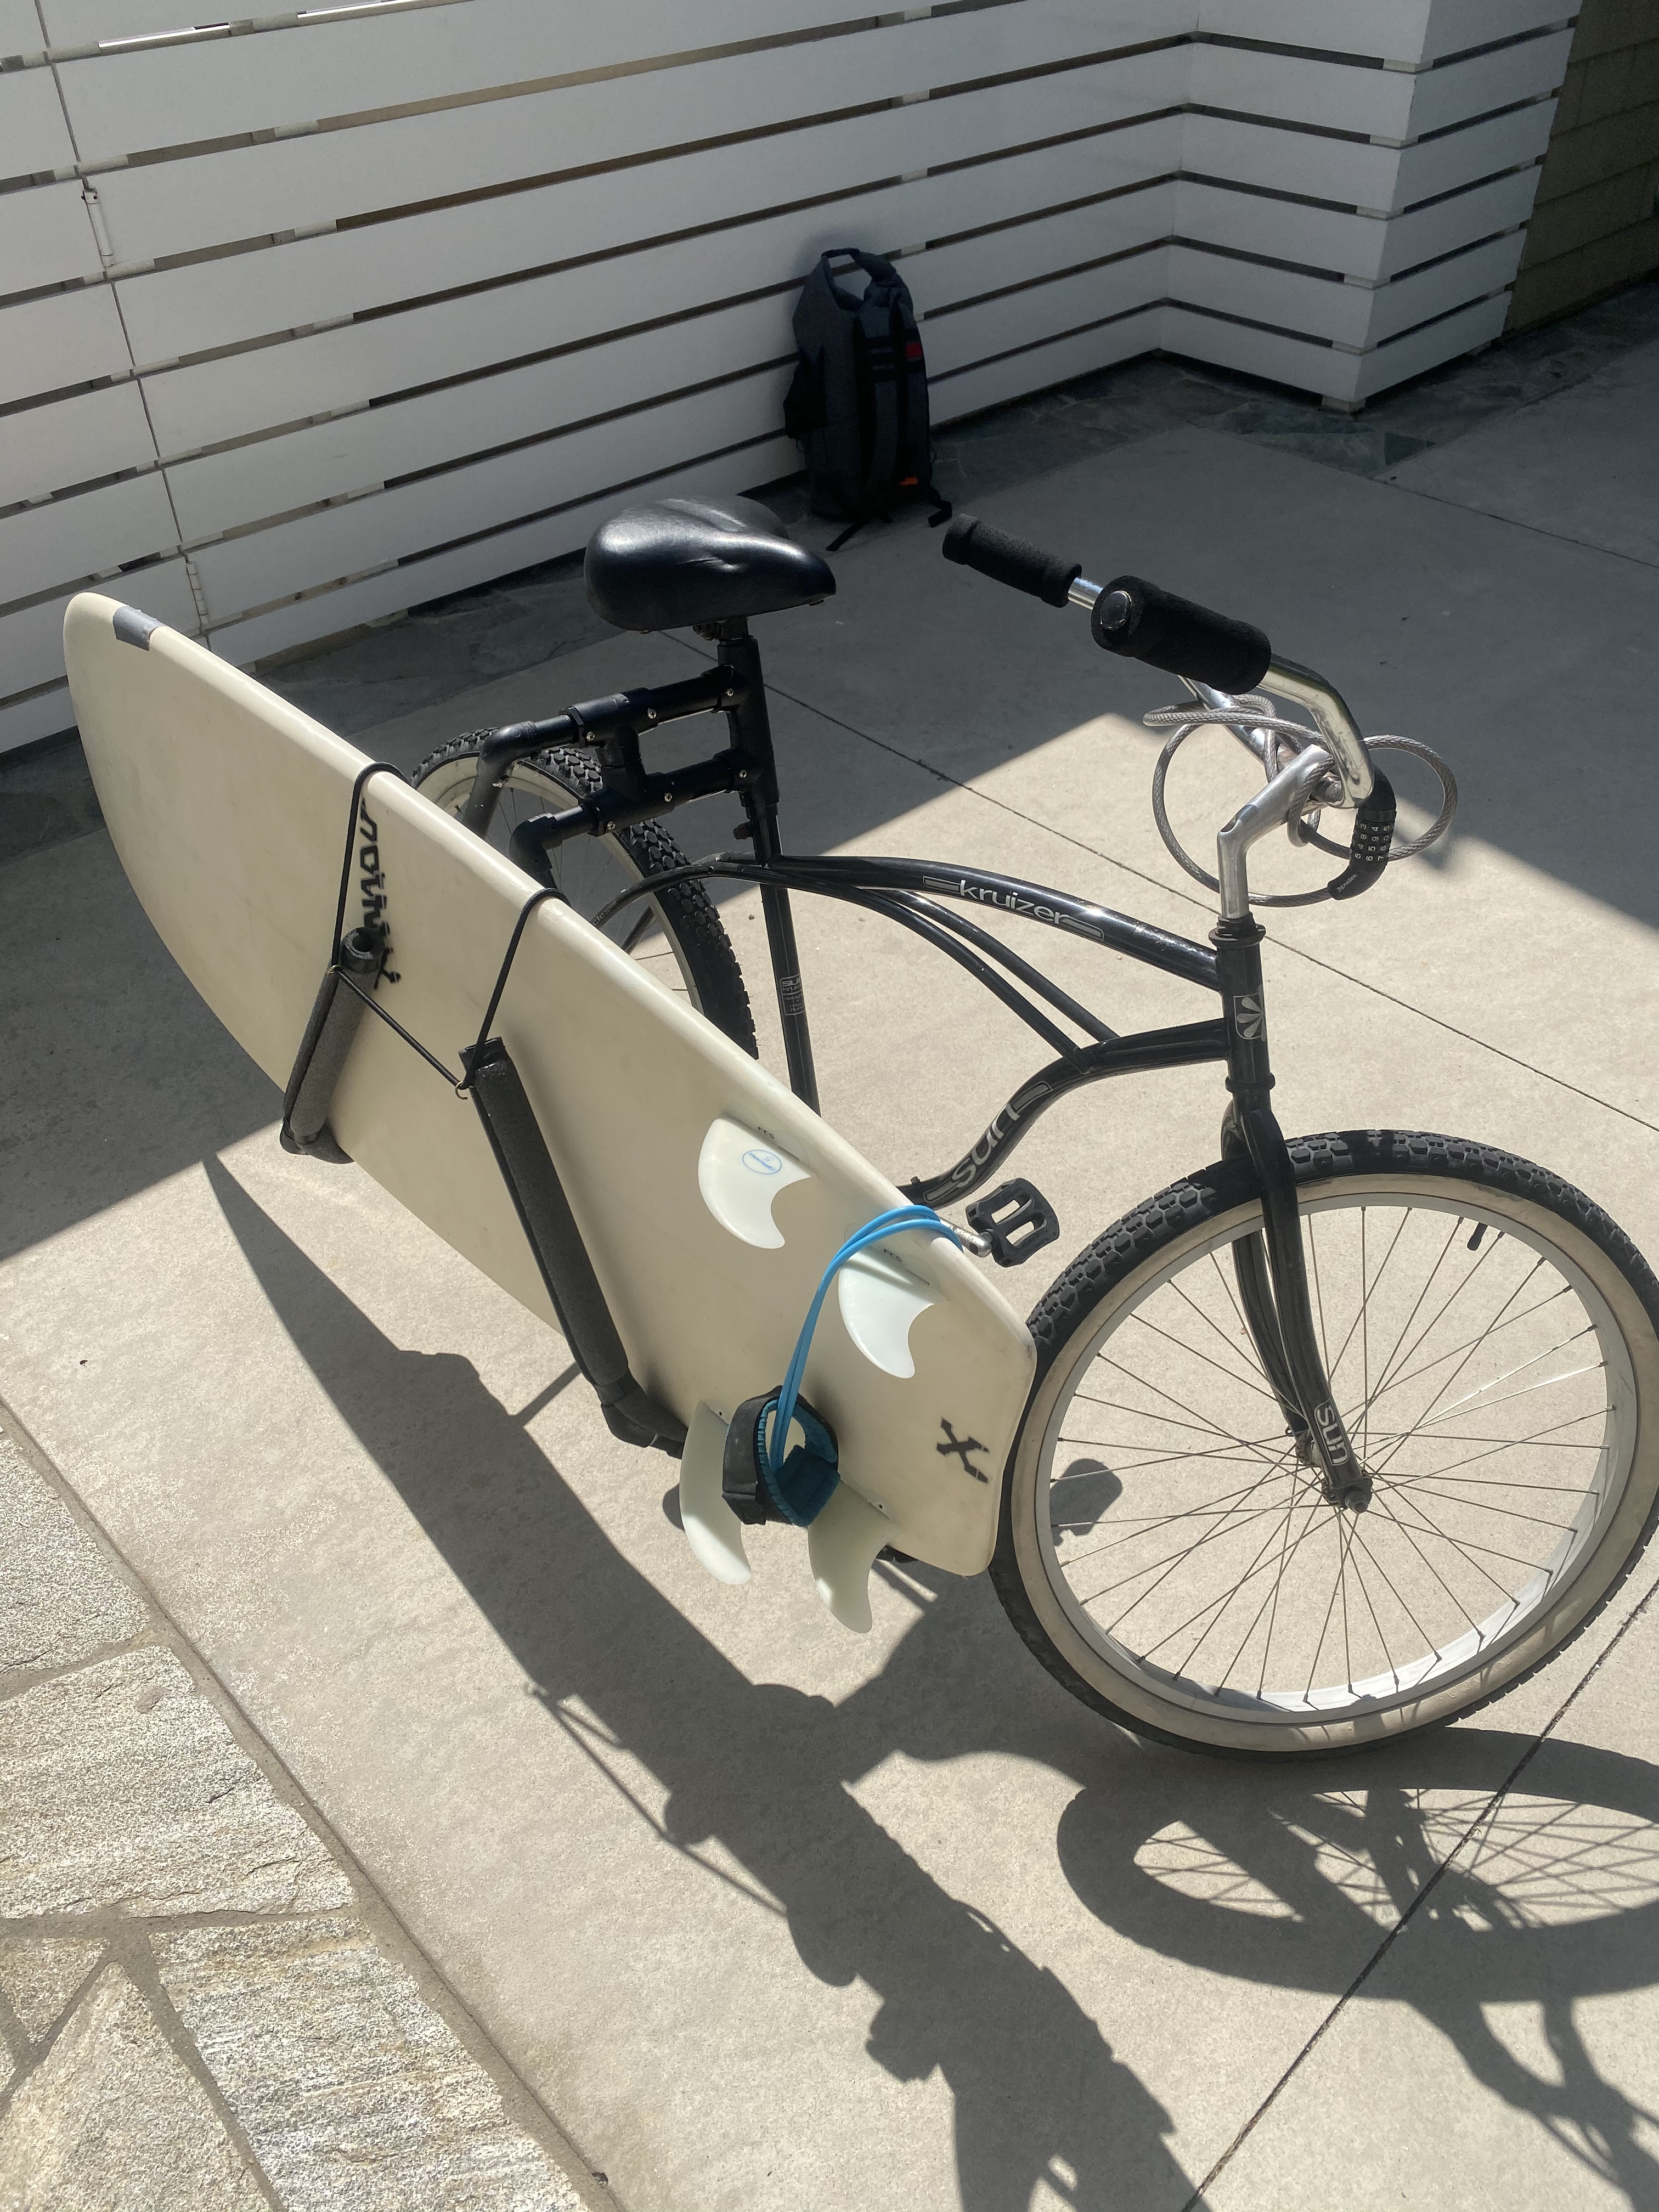
The elastic was the last piece, and if you’re really against it you probably can live without it. It’s a nice feature to keep the board tight in the arms versus getting shifted when you’re on bumpy sections of your ride.
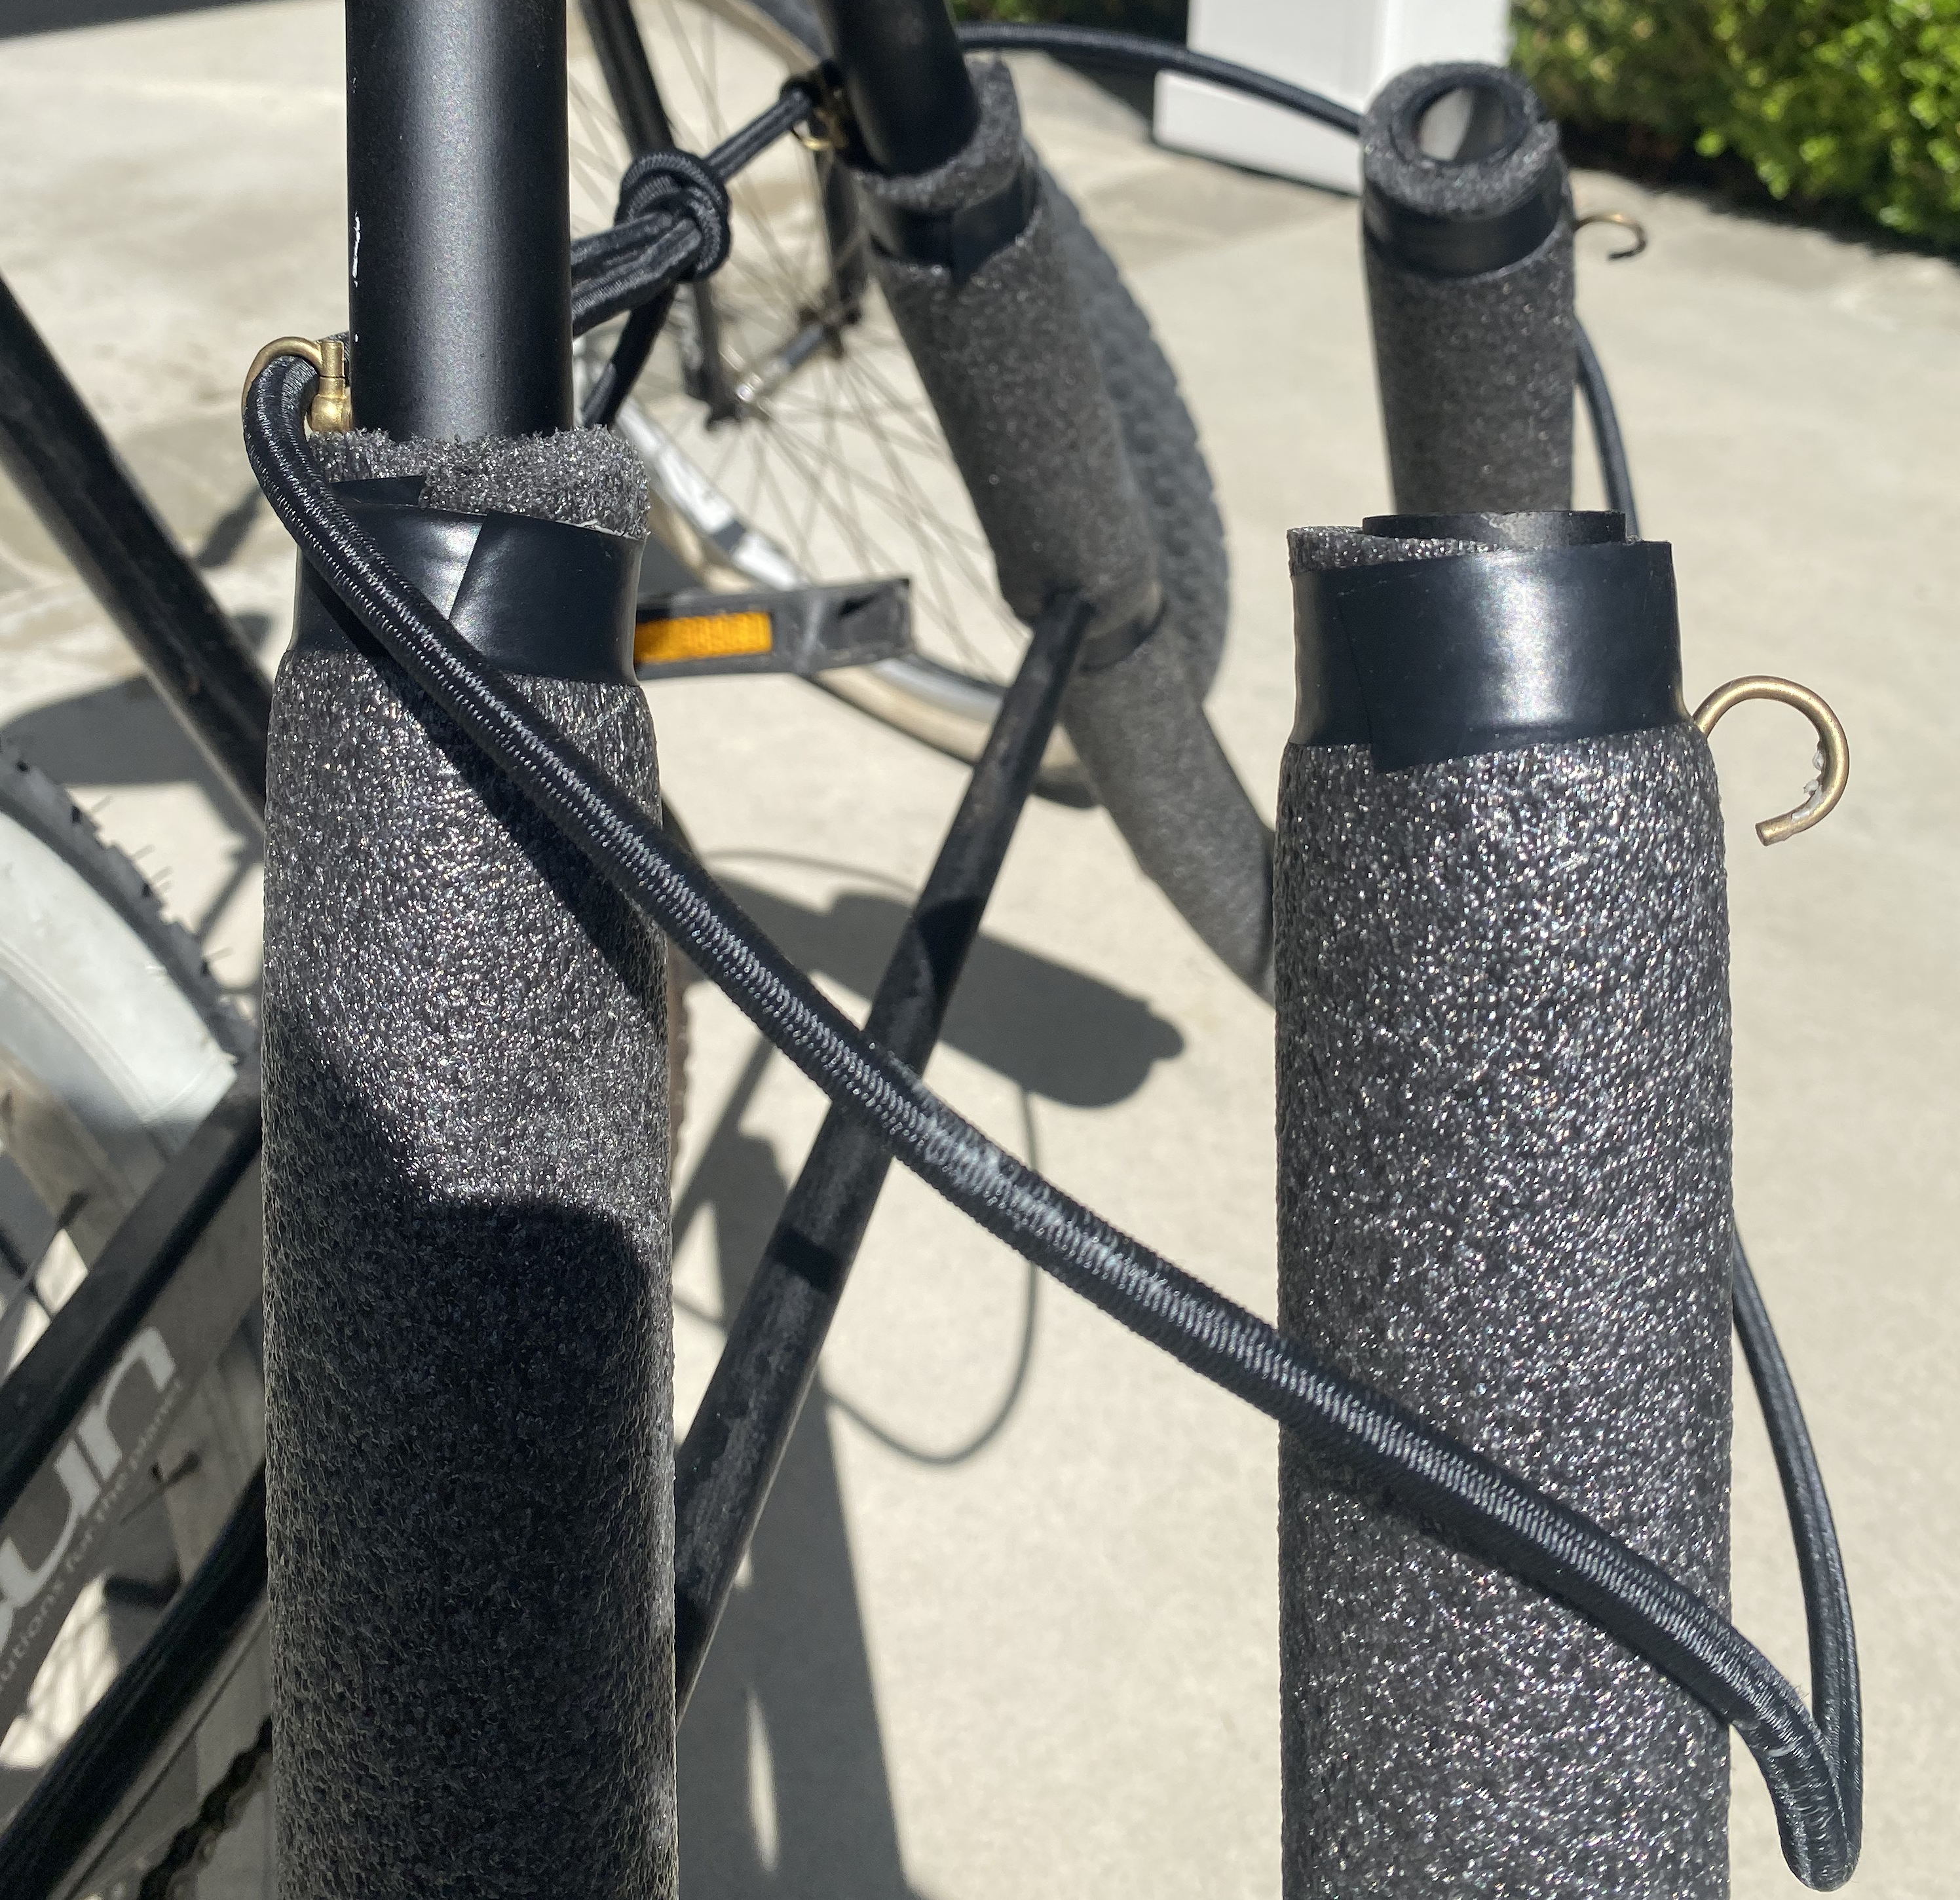
I screwed two small D-rings on the inside of the inner arms and two small hooks facing downward on the outside of the outer arms. I tied a section of medium-strength bungee cord through the D rings, and then with the board in the rack, looped it over the board edge and under both outer hooks. This was another eyeball / feely measurement since I wanted it tight enough for the shortboard but loose enough I could get the Wavestorm in it. It doesn’t need to be super tight; a little tension goes a long way.
Look good, feel good, surf good
The foam + white PVC + wooden dowel looks pretty trash, so I ran a full coat of black spray paint over it all before adding the black foam. It looks a million percent better and I highly recommend it. Any color would work, just make it uniform.
Overview
Was this worth the time? I think so, it was a fun project. It ended up costing around ~$30 for the PVC pipe, joints, and foam. Subtract some from that if you go more spartan on the joint setup, those are what drive the cost up. I also already had all the screws, nuts, bolts, and dowels I needed, so add another $8 or so for those if you don’t already.
I’m interested to see how well this stands the test of time. I have a fair amount of confidence in it with every joint bolted, but the system’s biggest weakness is the back dowel connection to the rack. If the board weight isn’t evenly distributed between the two arms it can push fairly hard in the forward or backward direction on that joint as the rack tries to rotate/shift. Even if it does break, it wouldn’t be a catastrophic failure with the board dropping, I’d just need to hold it forward until I could limp home, so I’m okay with feeling it out.
It didn’t take me much time to build either, but if you’re ambivalent, don’t do it save the money. I’m happy I did it, but that’s because I love building things. Spend some dollars and get a manufactured one for peace of mind, especially if you live somewhere with surfing nearby and can probably scoop it off Craigslist.