Setting up https for a node.js-based Express server
A chronicle of my (very) rough path to getting my node.js express API serving content over https and redirecting all http traffic back to https. Full disclosure: I’ve done more work around nginx and reverse proxying now, and agree that approach is MUCH simpler for handling the https/http handoff and listening. When I first implemented it, I didn’t want to focus on learning that extra step, and just wanted to focus on the express-based implementation, so if that sounds like you then enjoy the stream-of-consciousness path below.
Rough code I started with:
const express = require('express');

const app = express();
const port = process.env.PORT || 5000;

app.get(........

/* snip */

app.listen(port, () => console.log('Express backend listening on ' + port));
This is available in about 1 million tutorials on the internet for “how to set up express node server”.
I could access this server when running it locally, and also from the domain name or external IP of my raspberry pi.
The first thing I wanted to get working was https access on my local machine. After some quick searching, I determined that I’d need to generate a self-signed cert. I understood this to be a certificate/key pair in which the key correctly validated the cert, but The Real World™ still didn’t trust/care about the cert. I used a super simple openssl command to do this:
openssl req -x509 -newkey rsa:4096 -nodes -keyout name-of-your-key.pem -out name-of-your-cert.pem -days 365
req - specifies we want to generate a PKCS#10 X.509 cert
-x509 - specify we want to generate a self-signed root cert instead of a certificate request
-newkey - generate a 4096-bit RSA key along with this cert (it’s possible to generate a key initially and then the cert from that key)
-nodes - (’no DES’, not ’nodes’) create an unencrypted key (if you don’t specify this it’ll still work, you just have to enter an encrypting password)
-keyout - the path/name of the key it will generate
-out - the path/name of the cert it will generate
-days - number of days this cert will be valid for
Quick note about filetypes: a lot of the stuff I saw used .pem, .crt, .key, and probably others. I’m fairly certain you can use whatever filetype you want to distinguish the files; all they are is a short block of text.
I needed to answer some super simple questions about region, email, etc. Feel free to fill out as much or as little of this as you’d like:
Country Name (2 letter code) []: your country code
State or Province Name (full name) []: your state
Locality Name (eg, city) []: your city
Organization Name (eg, company) []:.
Organizational Unit Name (eg, section) []:.
Common Name (eg, fully qualified host name) []: localhost/your website domain name/anything
Email Address []:you@you.com
Next, I needed to use these files within the express server. That’s done through the https node module.
First,
npm install https --save
Then within the express file:
const express = require('express');
const https = require('https');

const app = express();
const port = process.env.PORT || 443;

app.get(........

/* snip */

var key = fs.readFileSync(__dirname + '/name-of-your-selfsigned-key.pem');
 var cert = fs.readFileSync(__dirname + '/name-of-your-selfsigned-crt.pem');
 var creds = {
    key: key,
    cert: cert
 };

 var httpsServer = https.createServer(creds, app);
 httpsServer.listen(port, () => console.log('https listening on 443...'));
Now, the https server is listening on the port I specified (443) and proxying the requests through to the express server. I could now open my browser and navigate to https://localhost:443 to get a nice big old warning message. This will differ based on the browser used, but it’s saying “hey, this server is providing a certificate to use with SSL, but I have no idea where the certificate is from so I’m not going to trust it. Continue at your own risk”.
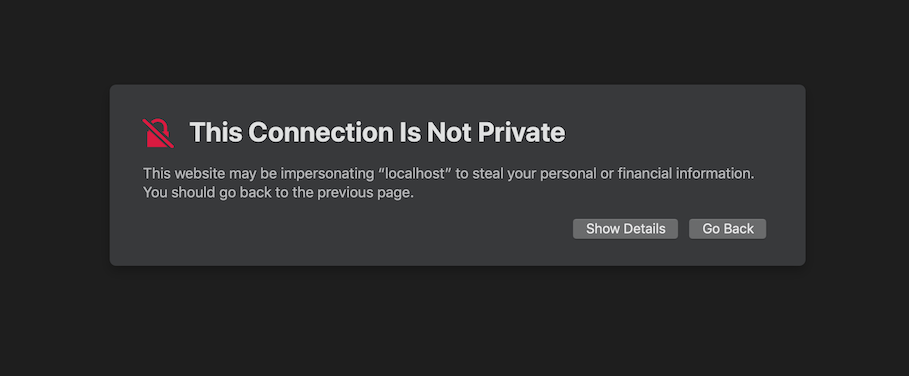
Warning shown in Safari when navigating to a site using a self-signed certificate
If users tried to navigate to the old http version of my site at this point, they’d get stuck since I was no longer listening to http connections on port 80. To fix this, I mapped all http connections over to my https listener on 443 using some express middleware.
const express = require('express');
const http = require('http');
const https = require('https');

const app = express();
const port = process.env.PORT || 443;

app.get(........

/* snip */

app.use((req, res, next) => {
    // https://expressjs.com/en/api.html#req.secure
    if (req.headers['x-forwarded-proto'] === 'http' || !req.secure) {
        return res.redirect(301, `https://${req.headers.host}${req.originalUrl}`)
    }

    return next();
});

var httpServer = http.createServer(app);
var httpsServer = https.createServer(creds, app);
httpServer.listen(80);
httpsServer.listen(port, () => console.log('http redirecting from 80 to 443, https listening on 443...'));
The http server will now listen to port 80 (the default http port) and route all requests that come through there to all of our express handlers.
The added middleware checks the headers of any request for the x-forwarded-proto header, which is the agreed-upon header that contains the request type. I also added the check for the secure field of the request object for completeness’ sake - this probably isn’t needed. If it’s an http request, I send back a 301 for the ‘Moved Permanently’ response, and manually force them over to the https url. I haven’t done a ton of testing around the rebuilding of their request url yet, but since this is only a simple 1-page app right now, as long as it dumps them to the base url using https that’s fine with me.
https locally: check. Onto my ‘production’ environment.
I purchased the domain brianteam.dev because it was $14 and why not. I’ve been using it for prototyping any sort of webserver or external-facing testing I have. I mapped my domain name to the external IP of my raspberry pi by setting the A record in the google domains settings (aside: I actually set it to the external IP of my home router which my pi is connected to, and then use different ports forwarded through the router to get to the pi, but that’s a different topic).
To deploy my ‘production’ build on my pi, I cloned my git repo and simply ran the server.js file (it was actually more complicated than this since the server was connected to a react app frontend and it took me a while to realize that you can’t use the react dev server in prod and have to statically serve the /build folder of minified js but again, don’t need to go into that).
This immediately resulted in a Error: listen EACCES 0.0.0.0:443. After some poking I discovered that low ports (< 1024) are restricted by most operating systems. My options were either to brute-force it through by tacking a sudo onto my command to start the server, or to set up some fancy reverse-proxying through nginx or something similar. To unblock myself semi-temporarily, I dropped the sudo hammer on it, but it’s in my todos to go back and determine an appropriate solution (I did this). I could also have just picked a different port like 8443 and 8080 but I had already forwarded the ports within my router to 443 and 80 and I was too lazy.
A little bit of googling led me to LetsEncrypt and Certbot for easy, free, SSL certificate generation from a certificate authority (CA). CAs are the things that your browsers know to trust internally, so when they see certs issued from CAs they don’t barf up the warning page that we saw earlier.
Since I’m not doing anything fancy with Apache or Nginx, just a plain old raspberry pi with forwarded ports, I used the manual generation/verification process through Certbot described here https://certbot.eff.org/lets-encrypt/debianstretch-other. Following their instructions, I appended deb http://deb.debian.org/debian stretch-backports main to the /etc/apt/sources.list file (if there isn’t one, just create it). Then
apt-get update
and
sudo apt-get install certbot -t stretch-backports
No clue what they’re talking about with all that DNS plugin stuff and figured I wasn’t doing anything that wild so I skipped it. There are 2 different ways to verify to the CA that you indeed own/control the web address you’re trying to generate a cert for: serving a static file that it will give you (the webroot way) or standalone (which it says is a better one if you already have a webserver running). I kind of floundered here for a bit, but found the standalone one was simpler and worked for me. I ran sudo certbot certonly --standalone -d brianteam.dev, and it seemed to take care of the rest. I’m not sure how it determines it’s in control, but I’m guessing certbot sets up a listener on whatever machine it’s running, sends a request to the url you specified form it’s own servers, and if the listener registers it and sends back correct information, it gives the all-okay. Again, guessing here, but I’m sure this can be found out with some rudimentary googling.
Once I had a valid certificate(s) I once again needed to figure out how to serve it (them). It placed them in /etc/letsencrypt/live/brianteam.dev so I copied both the cert and the key file into my server’s directory, changed their names to match the filenames being read in from the code, and tried it out. Surprise, still a privacy warning. I used the browser to inspect the certificates it was seeing, and saw that it had the approved CA cert, my local brianteam.dev one, but also an intermediate LetsEncrypt one in between. This took some googling and snooping, but I eventually realized that it’s not just a single cert - it’s two. It seems there can be many chains of certs all the way up to the CA one, and you have to supply them all correctly or nothing works. I looked back to where it originally created the files and realized there were a few others in there: namely, chain.pem and fullchain.pem. I reworked https server credential code to supply everything it needed:
    var key = fs.readFileSync('/etc/letsencrypt/live/brianteam.dev/privkey.pem');
    var cert = fs.readFileSync('/etc/letsencrypt/live/brianteam.dev/cert.pem');
    var ca = fs.readFileSync('/etc/letsencrypt/live/brianteam.dev/chain.pem');
    creds = {
        key: key,
        cert: cert,
        ca: ca
    };
aaaaaand………… a permission denied error trying to read the files in. I’m embarrassed to say this took me way longer than it should have to figure out, but after much ls -al and chowning, I realized you have to enable your user group read access to the actual source of where the cert/key files are symlinked. So not only did I have to sudo chown -R /etc/letsencrypt/live/brianteam.dev, but also sudo chmod 0755 -R /etc/letsencrypt/archive (also realized that you have to give exec permissions to be able to read/access folders in linux, just read isn’t enough. linux is weird). Another thing worth noting here is the difference between fullchain.pem and chain.pem. In my case, fullchain.pem was the chain.pem cert appended to the cert.pem one. This is because there was only a single intermediate certificate. Like I mentioned before, there can be many levels. If this is the case, fullchain.pem will hold all of them concatenated together. You need to break this up into multiple different files and supply them all in an array in the ca field of your creds object.
After I ensured I was successfully reading in the files I need to, I once again navigated to my site to see…….. the privacy warning still yay!!! This one irritated me for like 30 minutes until I reread the actual certificates in my browser for like the 10th time. They mentioned something about the name not matching, and it suddenly dawned on me that while I had provisioned the certs with my domain name, brianteam.dev, I had been accessing my site through the external IP, 73.XXX.XXX.XXX. Quite the facepalm. Once I switched to the actual FQDN, everything worked out fine and dandy.
After some housekeeping and other cleanup, the end of my server.js file now looks like this:
/* snip */

var creds = {};
if (process.env.DEPLOY_STAGE === 'PROD') {
    console.log('Setting env variables for prod cert paths');
    if (!process.env.PROD_SSL_KEY_PATH || !process.env.PROD_SSL_CERT_PATH || !process.env.PROD_SSL_CA_CERT_PATH) {
        console.log("SSL cert env variables not set. Run the setup_env.sh script");
        process.exit(1);
    }

    var key = fs.readFileSync(process.env.PROD_SSL_KEY_PATH);
    var cert = fs.readFileSync(process.env.PROD_SSL_CERT_PATH);
    var ca = fs.readFileSync(process.env.PROD_SSL_CA_CERT_PATH);
    creds = {
        key: key,
        cert: cert,
        ca: ca
    };
} else {
    console.log('Running server locally, using local self-signed cert');
    var key = fs.readFileSync(__dirname + '/name-of-your-selfsigned-key.pem', 'utf-8');
    var cert = fs.readFileSync(__dirname + '/name-of-your-selfsigned-cert.pem', 'utf-8');
    creds = {
        key: key,
        cert: cert
    };
}

var httpServer = http.createServer(app);
var httpsServer = https.createServer(creds, app);
httpServer.listen(80);
httpsServer.listen(port, () => console.log('http redirecting from 80 to 443, https listening on 443...'));
Update:
So renewal time rolled around, and the cron I previously set up was failing. Surprise. This was the cron entry:
0 0 1 * * sudo certbot renew --pre-hook "sudo pkill node" --post-hook "cd ~/my-project && npm run deploy"
I was super over all this https setup by the time I finished so I don’t think I even tested that command, just chucked her in there. Fast-forward to now, and it was failing with the error
Unable to find post-hook command cd in the PATH.
(PATH is /usr/local/sbin:/usr/local/bin:/usr/sbin:/usr/bin:/sbin:/bin)
I figured this was because
- cron ran in a non-login shell so would have a different PATH and
- I needed to prefix my commands with their fully-qualified paths
Unfortunately, I both did the second thing and checked cron’s PATH to see that npm was indeed already on it, and it still didn’t work. And then proceeded to facepalm because it says right in the error that it’s cd that it’s failing to find. That kinda baffled me because I felt that cd would always be on the path since it’s pretty rudimentary, but I guess not.
After a couple of unsuccessful attempts to get that post-hook command to run, I scrapped it completely and just run the renewals by hand now.
However, when trying to manually renew with the --dry-run arg, I was getting Connection Refused errors:
Failed authorization procedure. brianteam.dev (http-01): urn:ietf:params:acme:error:connection :: The server could not connect to the client to verify the domain :: Fetching http://brianteam.dev/.well-known/acme-challenge/S1QpE5ltEaycpKUZCHoH-SgbRpqP8edjAyfkzliuCFY: Connection refused
I was pretty confused here but I figured it had something to do with the wonky port forwarding I had to do to get outside connections into the raspberry pi on the correct ports. I opened up the port forwarding menu for my wifi and lo and behold, I had the external 80 and 443 forwarded to 8080 and 8443 respectively, to enable me to run my server without using sudo (I know earlier in the post I didn’t do this but I went back and fixed it eventually). This means that whatever request that was coming in from the LetsEncrypt server was hitting port 80 of the external router and being forwarded to my server, which had no clue how to handle that route.
I scrapped the 80 rule since the url in the above request was an http one, but it still didn’t work. Then I continued with my habit of dumb facepalms and realized that now it wasn’t refused, it was just timing out since the external router’s port 80 also (obviously) wouldn’t know wtf to do with the request from LetsEncrypt. I reimplemented the forwarding for 80 to my Pi’s IP, but switched it to point to port 80 on the pi, since that’s where the LetsEncrypt renewal tool would set up its listening. Tada! Everything worked fine and dandy. There’s automation to do here, but at this point it’s easier for me to just teardown the server and switch a single port forwarding rule once every 90 days.